
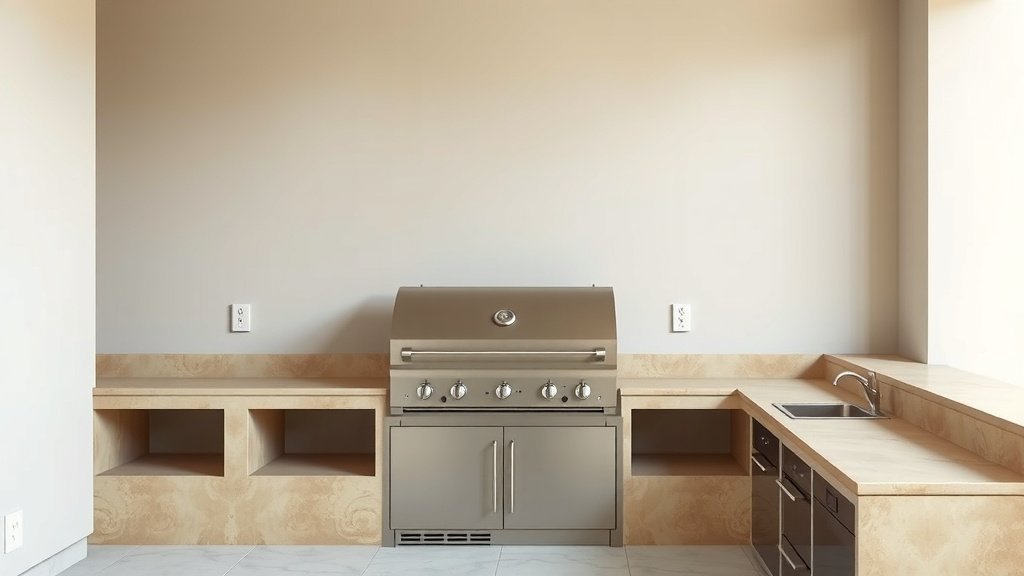
To build a built-in gas grill, you need to plan your outdoor kitchen layout, secure necessary permits, and construct a durable, fire-resistant island structure that safely houses your chosen grill head and gas line connections.
This process transforms your patio into a functional cooking area, requiring careful attention to utility hookups and proper ventilation for safety and optimal grilling performance.
- Plan your outdoor space and grill type before any construction begins.
- Secure local permits and understand building codes for safety and compliance.
- Choose a grill head that fits your cooking needs and the island’s dimensions.
- Construct a sturdy, non-combustible frame for the grill island.
- Ensure professional installation for gas lines and proper ventilation for safety.
How To Build A Built In Gas Grill?
Building a built-in gas grill creates a dedicated outdoor cooking zone. This project involves careful planning, precise construction, and ensuring all safety standards are met for a lasting and enjoyable experience.
Why Choose a Built-In Gas Grill?
Imagine stepping outside to a dedicated cooking space. A built-in gas grill offers a seamless look, integrating perfectly into your outdoor living area. It can truly elevate your backyard entertaining.
Many homeowners find built-ins more convenient than portable grills. They become a permanent fixture, ready for use whenever the mood strikes. Plus, they often boast more cooking power and features.
Understanding Your Outdoor Space
Before any digging or framing, take a good look at your backyard. Where will your grill island fit best? Consider sunlight, prevailing winds, and proximity to your indoor kitchen for easy access (Grill Industry Association).
Considering Layout and Flow
Think about how you move when you grill. Do you need prep space next to the grill? What about a sink or a mini-fridge? Planning for adequate counter space is a common recommendation by outdoor living experts.
Ensure there’s enough room for guests to mingle comfortably without crowding the cook. A good layout makes your outdoor kitchen enjoyable for everyone, not just the chef.
Utility Connections: Gas and Electric
This is where precision matters. Do you have a natural gas line nearby, or will you use propane tanks? You might also need electrical outlets for rotisseries or lighting. We found that planning for utilities early saves significant hassle later on.
Consult with licensed professionals for gas and electrical hookups. This ensures everything meets local codes and operates safely. Never try to DIY these critical connections if you are not qualified.
Essential Planning Steps
A successful built-in grill project starts with a solid plan. Don’t rush this phase. It’s like baking a cake; you need the right recipe and ingredients before you mix.
Researching Grill Head Options
The grill head is the heart of your outdoor kitchen. What features are important to you? Side burners, infrared searing, or rotisserie capabilities? Look for models designed specifically for built-in installation.
Measure the dimensions carefully. Each grill head has specific cutout requirements for the island structure. Many experts suggest choosing your grill head *before* you finalize island plans.
Permits and Local Codes
Yes, permits! This step is non-negotiable. Building codes exist for your safety and property value. Check with your local planning department to understand what’s required for outdoor kitchen construction.
Ignorance of the law is not an excuse. Failing to get permits can lead to fines, forced demolition, or issues when selling your home. It’s always better to be compliant from the start.
Gathering Your Materials
Once your plans are approved, it’s time to gather your supplies. Think of it as preparing your toolkit for a grand project.
- Grill Head: Your chosen appliance.
- Framing Materials: Steel studs or concrete blocks (non-combustible is key).
- Cement Board: For covering the frame, providing a stable base for finishes.
- Finishing Materials: Stone veneer, stucco, tile, or brick for aesthetic appeal.
- Countertop Material: Granite, concrete, or tile that can withstand outdoor elements.
- Ventilation Components: Vents, access doors (for propane tank storage, if applicable).
- Utility Connections: Gas lines, electrical conduit, fittings (installed by pros).
- Fasteners and Adhesives: Outdoor-rated screws, mortar, thin-set, caulk.
Building the Grill Island Structure
This is where your vision takes physical form. The structure must be robust and able to support the grill head and countertop weight.
Framing the Structure
You need a frame that won’t burn. Many experts recommend using steel stud framing or concrete blocks. Wood framing is generally not permitted for the grill cavity due to fire risk (National Fire Protection Association).
Build the frame to the exact dimensions required by your grill head manufacturer. Remember to include openings for access doors, electrical outlets, and ventilation grates.
Adding Countertops and Finishes
After framing, cover your structure with cement board. This provides a clean, stable surface for your chosen finish. Then, apply your stone veneer, stucco, or tile for the desired look.
Install your countertop material last. Ensure it’s level and properly secured. Choose materials that can withstand the elements – sun, rain, and temperature changes – without cracking or fading. Many research sources indicate that porcelain tile and natural stone are popular choices.
Installing the Gas Grill Head
The moment of truth! Carefully lift and slide your grill head into its designated opening. Follow the manufacturer’s instructions meticulously for proper placement and securing.
Connecting Gas Lines Safely
This step *must* be done by a licensed professional. They will connect your gas line to the grill, ensuring all fittings are secure and leak-free. They also perform a pressure test to confirm system integrity.
Never take shortcuts with gas connections. A small leak can have catastrophic consequences. Trust the experts for this critical part of the installation.
Ventilation Requirements
Proper ventilation is paramount for safety. A built-in grill island needs air circulation to prevent heat buildup and dissipate gas fumes (especially with propane tanks). We found that cross-ventilation is key.
Most manufacturers specify minimum ventilation opening sizes. This table shows typical recommendations for propane storage in an enclosed island:
| Propane Tank Size | Minimum Vent Area (Top) | Minimum Vent Area (Bottom) |
|---|---|---|
| 20 lb tank | 10 sq inches | 10 sq inches |
| 30 lb tank | 12 sq inches | 12 sq inches |
These are general guidelines; always follow your grill and island manufacturer’s specific instructions. More air flow is generally better.
Safety First: Pre-Use Checks
Before you light that first burger, perform a thorough safety check. This helps ensure everything is correctly installed and ready for safe operation.
- Check all gas connections for leaks using a soapy water solution. Bubbles mean a leak!
- Ensure the grill head is securely seated in the island.
- Confirm all ventilation openings are clear and unobstructed.
- Test the igniters to ensure they spark correctly.
- Read your grill’s owner’s manual for any specific first-time use instructions.
- Keep a fire extinguisher nearby, just in case.
Conclusion
Building a built-in gas grill is a rewarding project that significantly enhances your outdoor living space. By focusing on meticulous planning, adhering to safety standards, and engaging professionals for critical utility connections, you create a beautiful and functional cooking area. Enjoy countless hours of grilling with friends and family in your newly designed outdoor kitchen.
How long does it take to build a built-in gas grill?
The timeline for building a built-in gas grill varies widely. Planning and permitting alone can take several weeks. Actual construction, from framing to finishing, might take 1-2 weeks for a moderately sized island, not including cure times for concrete or mortar. Professional installation of gas lines and final inspections add to this. Overall, expect anywhere from 1 month to several months depending on complexity and contractor availability.
Can I use any gas grill as a built-in unit?
No, you cannot use just any gas grill. Only grills specifically designed as “built-in” or “drop-in” units should be installed in an island. These grills have specific ventilation requirements, heat shielding, and often come without a cart. Using a regular cart-style grill in an enclosed space is a significant fire hazard due to heat retention and lack of proper air circulation.
What materials are best for a built-in grill island?
For the structure, non-combustible materials are essential. Steel studs or concrete masonry units (CMU blocks) are top choices. For finishes, consider weather-resistant options like natural stone veneer, stucco, brick, or outdoor-rated tile. Countertops should also be durable and weather-proof, with granite, concrete, and certain porcelain tiles being popular and reliable selections that withstand outdoor conditions.
Is it cheaper to build a built-in grill or buy a stand-alone one?
Generally, building a built-in grill is more expensive upfront than purchasing a quality stand-alone grill. The cost includes the grill head itself, construction materials for the island, labor for framing, finishing, and professional utility installations (gas, electrical). While stand-alone grills require no construction, built-ins offer a custom, integrated aesthetic and can add more value to your home. It’s an investment in your outdoor living space.
How do I ensure proper ventilation for my built-in gas grill?
Proper ventilation involves creating pathways for air to enter and exit the grill island, especially if a propane tank is stored inside. This typically means installing vents at both the top and bottom of the island structure, ensuring cross-ventilation. Always follow the specific ventilation requirements outlined in your grill head and island manufacturer’s installation manuals, and local building codes. These guidelines are crucial for dissipating heat and safely venting any potential gas leaks, preventing dangerous gas buildup.
