Seasoning your Blackstone grill typically takes about 30 to 60 minutes for the initial process. You’ll need to apply 3-5 thin coats of oil, allowing each coat to smoke off completely before adding the next, which builds the protective layer.
The time investment is worthwhile, as proper seasoning protects your griddle from rust and creates a non-stick cooking surface that improves with every use.
TL;DR: Here’s a quick overview of seasoning your Blackstone griddle:
- The first seasoning takes around 30-60 minutes.
- You’ll apply 3 to 5 thin coats of cooking oil.
- Each coat needs to burn off until it stops smoking.
- This creates a protective, non-stick surface.
- Regular cooking helps maintain and improve the seasoning over time.
How Long Does It Take To Season A Blackstone Grill?
Expect to spend roughly 30 to 60 minutes seasoning your Blackstone grill for the very first time. This includes the time needed to apply multiple oil coats and let each one burn off thoroughly.
The process is more about attention to detail than rushing, ensuring a strong foundation for your griddle’s life.
Why Seasoning Your Griddle Matters So Much
Why bother seasoning? Think of it like a protective shield for your grill. This simple step creates a natural non-stick surface that makes cooking easier and cleaning a breeze.
More importantly, seasoning prevents rust, which can quickly ruin your griddle. It’s an investment in your grill’s longevity and your future cooking enjoyment.
Essential Tools for Seasoning Success
Before you start, gather your supplies. You’ll need your Blackstone griddle, a good cooking oil, paper towels or a clean cloth, and a pair of tongs. Having everything ready makes the process smooth and stress-free for you.
Don’t forget your heat-resistant gloves; those griddle surfaces get incredibly hot. Safety first when you’re working with heat.
Choosing the Right Oil for Your Blackstone
What’s the best oil to use? We found that oils with a high smoke point work best. These include flaxseed oil, grapeseed oil, canola oil, or even vegetable oil.
Some people swear by flaxseed oil for its hard, durable finish (Consumer Reports). However, many experts agree that any of the recommended oils will give you excellent results.
The Step-by-Step Seasoning Process
Ready to get started? We’ll walk you through each part of seasoning your griddle. It’s a straightforward process, but patience is key to a great outcome.
Remember, this isn’t just about applying oil; it’s about baking it into the metal. Think of it as painting a beautiful, protective layer.
Step 1: Clean Your Griddle Thoroughly
Start with a clean slate. Turn your griddle on high heat to burn off any factory oils or residues. Once hot, scrape it clean and wipe it down with paper towels. You want a perfectly clean surface to begin.
This initial clean ensures that your seasoning adheres properly. Many guidelines point to a spotless surface as a good first step (Blackstone manual).
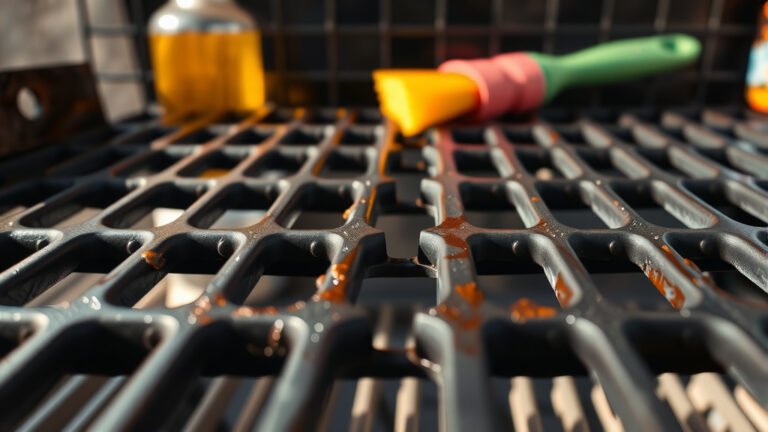
Step 2: Apply a Thin Coat of Oil
Now for the oil. Pour a small amount (about a tablespoon) of your chosen oil onto the hot griddle. Use paper towels held by tongs to spread a very thin, even coat across the entire surface.
Think “less is more” here; a thick coat can become sticky or uneven. You want just enough to lightly sheen the entire cooking area.
Step 3: Heat Until Smoking
Once oiled, let the griddle heat up until the oil begins to smoke. Keep the heat on high. You’ll see the oil turn dark and then stop smoking; this means the oil has polymerized and bonded with the metal. This is the magic moment!
Don’t turn off the heat until the smoke fully subsides. This step is essential for creating that durable, non-stick layer.
Step 4: Repeat the Process
After the first coat stops smoking, turn off the griddle and let it cool slightly. Then, repeat Steps 2 and 3. Apply another thin coat of oil and heat until it smokes off again. Do this at least 3-5 times for a strong initial seasoning.
Each layer builds upon the last, making your seasoning more robust. It’s like building muscle, one rep at a time for a stronger finish.
How Many Coats Do You Really Need?
While 3-5 coats are a great start, many enthusiasts go for more. We found that some people apply up to 7 or 8 coats for an exceptionally deep and durable finish. It truly depends on your personal preference and patience.
More coats often mean a more robust seasoning, offering better protection and a slicker cooking experience. It’s your call, chef!
What to Expect During Seasoning
It’s normal to have some questions or concerns during this process. Don’t worry, we’re here to guide you through it. Knowing what to expect makes the entire process smoother.
Think of it as a learning curve; every griddle owner goes through it. You’ll soon be a seasoning pro!
Patience is Your Best Tool
Seasoning isn’t a race; it’s a marathon. Each coat needs time to properly bake on and smoke off. Trying to rush it can lead to a sticky or uneven surface, which you definitely want to avoid. Take your time for the best possible outcome.
Many experts say that giving each coat its full cycle is the most important part of the whole process. Good things come to those who wait, especially with a perfectly seasoned griddle.
Uneven Coloring is Normal
Don’t be alarmed if your griddle surface doesn’t turn a perfectly uniform black right away. Some areas might look darker than others, and that’s perfectly normal. Over time, with more cooking, the color will even out and deepen. Your griddle will develop a beautiful, rich patina.
It’s like a well-loved pair of jeans; the character comes from use. Every cook adds to the griddle’s story.
Maintaining Your Seasoning After Initial Setup
Once seasoned, your work isn’t over entirely. The best way to maintain and improve your seasoning is by simply cooking on it regularly. Every time you cook with oil, you’re adding to that non-stick layer. It’s a fantastic cycle of cooking and caring.
After cooking, scrape off food residue and wipe down your griddle with a thin coat of oil. This simple step will keep your griddle ready for your next culinary adventure and ensure its longevity for years.
| Oil Type | Smoke Point | Pros | Cons |
|---|---|---|---|
| Flaxseed Oil | 350°F (177°C) | Creates a hard, durable finish. | More expensive, lower smoke point can be tricky. |
| Grapeseed Oil | 420°F (216°C) | High smoke point, neutral flavor. | Can be a bit pricier than other options. |
| Canola Oil | 400°F (204°C) | Readily available, affordable, good smoke point. | None notable for seasoning. |
| Vegetable Oil | 400°F (204°C) | Affordable, common, good smoke point. | Similar to canola, a reliable choice. |
Here’s a quick checklist to help you stay on track with your seasoning journey:
- Pre-heat griddle to high heat.
- Scrape clean and wipe down.
- Apply a very thin layer of oil.
- Heat until the oil smokes and then stops.
- Let cool slightly before next coat.
- Repeat 3-5 times for optimal results.
Conclusion
Seasoning your Blackstone griddle is a vital step that sets the stage for years of enjoyable outdoor cooking. While it takes about 30 to 60 minutes for the initial process of applying multiple oil coats, this time is a worthwhile investment in your griddle’s health and performance.
By following these steps, choosing the right oil, and being patient, you’ll create a durable, non-stick surface that improves with every meal. Remember, a well-seasoned griddle is a happy griddle, ready for countless delicious adventures.
How do I know my Blackstone griddle is fully seasoned?
You’ll know your Blackstone is well-seasoned when the surface develops a dark, even, non-stick sheen. Water will bead up on the surface, and food will release easily without sticking. It often takes a few cooking sessions after the initial seasoning to truly build up this robust, slick layer.
Can I use butter or olive oil to season my griddle?
It’s best to avoid butter or olive oil for initial seasoning. Butter has a very low smoke point and can burn, leaving a sticky residue. Olive oil also has a lower smoke point and can become gummy. Stick to oils like canola, vegetable, or grapeseed oil for optimal results.
What if my griddle gets sticky after seasoning?
If your griddle feels sticky, it usually means you applied the oil too thickly, or it didn’t fully burn off during heating. To fix this, heat the griddle to high, scrape off any sticky residue, and then reapply very thin coats of oil, ensuring each coat completely stops smoking before adding the next. This helps to properly polymerize the oil and create a smooth finish.
How often should I re-season my Blackstone griddle?
You don’t typically need a full re-seasoning often if you maintain it well. Regular cooking with oil naturally enhances the seasoning. You might need a minor re-seasoning (1-2 coats) if you see rust spots, if food starts sticking consistently, or after a very deep cleaning that removes some of the seasoning. Just listen to your griddle; it will tell you when it needs a little TLC.
Can I speed up the seasoning process for my griddle?
While you might be tempted to rush, trying to speed up the process isn’t recommended. Each thin coat of oil needs time to properly heat and polymerize into the metal. Rushing can lead to an uneven, sticky, or weak seasoning layer. Patience ensures a more durable and effective non-stick surface, so take your time for the best outcome.