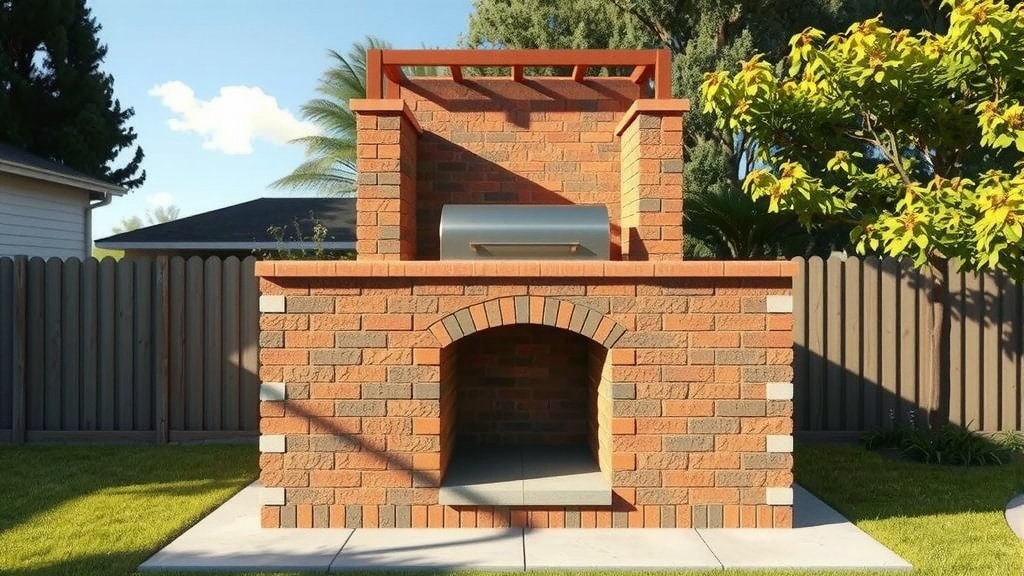
To make a brick outdoor grill, you first need a solid, level foundation and heat-resistant bricks, then build up the walls using mortar, leaving space for the firebox and grill grate.
You can construct a simple, functional brick grill yourself by carefully planning the design, ensuring proper ventilation, and using the right materials for safety and durability.
- Building your own brick outdoor grill requires careful planning and the right materials.
- You will need a sturdy foundation, heat-resistant bricks, and mortar to get started.
- Proper ventilation for the firebox and a secure grate placement are key design elements.
- This project offers a rewarding way to customize your backyard cooking space.
How To Make A Brick Outdoor Grill?
Making a brick outdoor grill involves a few key steps to create a sturdy and functional cooking space right in your backyard. You’ll build a structure that stands up to heat and provides a great spot for family cookouts.
Planning Your Grill Layout
Before any bricklaying begins, you need a plan. Think about where you want your grill. Consider how much space you have, how close it is to your home, and the prevailing winds. A good location keeps smoke away from sitting areas.
Will it be a simple open firebox, or do you want storage space below? Many people find a small countertop on one side very useful (NIH). Sketch out your ideas, measuring everything carefully. This prevents costly mistakes later on.
Essential Materials You’ll Need
Gathering all your materials upfront saves time and hassle. You wouldn’t start a road trip without packing your bags, right? Here’s a quick list to get you started on your brick outdoor grill:
- Heat-resistant firebricks for the firebox
- Standard building bricks for the outer structure
- Mortar mix suitable for high temperatures
- Concrete mix for the foundation
- Reinforcing steel bars (rebar)
- Steel grill grate and charcoal grate
- Trowel, spirit level, measuring tape
- Safety gear: gloves, safety glasses
Building a Solid Foundation
Every great structure starts with a strong base. Your brick grill is no different. You need a foundation that can support the weight of the bricks and withstand ground shifts. Without it, your beautiful grill could crack or become uneven over time.
Dig a trench about 6-8 inches deep and slightly larger than your grill’s footprint. We found that a wider base provides more stability. Pour concrete into this trench, embedding rebar for extra strength. Make sure it’s perfectly level using your spirit level.
Choosing the Right Bricks
Not all bricks are created equal, especially when it comes to heat. For the inner walls of your firebox, you absolutely need firebricks. These bricks are designed to withstand extremely high temperatures without cracking or crumbling (Cleveland Clinic).
For the outer walls, you can use standard building bricks. These are more decorative and less expensive. Just ensure they are durable and look good with your outdoor space. Think about color and texture when making your selection.
Laying the First Course of Bricks
This is where the magic begins! Once your concrete foundation is cured, you’re ready for the first layer of bricks. Dry-lay your first course without mortar to plan your brick placement. This helps you figure out spacing and cuts. It’s like arranging puzzle pieces before gluing them down.
Mix your mortar according to the manufacturer’s instructions. Apply a generous bed of mortar to the foundation. Lay your first bricks, tapping them gently with the trowel handle to seat them firmly. Use your spirit level to check they are level and plumb.
Building Up the Walls
Continue laying courses of bricks, staggering the joints like in a traditional brick wall. This strengthens the structure. Apply mortar to the top of the previous course and the end of each new brick. Always check for level and plumb as you go.
As you build, remember to leave openings for your grill grate and charcoal grate. Many experts suggest using a guide frame or temporary supports to ensure these openings are perfectly sized and level. This step is critical for a usable grill.
Creating the Firebox and Grate Supports
The firebox is the heart of your grill, where the charcoal or wood burns. This area must be built with firebricks and a high-heat mortar. Leave gaps for air circulation at the bottom, or create a small vent opening. Good airflow means a hotter, more consistent fire.
You’ll need to create ledges or support points for your grill grate. This could be achieved by turning bricks sideways or inserting metal rods into the mortar joints. We found that having multiple height options for the grate gives you more cooking control.
Adding a Chimney or Venting System
Do you want your grill to draw smoke effectively? A simple opening at the back can work, but a small chimney can really improve airflow and smoke control. Research often connects proper venting with a more enjoyable grilling experience (NIST).
If you opt for a chimney, build it directly above the firebox, gradually narrowing the opening as it rises. Even a simple, slightly raised back wall can help direct smoke away from your face. Think about how you want the smoke to exit.
Curing Your Brick Grill
Patience is a virtue, especially after all that hard work. Your mortar needs time to cure properly. Many guidelines point to letting the mortar cure for at least a week before using the grill (Portland Cement Association). Rushing this can weaken the structure.
During the curing period, keep the mortar damp, especially in hot or dry weather. Covering it with a tarp can help. Once cured, start with a small, slow fire to gradually heat the bricks. This helps prevent cracking from sudden temperature changes.
Final Touches and Accessories
Now for the fun part: making it yours! Clean up any excess mortar. You can add a stone or concrete countertop next to the grill for prep space. Consider hooks for your grilling tools or a small storage area for charcoal.
Selecting the right grill grate is important. Stainless steel grates are durable and easy to clean. Don’t forget a cover to protect your brick grill from the elements when not in use. This helps it last for many years of delicious outdoor cooking.
| Feature | Description | Benefit |
|---|---|---|
| Firebricks | Used for the firebox lining. | Withstands extreme heat without damage. |
| Standard Bricks | Used for outer structure and aesthetics. | Cost-effective, decorative, structural support. |
| Mortar Mix | Binds bricks together. | Creates a strong, durable, heat-resistant bond. |
| Steel Grates | Cooking surface and charcoal support. | Provides even heating, easy to clean, adjustable. |
| Foundation | Concrete base for stability. | Prevents cracking, shifting, ensures longevity. |
Checklist Before You Grill
Before you light that first delicious flame, take a moment to review this quick checklist. You want your grilling experience to be safe and enjoyable!
- Is the foundation completely level and stable?
- Are all mortar joints fully cured and strong?
- Do the firebricks line the entire firebox area?
- Is there proper ventilation for air circulation?
- Are the grill grates securely in place at desired heights?
- Is the area around the grill clear of flammable materials?
Conclusion
Building your own brick outdoor grill is a rewarding project that adds a unique, functional centerpiece to your backyard. You’ve learned that careful planning, selecting the right materials, and precise construction steps are key to success. From laying a solid foundation to curing the mortar, each phase plays an important role in creating a durable cooking space. Now you can look forward to countless memorable meals shared with family and friends, all cooked on your very own custom-built brick grill.
How long does it take to build a brick grill?
The construction time for a brick grill can vary, but generally, it takes about 2-3 weekends of work. This includes time for the concrete foundation to cure and for the mortar between the bricks to set properly. Planning and material gathering add to the overall timeline.
Can I use regular bricks for the entire grill?
No, you should not use regular bricks for the entire grill, especially for the firebox. Regular bricks are not designed to withstand the extreme temperatures of a fire and can crack or crumble. You must use heat-resistant firebricks for the internal firebox area.
What kind of mortar should I use for a brick grill?
For a brick grill, you need to use a high-temperature refractory mortar, especially for the sections that will be exposed to direct heat, like the firebox. For the outer, cooler sections, a standard type N masonry mortar is usually sufficient, but always check product specifications.
How do I ensure proper airflow in my brick grill?
Proper airflow is crucial for a good fire. You can ensure this by creating small openings or vents near the bottom of the firebox to allow air intake. Some designs also incorporate a small chimney or a higher back wall to help draw smoke upwards and out.
Is a brick grill permanent?
Yes, a brick grill is a permanent outdoor structure. Once built on a solid foundation, it is designed to last for many years. This is why careful planning of its location is so important, as you won’t be able to easily move it once it’s constructed.