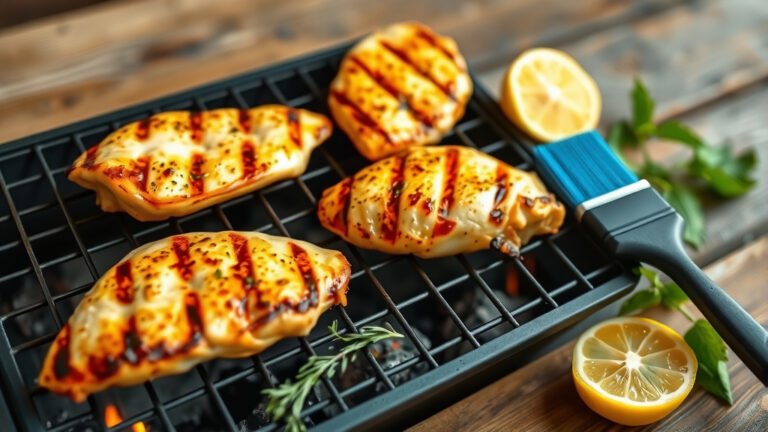
To season a new BBQ grill, clean the grates thoroughly with soap and water, then apply a thin, even coat of high-smoke-point cooking oil and heat the grill to a high temperature for about 30-60 minutes until the oil smokes and cures.
This process creates a protective, non-stick layer on your new BBQ grill, preventing rust and ensuring your food cooks beautifully without sticking.
- Clean Your Grill First: Always wash off factory residue with warm, soapy water.
- Pick the Right Oil: Use oils like canola, grapeseed, or flaxseed for their high smoke points.
- Apply Thinly: A light, even coat prevents a sticky mess.
- Heat to Smoke: Run your grill at high heat until the oil burns off and cures.
- Repeat for Durability: Multiple layers build a stronger, lasting seasoning.
How To Season A New BBQ Grill?
Seasoning a new BBQ grill is a simple yet crucial step. It builds a non-stick surface and helps protect your grates from rust, extending the life of your grill for many delicious meals.
What Exactly is Grill Seasoning?
Think of grill seasoning like seasoning a cast-iron pan. You are essentially baking oil onto the metal surface. This process creates a thin, polymerized layer that is naturally non-stick and rust-resistant. It makes grilling much more enjoyable, we found, as food releases easily.
Why Does My New Grill Need Seasoning?
Your brand-new grill often comes with factory oils or coatings that need to be removed. More importantly, seasoning protects the metal from oxidation. Many experts say that proper seasoning prevents rust from forming on your grates (Consumer Reports).
The Benefits of a Well-Seasoned Grill
A properly seasoned grill offers several advantages. You will notice food sticks less, cleanup becomes easier, and your grates will last longer. It’s an investment of time that pays off in big ways.
Tools and Materials You’ll Need
Before you begin, gather your supplies. You won’t need much, but having them ready makes the process smoother. Here is a simple list to guide you:
- High-smoke-point cooking oil (e.g., canola, grapeseed, flaxseed)
- Clean cloths or paper towels
- Dish soap and warm water
- Heat-resistant gloves (optional, but helpful)
Step-by-Step Guide to Seasoning Your Grill
Let’s walk through the process together. It’s easier than you might think and well worth the effort. Follow these steps for a perfectly seasoned grill.
Step 1: The Initial Clean-Up
Your new grill might have manufacturing oils or dust. Start by giving it a good wash. Use warm, soapy water and a sponge to clean the grates. Rinse thoroughly and let them air dry completely. Any residue can prevent the oil from bonding properly.
Step 2: Choosing the Best Oil for Seasoning
This is where oil choice matters. You need an oil with a high smoke point. These oils can withstand high temperatures without breaking down quickly. Research often connects oils like canola, grapeseed, and flaxseed with effective grill seasoning (Cook’s Illustrated).
| Oil Type | Smoke Point | Notes for Seasoning |
|---|---|---|
| Canola Oil | Around 400°F | Common, affordable, good all-rounder. |
| Grapeseed Oil | Around 420°F | Slightly higher smoke point, neutral flavor. |
| Flaxseed Oil | Around 225°F | Lower smoke point but creates a very hard, durable finish; often used in thinner layers and multiple coats for specific applications. Many experts say its unique properties create a very durable layer for seasoning. |
| Vegetable Oil | Around 400°F | General term, often a blend, usually works well. |
Step 3: Applying the Oil Evenly
Now, it’s time to apply the oil. Pour a small amount onto a clean cloth or paper towel. Wipe down all surfaces that food will touch – the grates themselves, and any internal parts if instructed by your grill’s manual. The key is a thin, even coating. Too much oil can lead to a sticky, gummy mess.
Step 4: The Heating and Curing Process
Place the oiled grates back into the grill. Close the lid. For gas grills, turn all burners to high. For charcoal grills, get your coals nice and hot. Let the grill heat up for 30 to 60 minutes. You will likely see smoke; this is normal as the oil burns off and polymerizes onto the metal. Many guidelines point to heating until the smoke subsides as a good first step (Weber Grills).
Step 5: Cool Down and Repeat (Optional, but Recommended)
After the heating cycle, turn off your grill and let it cool completely. Once cool, you can repeat the oiling and heating steps. We found that multiple thin coats create a stronger, more resilient seasoning layer. Two to three cycles are usually enough for an excellent start.
Seasoning Specific Grill Types
While the basic steps are similar, some grills have specific considerations. Knowing these can help you achieve the best results for your particular model.
Seasoning a New Gas Grill
For gas grills, you can often do an initial “burn-off” before seasoning. Turn all burners to high for 15 minutes to burn off any factory residue. Then, proceed with oiling and heating as described. Ensure your gas tank has enough fuel for the process.
Seasoning a New Charcoal Grill
Charcoal grills mainly require seasoning on the cooking grates. The bowl itself doesn’t typically need oiling for seasoning, though keeping it clean is important. Focus on getting those grates properly coated and cured with a good coal bed.
Seasoning a New Smoker
Smokers, especially offset smokers, benefit greatly from seasoning. Follow the same steps, but also consider oiling the inside of the cooking chamber. Some smoker manufacturers provide specific initial burn-in instructions that might involve wood chunks to build up an early “patina” of smoke residue along with the oil.
Important Tips for Grill Longevity
Seasoning is just the beginning. Regular care keeps your grill in top shape. Here are a few simple tips to maintain your seasoned surface.
Clean Your Grates After Each Use
A quick brush down after grilling, while the grates are still warm, helps remove food particles. This prevents build-up and keeps your seasoning intact. A good grill brush is your friend here.
Re-Season When Necessary
Over time, especially with heavy use, your seasoning might wear down. If you notice food sticking more, or see signs of rust, it’s time for a touch-up. Just repeat the oiling and heating steps as needed.
Cover Your Grill When Not in Use
Protecting your grill from the elements is vital. A good grill cover prevents rain, snow, and excessive humidity from reaching the grates, which can cause rust even on a seasoned surface.
Common Mistakes to Avoid When Seasoning
Making a few simple errors can hinder your seasoning efforts. Let’s make sure you avoid these common pitfalls:
- Applying Too Much Oil: This creates a gummy, sticky mess that is hard to fix. Less is more here.
- Not Cleaning First: Leaving factory residue means the oil won’t properly bond to the metal.
- Using the Wrong Oil: Low smoke point oils will just burn off quickly without forming a good layer.
- Not Heating Long Enough: The oil needs time at high temperatures to polymerize and cure.
- Skipping the Repeat: A single coat is often not as durable as multiple thin layers.
Your Seasoning Checklist
Here’s a quick rundown to ensure you hit all the marks:
- Did you clean the grates thoroughly?
- Did you choose a high-smoke-point oil?
- Was the oil applied in a very thin, even layer?
- Did you heat the grill to high temperatures?
- Did you allow the oil to cure and smoke off?
- Did you let the grill cool down completely?
- Did you consider repeating the process for better results?
Conclusion
Seasoning your new BBQ grill is a small investment of time that offers big rewards. It creates a robust, non-stick surface, protects against rust, and sets the stage for countless enjoyable cooking sessions. By following these simple steps, you’ll ensure your grill is ready to deliver delicious meals for years to come. So, fire it up, get it seasoned, and let the grilling adventures begin!
FAQs About Grill Seasoning
Can I use olive oil to season my grill?
It’s generally not recommended to use olive oil for seasoning. Olive oil has a lower smoke point compared to other cooking oils, meaning it will likely burn off too quickly or become sticky rather than forming a durable, non-stick layer. Stick to oils like canola or grapeseed for best results.
How often should I re-season my grill grates?
The frequency depends on how often you grill and how well you maintain your grates. For casual grillers, re-seasoning once or twice a year might be enough. If you grill frequently or notice food sticking more often, a quick re-seasoning every few months can be beneficial. Always clean thoroughly before re-seasoning.
What if my grill grates start to rust after seasoning?
If rust appears, it usually means the seasoning layer has worn off or was not fully established. Gently scrub away the rust with a grill brush or steel wool, then wash, dry, and thoroughly re-season the affected areas. Consider applying multiple thin coats for better protection.
Can I season porcelain-coated grates?
Porcelain-coated grates typically do not require traditional seasoning with oil in the same way cast iron or bare steel grates do. The porcelain itself is naturally non-stick and rust-resistant. You can, however, do an initial high-heat burn-off to remove any factory residues. Always refer to your grill’s manufacturer guidelines for specific care instructions.
Is it possible to over-season a grill?
It’s less about “over-seasoning” and more about improper seasoning. Applying too much oil at once, rather than thin layers, can lead to a sticky, gummy residue that doesn’t cure properly. The goal is thin, polymerized layers, not a thick coating of baked-on oil. If you have a sticky mess, you might need to clean it off and start with thinner applications.