The ideal temperature to cook chicken on a pellet grill is generally 325-375°F (163-190°C) for most cuts.
This temperature range helps ensure the chicken cooks thoroughly to a safe internal temperature while achieving a delicious, crispy skin.
Here’s a quick summary of what you’ll discover in this guide:
- Aim for 325-375°F (163-190°C) for juicy, safe chicken.
- Always check for an internal temperature of 165°F (74°C) in the thickest part.
- Whole chickens benefit from a two-phase cooking method for best results.
- Chicken breasts often prefer a slightly lower, consistent heat to avoid drying out.
- Use a reliable meat thermometer for accuracy; it’s your best friend.
- Don’t forget to rest your chicken after grilling for ultimate juiciness.
What Temp To Cook Chicken On Pellet Grill?
Cooking chicken on a pellet grill requires hitting that sweet spot: hot enough for safety and crispy skin, but not so hot that it dries out the meat.
For most chicken pieces, like thighs, wings, or quarters, a grill temperature between 325-375°F (163-190°C) works perfectly.
Why This Temperature Range Works Best
You might wonder, “Why this specific range?” Well, it’s a balance of science and deliciousness for poultry.
Cooking chicken too low can lead to tough meat and rubbery skin, taking too long to reach safe temperatures (USDA).
Too high, and you risk burning the outside before the inside is safely cooked through, leaving you with dry results.
This medium-high range on a pellet grill creates a consistent, convection-like heat, ensuring even cooking from all sides.
The Golden Rule: Internal Temperature is King
No matter your grill temperature, the ultimate indicator of doneness and safety is the chicken’s internal temperature.
Many food safety guidelines, including those from the CDC, state that all poultry must reach an internal temperature of 165°F (74°C).
A good quality digital meat thermometer is non-negotiable here. It’s your kitchen superpower for perfectly cooked chicken!
Where to Probe Your Chicken
Always insert your thermometer into the thickest part of the meat without touching bone.
For whole chickens, check both the breast and thigh. For individual pieces, aim for the thickest area of each.
Tailoring Temperatures for Different Cuts
While 325-375°F is a solid general guideline, different chicken cuts sometimes benefit from slight adjustments.
Think about it: a delicate breast cooks differently than a bone-in thigh or a whole bird.
Whole Chicken: A Two-Phase Approach
Cooking a whole bird? Many experts suggest a two-phase approach for a succulent interior and crisp skin.
Start lower, around 275-300°F (135-149°C), for the first hour or so to allow gentle smoke flavor to penetrate.
Then, crank up the heat to 375-400°F (190-204°C) for the remaining time to achieve that beautiful, crispy skin you crave.
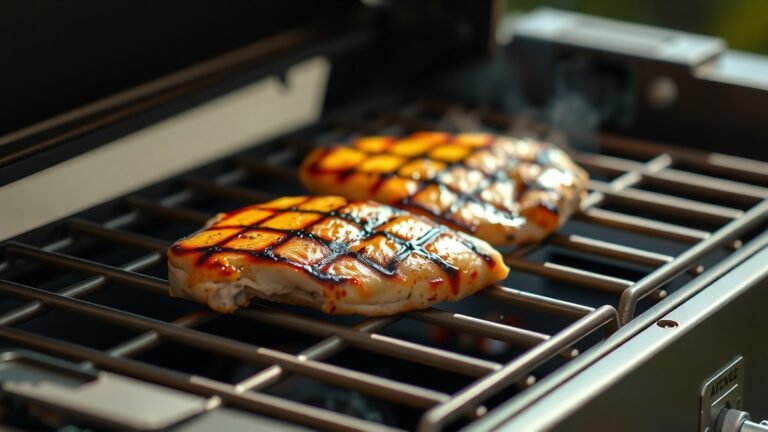
Chicken Breasts: Keeping Them Juicy
Chicken breasts can dry out quickly. We found that cooking them at around 325-350°F (163-177°C) works wonderfully.
This temperature allows them to cook through without losing all their precious moisture.
Pull them off the grill when they reach 160-162°F (71-72°C) and let them rest; carryover cooking will take them to 165°F.
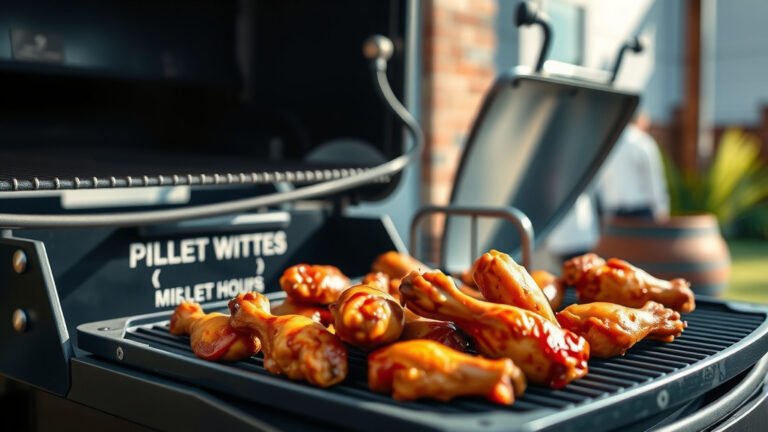
Thighs, Drumsticks, and Wings: Dark Meat Details
Dark meat cuts like thighs and drumsticks are more forgiving due to their higher fat content.
You can comfortably cook them at 350-375°F (177-190°C). They often taste even better when cooked slightly past 165°F, reaching 175°F (79°C) for extra tenderness, without drying.
For crispy chicken wings, research suggests a slightly higher temperature, around 375-400°F (190-204°C), is ideal. The higher heat helps render the fat and crisp up the skin quickly.
Factors Influencing Your Cook Time
Cooking isn’t just about temperature; other elements play a big role in how long your chicken stays on the grill.
Consider these variables when planning your meal for pellet grill success.
Size, Starting Temp, and Weather
A smaller chicken breast will cook faster than a large, bone-in thigh or a whole bird. It’s simple physics: thicker items need more time for heat to penetrate to the center.
Cold chicken straight from the fridge takes longer to cook than chicken brought closer to room temperature. Allowing chicken to sit out for 20-30 minutes before grilling can help with more even cooking.
Yes, even the weather matters! A cold, windy day means your pellet grill works harder to maintain temperature. This can extend your cooking time, so factor in mother nature.
Prepping Your Chicken for Success
A little prep goes a long way in achieving fantastic results on your pellet grill.
Don’t skip these simple steps if you want truly delicious chicken.
Brining, Marinating, and Patting Dry
Many experts agree that brining or marinating chicken can significantly improve moisture and flavor. A simple brine (salt, sugar, water) helps the meat retain moisture during cooking, combating dryness.
Marinades add a burst of flavor, making your chicken truly stand out. They penetrate the meat, enhancing taste and tenderness.
Want crispy skin? You must pat the chicken skin completely dry with paper towels before seasoning and grilling. Moisture creates steam, which is the enemy of crispiness, preventing a good sear.
Essential Tools for Pellet Grill Perfection
Having the right gadgets makes all the difference for a stress-free grilling experience.
Are you ready to make your pellet grilling easier?
- Good Digital Meat Thermometer: Absolutely important for food safety and perfect doneness.
- Quality Pellets: Choose a flavor profile that complements chicken, like apple, cherry, or pecan.
- Heat-Resistant Gloves: For safely handling hot grates and chicken without burns.
- Tongs and Spatula: Basic but essential for flipping and moving chicken.
- Foil Pan: Useful for whole chickens to catch drippings or prevent the bottom from overcooking.
Troubleshooting Common Issues
Even the pros sometimes encounter challenges. Here’s how to tackle a few common chicken grilling woes, so you can cook with confidence.
Fixing Rubbery Skin and Dry Chicken
If your chicken skin isn’t crisp, your grill temperature might be too low, or the skin wasn’t dry enough. Try cooking at a slightly higher temperature or finish with a quick sear at the end if your grill allows it.
Dry chicken usually means it was cooked too long or at too high a temperature without proper attention. Always trust your thermometer, and remember that resting the chicken is crucial for juices to redistribute, leading to a moist result.
Quick Reference Guide: Temps & Times
This table offers a general overview to help you plan your cook. Remember, these are estimates and can vary!
| Chicken Cut | Recommended Pellet Grill Temp | Approximate Cook Time | Target Internal Temp |
|---|---|---|---|
| Whole Chicken (3-4 lbs) | 275-300°F then 375-400°F | 2-3 hours | 165°F (Thigh/Breast) |
| Chicken Breasts (boneless, skinless) | 325-350°F | 30-45 minutes | 165°F |
| Chicken Thighs/Drumsticks | 350-375°F | 45-60 minutes | 165-175°F |
| Chicken Wings | 375-400°F | 45-60 minutes | 175°F (for tenderness) |
Your Pre-Grill Checklist
Before you fire up that pellet grill, take a moment for this quick mental run-through. It helps prevent mishaps and ensures a smoother cook!
- Chicken thawed and at room temp? (If applicable, for even cooking)
- Brined or marinated? (If desired, adds flavor and moisture)
- Skin patted bone dry? (Important for that sought-after crispiness)
- Seasoned evenly? (Don’t forget the underside for complete flavor!)
- Pellet hopper full? (Avoid running out mid-cook, it’s a pain!)
- Grill grates clean and preheated? (Prevents sticking and promotes good searing)
- Meat thermometer ready? (Your food safety hero, always at hand)
Conclusion
Mastering the art of cooking chicken on a pellet grill is genuinely satisfying. You now have the knowledge to achieve that perfect balance of smoky flavor, juicy tenderness, and wonderfully crispy skin.
Remember, your grill temperature is a guide, but the internal temperature is your ultimate chef’s secret for safety and success.
Don’t be afraid to experiment a little with temperatures and pellet flavors. Every cook is a chance to refine your skills and make delicious discoveries!
With these tips, you’re well on your way to serving up unforgettable pellet grill chicken every time. Happy grilling!
Frequently Asked Questions About Pellet Grill Chicken
Can I cook frozen chicken directly on a pellet grill?
It’s generally not recommended to cook chicken from frozen on a pellet grill. Cooking from frozen can lead to uneven cooking, potentially leaving parts of the chicken in the “danger zone” for too long, fostering bacterial growth. Always thaw chicken completely before grilling for safety and better results (USDA).
How long should I rest chicken after cooking on a pellet grill?
Resting chicken is an important step! Allow your chicken to rest for at least 10-15 minutes after taking it off the pellet grill. For a whole chicken, 15-20 minutes is even better. This time allows the muscle fibers to relax and reabsorb the juices, ensuring a much more tender and moist result.
What kind of pellets are best for chicken?
For chicken, lighter fruit woods like apple, cherry, or pecan are often recommended by grilling enthusiasts. These pellets impart a mild, sweet, and complementary smoke flavor that enhances the chicken without overpowering it. Oak or hickory can also work, but use them sparingly for a more subtle smoke profile.
My chicken skin is getting too dark before the inside is done, what should I do?
If the skin is browning too quickly, you can try reducing your grill temperature slightly, or tent the chicken loosely with aluminum foil. This helps shield the skin from direct heat, allowing the interior to catch up without burning the outside. Always monitor with your meat thermometer to verify internal doneness.
Can I open the pellet grill lid often to check on the chicken?
While it’s tempting to peek, “if you’re looking, you’re not cooking” definitely applies to pellet grills. Every time you open the lid, you lose valuable heat and smoke, which can extend cooking times and affect temperature consistency. Try to limit opening the lid to only when flipping or checking the internal temperature with your probe.