
To hook up a propane tank to a grill, you simply need to connect the grill’s regulator hose to the tank’s valve. Make sure both the tank valve and your grill’s control knobs are off first. Then, hand-tighten the connector clockwise until it’s secure.
This simple process ensures your grill receives a steady flow of propane for cooking. We found that checking for leaks after connecting is a very important safety step. A secure connection prevents gas from escaping, keeping you and your family safe.
TL;DR:
- Check that both grill knobs and tank valve are off.
- Connect the regulator hose to the tank valve.
- Turn clockwise until hand-tight.
- Perform a leak test with soapy water.
- Open the tank valve slowly.
Let’s walk through exactly how this works, step by step, so you can grill with confidence.
Connecting Your Propane Tank to the Grill
You’re ready to fire up the grill! This section walks you through the simple steps to safely connect your propane tank. It’s easier than you might think.
Gather Your Supplies
Before you begin, let’s make sure you have everything you need. Having your tools ready prevents frustrating interruptions.
What You’ll Need
- Your propane tank (full, of course!).
- Your gas grill with its regulator hose.
- A small bowl for soapy water (for leak testing).
- Dish soap.
That’s really all it takes! No fancy gadgets are necessary for this job.
Safety First: Pre-Connection Checks
Safety is not just a buzzword; it’s essential when dealing with propane. A few quick checks can prevent big problems (Occupational Safety and Health Administration).
Inspect Your Equipment
- Check the propane tank: Look for any visible damage like dents or rust. Is the tank certified and within its requalification date? Most tanks have a 12-year lifespan from the manufacturing date, then need recertification every five years.
- Examine the regulator hose: Feel along the hose for cracks, cuts, or kinks. Does the connector look clean and free of debris? We found that even small imperfections can compromise safety.
- Ensure all grill knobs are off: Double-check every burner control knob on your grill. They should all be in the “off” position. This prevents gas from flowing before you’re ready.
Think of it like a pilot’s pre-flight check. Small steps ensure a smooth (and safe) takeoff for your barbecue.
Making the Connection: Step-by-Step
Now, let’s get that tank connected. This is the heart of the process. Follow these steps carefully.
Positioning the Tank
Place the propane tank in its designated spot on your grill. Many grills have a tray or a ring at the bottom to secure the tank. This prevents the tank from tipping over, which is a real safety concern (National Fire Protection Association).
Attaching the Regulator
Locate the end of your grill’s regulator hose. This is the part with the large, often black, plastic or metal fitting. You’ll see a threaded nozzle on the propane tank valve.
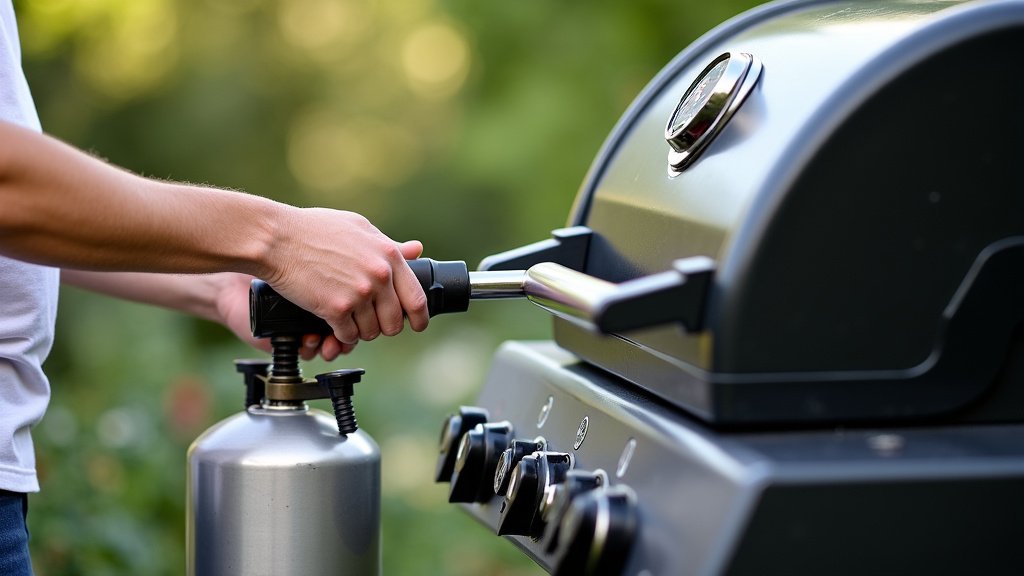
Align the regulator fitting with the tank’s valve. It’s usually a large, ACME-style thread. Turn the fitting clockwise. You should feel it catch the threads easily. Keep turning until it’s snug.
You want it “hand-tight.” What does “hand-tight” mean? It means tight enough that you can’t turn it any further with just your hand, but don’t use a wrench. Overtightening can actually damage the seal (Consumer Product Safety Commission).
The All-Important Leak Test
This step is non-negotiable. Don’t skip it! We found that a quick leak test is the most important safety measure after connecting the tank.
Preparing Your Soapy Water Solution
Mix a small amount of dish soap with water in your bowl. You want a good, bubbly solution. Think of it like bubble solution for kids, but maybe a bit thicker.
Performing the Test
- First, ensure your grill’s burner knobs are still OFF. This is crucial.
- Slowly, very slowly, turn on the main valve on top of your propane tank. You’ll hear a slight hiss of gas for a second.
- Dip your finger or a small brush into the soapy water.
- Apply the solution liberally to the connection point between the regulator and the tank valve. Coat it completely.
- Watch for bubbles: If you see bubbles forming and growing, you have a leak. It will look like soap suds rapidly expanding.
What to Do If You Find a Leak
Don’t panic! If you see bubbles, immediately turn off the propane tank valve. Disconnect the regulator, inspect the threads for any debris, and reconnect it, ensuring it’s hand-tight. Repeat the leak test.
If you still detect a leak after re-tightening, stop. Do not use the grill. There might be a faulty regulator or tank valve. It’s time to contact the grill manufacturer or a propane supplier. Your safety is worth it.
If no bubbles appear, you’re good to go! Your connection is secure.
Opening the Tank Valve
Your leak test passed, fantastic! Now, it’s time to open the gas supply. But there’s a trick to it.
Slowly open the propane tank valve all the way. Why slowly? Many modern propane tanks have an Overfilling Prevention Device (OPD) and a flow-limiting device. If you open the valve too quickly, the flow limiter can mistakenly think there’s a leak and restrict the gas flow, making your grill seem like it’s low on propane or won’t light (Propane Education & Research Council).
Turn it until it stops. This ensures you get a full, steady flow of gas to your grill.
A Quick Checklist for Success
Let’s recap to make sure you’ve covered all your bases. Think of this as your “ready to grill” list.
| Step | Description | Status |
|---|---|---|
| Tank Inspection | Checked for damage and certification date. | ✓ |
| Hose & Regulator | Inspected for cracks, cuts, and debris. | ✓ |
| Grill Knobs | All burner control knobs are OFF. | ✓ |
| Tank Position | Tank is securely placed and upright. | ✓ |
| Connection | Regulator is hand-tight to the tank valve. | ✓ |
| Leak Test | Performed with soapy water; no bubbles found. | ✓ |
| Valve Opening | Tank valve opened slowly and fully. | ✓ |
You’ve successfully connected your propane tank! Give yourself a pat on the back. You’re ready to light that grill and start cooking up some delicious meals.
Remember, proper connection and leak testing are your best friends for a safe and enjoyable grilling experience. Don’t rush these steps.
Conclusion
You’ve now got the knowledge to connect your propane tank safely and confidently. Remember, a few careful steps, especially the all-important leak test, are all it takes. By taking the time to inspect your equipment and make a secure connection, you ensure a safe and delicious grilling experience. So go ahead, get grilling, and enjoy those perfectly cooked meals!
Frequently Asked Questions
Can I use an old propane tank with my new grill?
Yes, as long as the propane tank is still within its requalification date and shows no visible signs of damage, like rust or dents, you can use it. Always check the tank’s collar for a recertification date stamp.
What if my grill’s regulator hose doesn’t fit my propane tank?
Most modern grills and propane tanks use a universal ACME-style fitting. If yours doesn’t fit, it’s possible you have an older tank or a specialized grill connection. You might need an adapter or a new regulator designed for your specific setup.
How often should I check for propane leaks?
You should perform a leak test with soapy water every time you connect a new or refilled propane tank to your grill. It’s a quick and essential safety measure that shouldn’t be skipped.
Can I leave my propane tank connected to the grill all the time?
For safety, it’s generally recommended to turn off the propane tank valve after each use, especially if you won’t be using the grill for an extended period. This reduces the risk of leaks and ensures gas isn’t escaping unnecessarily.
Why does my grill flame seem low after connecting a new tank?
This often happens if you open the tank valve too quickly. Modern tanks have a safety device that can restrict gas flow if it senses a sudden surge, mistakenly thinking it’s a leak. Turn the tank valve off, wait a minute, then reopen it slowly and fully to reset the flow.
