To slow cook ribs on a charcoal grill, set up your grill for indirect heat, maintaining a consistent low temperature between 225°F and 275°F (107°C-135°C), and use the 3-2-1 method, smoking them, wrapping them, and then saucing for tenderness.
Achieving fall-off-the-bone ribs involves precise temperature control, steady smoke, and patience, transforming tough cuts into melt-in-your-mouth barbecue masterpieces.
Here’s a quick overview of what you’ll learn to master charcoal grill ribs:
- Understand the 3-2-1 method for tender ribs.
- Learn how to set up your charcoal grill for consistent low heat.
- Discover essential tips for prepping your ribs.
- Find out how to add delicious smoky flavor.
- Know when your perfectly cooked ribs are ready to enjoy.
How To Slow Cook Ribs On Charcoal Grill?
Slow cooking ribs on a charcoal grill involves careful heat management and the popular 3-2-1 method, giving you tender, flavorful results. You are in for a treat with this method.
Choosing the Right Ribs
Before you even light a match, picking the right ribs makes a huge difference. You’ll generally find two main types: baby back ribs and spare ribs.
Baby backs are smaller and leaner, often found closer to the loin. Spare ribs are larger, meatier, and come from the belly area. Many experts say spare ribs, especially St. Louis cut (trimmed spare ribs), offer a richer flavor profile for slow cooking (National Pork Board).
Your Essential Grilling Gear Checklist
You don’t need a fancy smoker to make amazing ribs. Your charcoal grill can do the job perfectly. Just make sure you have a few key items.
Having the right tools helps you manage the cooking process smoothly. Think of it like a chef prepping their station. You need to be ready.
- A sturdy charcoal grill (kettle style works great)
- Good quality lump charcoal or briquettes
- Wood chunks or chips for smoke (hickory, apple, cherry are popular)
- A reliable grill thermometer and an instant-read meat thermometer
- Aluminum foil (heavy-duty is best)
- A spray bottle for apple cider vinegar or apple juice
- Tongs, heat-resistant gloves, and a basting brush
- A drip pan to catch juices
Prepping Your Ribs for Perfection
Proper preparation sets the stage for juicy, tender ribs. Don’t skip these steps. They are simple but very important.
First, remove the membrane from the back of the ribs. This thin, silverskin layer can make ribs tough. We found that gently prying it up with a butter knife and pulling it off with a paper towel works best.
Next, apply your favorite dry rub generously. Cover all sides of the ribs. Many pitmasters say a good rub creates a flavorful crust, often called “bark.” Let the ribs sit with the rub for at least 30 minutes, or even overnight in the fridge.
Setting Up Your Charcoal Grill for Indirect Heat
This is where the “slow cook” magic begins. Indirect heat means your ribs aren’t directly over the coals. This prevents burning and promotes even cooking.
You want to create two zones: a hot zone for your charcoal and a cool zone for your ribs. This setup is vital for low and slow temperatures. We found that this method prevents scorching while still imparting smoky flavors.
| Setup Type | Charcoal Placement | Ribs Placement |
|---|---|---|
| Two-Zone Setup | One side of the grill | On the opposite side, away from coals |
| Snake Method | Around the perimeter, in a “C” shape | In the center, within the “C” |
Maintaining That Low, Slow Temperature
Your target temperature is between 225°F and 275°F (107°C-135°C). This range is crucial for breaking down connective tissues in the ribs. Lower temperatures ensure tenderness. Too high, and they’ll dry out.
Use your grill’s vents to control the airflow. The bottom vent controls how much oxygen feeds the fire. The top vent controls how much smoke and heat escape. Small adjustments go a long way.
Adding a drip pan filled with water under the ribs helps stabilize temperature and adds moisture to the cooking environment. Many research studies show that maintaining humidity in the grill helps keep meat juicy (Food Science Institute).
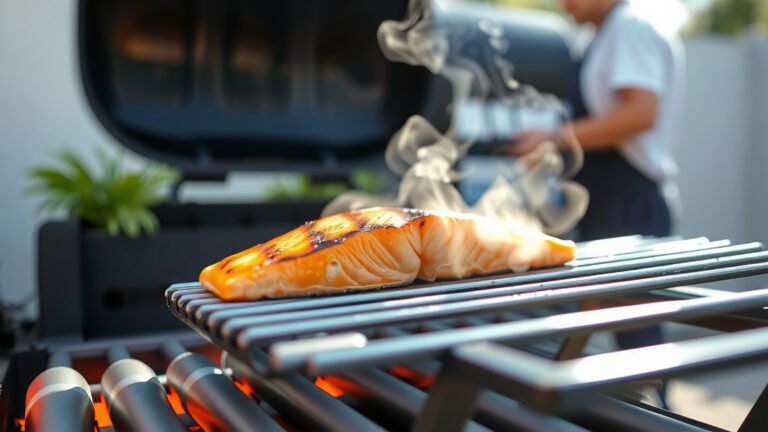
Adding Wood for Smoky Flavor
A few wood chunks are all you need for amazing smoke flavor. Don’t overdo it, or your ribs might taste bitter. Wood chips can be used too, but they burn faster.
Place 2-3 chunks directly on your lit coals at the start. You’ll add more every hour or so, as needed. Apple, cherry, and hickory are classic choices for ribs. They offer a sweet or robust smoke that complements pork beautifully.
The 3-2-1 Method for Ribs
This method is a popular framework for cooking spare ribs. For baby backs, sometimes a 2-2-1 method is preferred due to their smaller size. It breaks the cook into three phases, each with a distinct purpose.
This tried-and-true approach helps ensure your ribs are incredibly tender and packed with flavor. It addresses the need for smoke, moisture, and final tenderization.
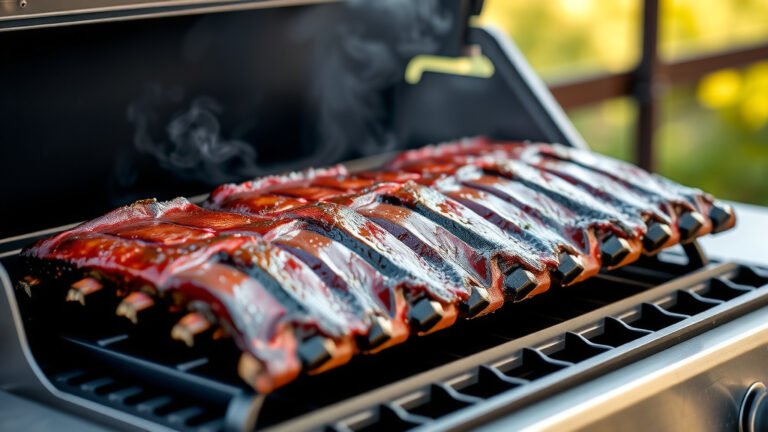
Phase 1: The “Smoke” Phase (3 Hours)
Place your prepped ribs, bone-side down, on the indirect side of the grill. Close the lid and let the smoke do its work. Keep that temperature steady between 225-275°F.
During this phase, the ribs absorb most of their smoky flavor. Resist the urge to peek too often. Each time you open the lid, heat escapes, extending your cooking time.
Phase 2: The “Wrap” Phase (2 Hours)
After three hours, it’s time to wrap the ribs tightly in heavy-duty aluminum foil. You can add a splash of apple juice, cider vinegar, or even a pat of butter inside the foil before sealing it.
The foil steams the ribs, making them incredibly tender. This process helps break down any remaining tough connective tissue. This is sometimes called “the Texas crutch” by pitmasters.
Phase 3: The “Sauce/Tender Up” Phase (1 Hour)
Unwrap the ribs and place them back on the indirect heat. This is your chance to brush on your favorite barbecue sauce, if you like. The sauce will caramelize nicely.
This final hour lets the sauce set and allows the ribs to firm up slightly. The outside develops that beautiful, sticky glaze we all love.
Knowing When They’re Done
How do you know when your ribs are perfect? You’re looking for tenderness, but not so much that they fall off the bone. They should have a slight tug.
Many experts say the best way is the “bend test.” Pick up one end of the rack with tongs. If the rack bends significantly and cracks in the middle, they’re ready (AmazingRibs.com).
You can also check the internal temperature. While not as common for ribs, it should be around 195-203°F (90-95°C) for optimal tenderness. Use an instant-read thermometer.
Quick Ribs Cooking Checklist
- Remove the membrane from ribs.
- Apply dry rub thoroughly.
- Set up grill for indirect heat (225-275°F).
- Add wood chunks for smoke.
- Follow the 3-2-1 cooking stages.
- Perform the “bend test” for doneness.
Troubleshooting Common Rib Issues
Even seasoned grillers face challenges sometimes. Don’t worry, we’ve got you covered with solutions to common rib problems.
Understanding these fixes will build your confidence. You’ll be able to handle anything your grill throws at you.
Ribs Too Dry?
If your ribs are dry, it often means the grill temperature was too high or they cooked for too long. Next time, aim for the lower end of the temperature range (225°F). Make sure to use that drip pan with water too.
Another trick is to spritz them periodically with apple cider vinegar or apple juice during the smoke phase. This adds moisture and a little flavor.
Not Tender Enough?
Lack of tenderness usually means they didn’t cook long enough, or the temperature wasn’t consistently low enough. Connective tissues need time and gentle heat to break down. Don’t rush the process.
Ensure your grill holds that steady low temperature. If they’re still tough after the 3-2-1 method, give them a little more time in the wrap phase.
Flare-Ups!
Flare-ups happen when fat drips directly onto the hot coals. This can char your ribs quickly. Your indirect heat setup should largely prevent this.
If you see a flare-up, move the ribs away from the direct heat source. Close the lid to starve the fire of oxygen. A spray bottle with water can also douse small flames, but avoid spraying directly on the ribs.
Conclusion
Slow cooking ribs on your charcoal grill is a rewarding experience. It takes a little patience, but the results are truly worth the effort. You’re creating something delicious and memorable right in your backyard.
Remember, the core principles are consistent low heat, good smoke, and following the phases of the 3-2-1 method. With these tips, you’re well on your way to becoming a rib master. So, fire up that grill and enjoy the journey!
Are baby back ribs cooked differently than spare ribs on a charcoal grill?
Yes, baby back ribs generally cook faster due to their smaller size and leaner meat. While spare ribs often use a 3-2-1 method, baby backs might be better suited for a 2-2-1 method (2 hours smoke, 2 hours wrapped, 1 hour sauced) or even slightly less time in each phase.
What kind of charcoal is best for slow cooking ribs?
For slow cooking, good quality lump charcoal or briquettes work well. Lump charcoal burns hotter and cleaner but needs more management. Briquettes offer a more consistent, longer burn, which is often easier for beginners to control over extended periods.
Do I need to soak wood chips before adding them to the grill?
Many people soak wood chips, but research suggests it doesn’t significantly prolong smoke production. Soaking mainly delays the initial smoking. For wood chunks, soaking is usually not necessary. Just add them directly to your lit coals for consistent smoke.
How do I know if my grill’s temperature gauge is accurate?
Grill lid thermometers can sometimes be inaccurate. We found that using a separate, reliable digital grill thermometer placed near your food provides a more accurate reading of the cooking environment. Calibrating your grill’s built-in thermometer is also an option if it’s adjustable.
Can I use sugar-based rubs or sauces from the start of cooking?
It’s generally not recommended to use sugar-heavy rubs or sauces at the very beginning of a long, slow cook. Sugars can burn easily at higher temperatures or over extended periods. It’s best to apply sweet sauces during the last phase (the “sauce/tender up” phase) to prevent charring and allow them to caramelize beautifully.