
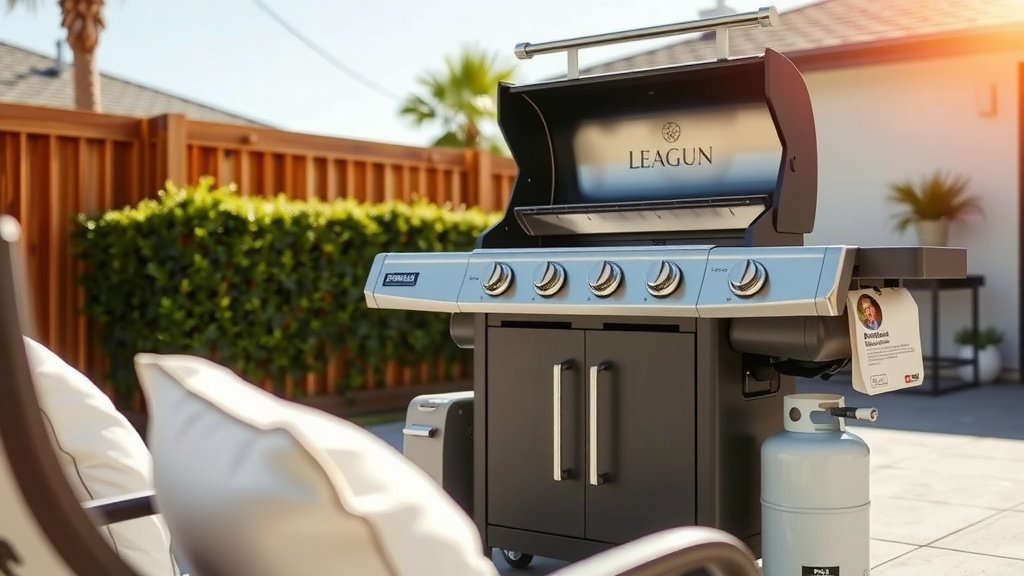
Setting up a propane grill involves connecting the regulator hose from the grill to the propane tank valve, then performing a leak test before the first ignition.
To safely set up a propane grill, make sure your grill is on a level, non-combustible surface, and always double-check all connections for leaks.
- First, gather your tools like gloves and a spray bottle for leak testing.
- Next, find a safe, open spot for your grill, away from walls and overhangs.
- Connect the grill’s regulator hose to your propane tank, tightening by hand.
- Perform a crucial leak test using soapy water on all connections.
- Finally, open the tank valve slowly, and you are ready to fire up your grill.
How To Set Up A Propane Grill?
Setting up your propane grill correctly is the first step to delicious outdoor cooking. It means connecting your propane tank safely and preparing your grill for its first use. This guide will walk you through each step, ensuring you grill with confidence.
Why Set Up Your Grill Correctly? It’s About Safety and Flavor!
Picture this: a perfect steak, sizzling over an open flame. Getting there starts with a proper setup. A well-assembled grill prevents gas leaks and ensures even heat distribution. It’s not just about safety; it’s about cooking consistently and deliciously every time.
Gather Your Gear: Essential Items for Propane Grill Setup
Before you start, make sure you have everything ready. This prevents frustrating pauses during the setup process. We found that having your tools handy makes the job much smoother. You wouldn’t start a road trip without packing, would you?
- Propane tank (full and inspected)
- Grill brush or cleaning tool
- Spray bottle with soapy water (for leak testing)
- Work gloves (optional, but helpful)
- Small wrench (sometimes needed for tight connections)
The Propane Tank: Your Grill’s Power Core
Your propane tank is the heart of your grill. Choosing the right tank and inspecting it properly are vital. Most home grills use a standard 20-pound tank. Always ensure your tank is upright and on a level surface.
| Component | What to Look For | Why It Matters |
|---|---|---|
| Tank Condition | No rust, dents, or damage | Ensures structural integrity and safety |
| Valve Type | OPD valve (triangular handwheel) | Prevents overfilling, a key safety feature |
| Certification Date | Within 12 years of manufacture | Tanks expire, old tanks can be unsafe (Propane Education & Research Council) |
| Fuel Level | Check weight or gauge if available | You don’t want to run out mid-cook! |
Tank Inspection Tips: A Quick Safety Check
Before you even think about connecting, give your propane tank a once-over. Check the tank itself for any visible damage. Also, ensure the OPD (Overfill Protection Device) valve is present. This is the triangular handwheel at the top.
Positioning Your Grill Safely: Location, Location, Location!
Where you place your grill matters a lot. You want it away from anything flammable. Think of your grill needing its own personal space. Many experts say a safe distance is at least 10 feet from any structure or combustible materials (National Fire Protection Association).
Choose a flat, stable surface like a patio or deck. Avoid placing your grill under eaves, low-hanging branches, or other overhead obstructions. Proper ventilation is always important for safe grilling.
Connecting the Propane Tank: The Main Event
This is where the magic happens! Connecting the tank might seem daunting, but it’s quite simple. Remember, slow and steady wins the race when dealing with gas connections. You’ve got this!
- Ensure both the grill burner control knobs and the tank valve are turned OFF.
- Remove the protective cap or plug from the tank valve.
- Locate the connector on your grill’s regulator hose.
- Insert the connector into the tank valve.
- Turn the large, black coupling nut clockwise until it feels snug.
The Hand-Tighten Rule: Don’t Overtighten!
When connecting the regulator, remember the “hand-tighten” rule. You want it secure, but not overly tight. Research often connects over-tightening with damaged seals, which can lead to leaks. Just make it firm, not wrench-tight.
The Leak Test: Your Crucial Safety Step
This step is non-negotiable. Skipping the leak test is like driving without checking your tires. It’s risky! We found that a simple soap and water solution is your best friend here. Many guidelines point to this as a good first step (Consumer Product Safety Commission).
Mix equal parts dish soap and water in a spray bottle. With the tank valve slowly opened (and grill knobs still off), spray the solution generously onto all connections: where the hose meets the tank and where it connects to the grill. Look for bubbles. Bubbles mean a leak!
What If You Find a Leak? Stay Calm and Act Fast!
If you see bubbles, immediately turn off the propane tank valve. Do not light the grill. Check your connections again. Make sure they are tight. If the leak persists, do not use the grill. Disconnect the tank and consider contacting the manufacturer or a professional.
First Time Firing Up Your Grill: The Initial Burn-Off
You’ve connected everything, checked for leaks, and you’re ready to cook, right? Almost! A new grill often has manufacturing oils or residues. A quick burn-off helps prepare it for food. This is like rinsing a new pan before cooking.
Open the tank valve slowly. Turn one burner to high and ignite it. Once lit, turn all burners to high. Close the lid and let the grill heat up for about 10-15 minutes. This process burns off any factory smells and residues, making your first meal safer and tastier.
Seasoning Your Grill Grates: A Non-Stick Boost
After the initial burn-off, your grates are ready for seasoning. This helps create a natural non-stick surface and protects against rust. With the grill warm, spray or wipe cooking oil (like vegetable or canola oil) onto the grates. Let it cook for another 5-10 minutes. Your grates will thank you!
Maintaining Your Propane Grill: Keep the Good Times Rolling
Setting up is one thing, but maintenance keeps your grill going strong. Regular cleaning of grates and burner tubes extends the life of your grill. Always disconnect the propane tank when cleaning deeply or storing your grill. Many experts agree that consistent upkeep prevents costly repairs and ensures safety.
When to Replace Your Propane Tank: Don’t Guess, Check!
Propane tanks have an expiration date, usually 12 years from the manufacturing date. Look for the “collar date” stamped on the tank. Research shows that expired tanks might not be refilled by vendors for safety reasons. Always prioritize a safe, current tank.
Conclusion
Setting up your propane grill doesn’t have to be a chore. By following these straightforward steps, you ensure both safety and optimal performance for your grilling adventures. From connecting the tank to performing that crucial leak test, each action contributes to a worry-free cooking experience. Now, fire it up and enjoy those delicious meals!
What should I do if my propane tank connection is frozen?
If your propane tank connection appears frozen, do not attempt to thaw it with open flames or hot water. This can be extremely dangerous. First, turn off the tank valve. Then, allow it to thaw naturally at room temperature in a well-ventilated area. Always check for leaks again after it thaws.
How often should I check my grill for gas leaks?
It’s a smart habit to perform a leak test at the beginning of each grilling season, or anytime you reconnect the propane tank. Even a yearly check can prevent major issues. Your safety and peace of mind are worth the few minutes it takes.
Can I use an old propane tank with a new grill?
You can use an old propane tank with a new grill, as long as the tank is in good condition, hasn’t expired (check the date stamp), and has an OPD valve. Always ensure the connections match. If unsure, get the tank professionally inspected or exchanged.
Is it normal for a new grill to smell during the first use?
Yes, it’s quite normal for a new grill to emit a distinct odor during its initial burn-off. This smell comes from the manufacturing oils and protective coatings burning off. This is precisely why the initial burn-off process is so important before you cook food.
Should I keep my propane tank connected to the grill when not in use?
Many experts advise against keeping your propane tank connected to the grill when it’s not in use for extended periods. It’s a good practice to turn off the tank valve and disconnect it for added safety and to prevent potential slow leaks over time. Store the tank upright and away from direct sunlight.
