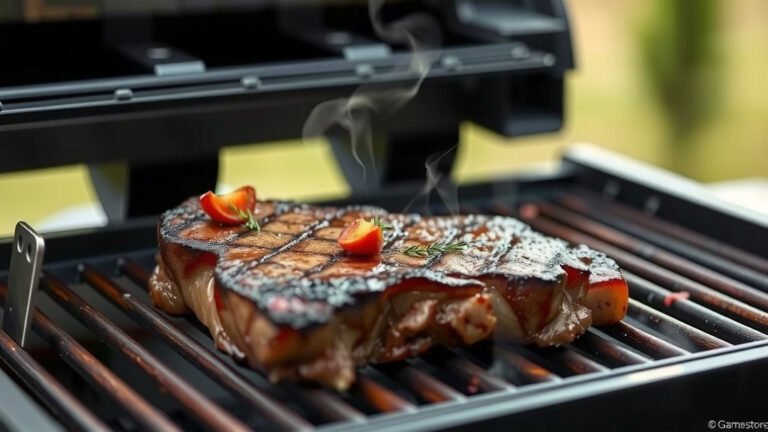
You make spare ribs on a gas grill by utilizing indirect cooking zones, maintaining a low, consistent temperature, and crafting a flavorful dry rub. This method ensures your ribs cook slowly and evenly.
First, prepare your spare ribs with a good rub. Then, cook them using a two-zone setup on your gas grill, typically following the popular 3-2-1 method for tender, fall-off-the-bone results.
Here’s a quick overview of how to grill spare ribs on your gas grill:
- Prepare your spare ribs by removing the membrane and applying a dry rub.
- Set up your gas grill for indirect heat, aiming for a consistent low temperature.
- Cook the ribs in stages, often using the 3-2-1 method: slow grilling, then wrapping, then finishing.
- Monitor the temperature and tenderness to ensure perfect, juicy ribs.
- Rest your ribs briefly before slicing to lock in all the delicious juices.
How To Make Spare Ribs On Gas Grill?
Making spare ribs on a gas grill is all about controlling your heat and having patience. You will use indirect heat to slowly cook the meat until it’s wonderfully tender and full of flavor.
Why Choose the Gas Grill for Ribs?
A gas grill offers precise temperature control, which is a big plus for ribs. You can easily maintain a low, steady heat for hours. This makes the slow-cooking process much more manageable compared to charcoal.
Plus, many gas grills allow for easy two-zone setup. This means you can create a cool side for indirect cooking. It’s a great way to get that grilled taste without burning your meat.
Picking the Perfect Rack of Ribs
The journey to great ribs starts with selecting the right meat. Don’t just grab any rack; a little knowledge goes a long way. You want ribs with good meat coverage and a nice, even thickness.
Types of Spare Ribs
You’ll usually find two main types of spare ribs. Full spare ribs are larger and more rectangular. St. Louis cut ribs are full spare ribs with the breast bone removed, making them a uniform shape. Many chefs prefer the St. Louis cut for its consistency (Cook’s Illustrated).
What to Look For
Look for ribs that have a good amount of meat on the bone. Avoid racks that are overly fatty or appear dry. Fresh ribs should have a bright, consistent color and smell clean, not off.
Your Essential Rib-Grilling Checklist
Before you fire up the grill, gather your tools. Having everything ready streamlines the process. This helps you stay organized and enjoy the cooking experience.
- A full rack of spare ribs (St. Louis cut recommended)
- Your favorite dry rub spices
- Aluminum foil or butcher paper
- A reliable meat thermometer
- Grill tongs and heat-resistant gloves
- Apple cider vinegar or apple juice in a spray bottle
- Your preferred BBQ sauce (optional)
- Wood chips (hickory or apple work well) and a smoker box (if adding smoke)
Prepping Your Ribs: The Flavor Foundation
Preparation is key to getting tender, flavorful ribs. Don’t skip these initial steps; they make a huge difference in the final result. You’re building the base layers of taste here.
Removing the Membrane
On the bone side of the ribs, you’ll find a thin, silvery membrane. This membrane gets tough when cooked and prevents rub from penetrating. We found that removing it is vital for tender ribs. Simply slide a knife under an edge, then peel it off with a paper towel for grip.
Applying Your Dry Rub
Once the membrane is gone, it’s time for the rub. Apply your chosen dry rub generously over both sides of the ribs. Many experts say to massage it in gently for good adhesion. Let the ribs sit with the rub for at least 30 minutes, or even a few hours in the fridge.
Setting Up Your Gas Grill for Success
Proper grill setup is crucial for slow-cooked ribs. You need to create an environment where the ribs cook indirectly. This prevents burning and allows for even heat distribution.
The Two-Zone Setup
For spare ribs, you need a two-zone setup. This means turning on burners on one side of your grill to medium-low. Leave the burners on the other side completely off. This creates a hot zone and a cool zone. Your ribs will cook on the cool, indirect side.
Achieving the Right Temperature
Your target temperature for ribs is around 225-250°F (107-121°C). Many guidelines point to maintaining a consistent temperature for best results (USDA). Use your grill’s thermometer, or a separate grill thermometer, to monitor this. Adjust burners as needed to stay in this range.
The 3-2-1 Method Explained
The 3-2-1 method is a popular approach for spare ribs on a gas grill. It breaks down the cooking into three distinct phases. This ensures maximum tenderness and flavor. It’s a reliable technique for any grill master.
| Phase | Time | Method | Goal |
|---|---|---|---|
| 1 (Grill) | 3 Hours | Indirect heat, around 225-250°F, bone side down. Add wood chips if smoking. | Develop bark, infuse smoke flavor. |
| 2 (Wrap) | 2 Hours | Wrap tightly in foil with liquid (apple juice/cider vinegar). Return to indirect heat. | Tenderize meat, steam and break down collagen. |
| 3 (Finish) | 1 Hour | Unwrap, apply BBQ sauce (optional), return to indirect heat. | Set sauce, firm up bark, achieve desired texture. |
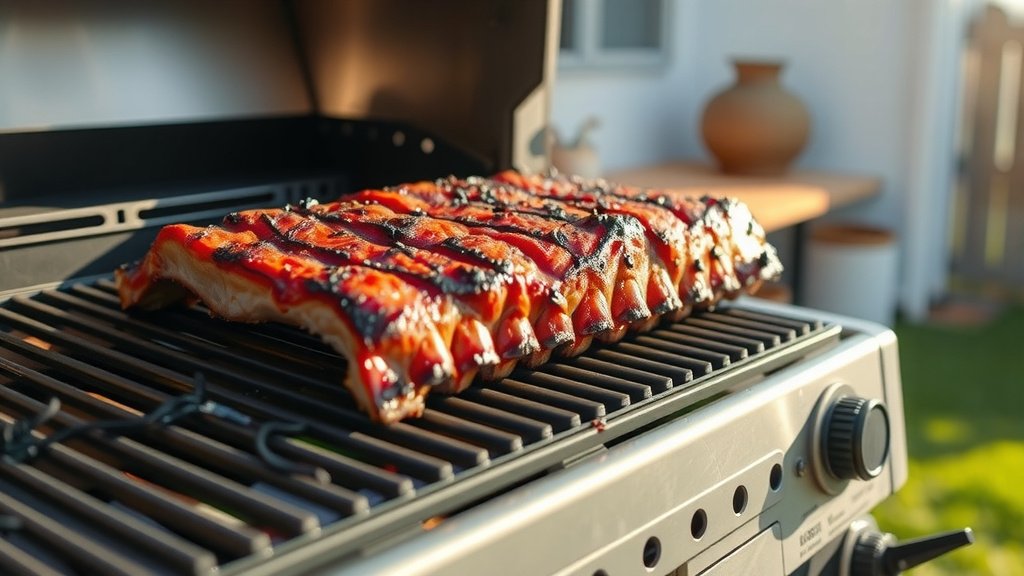
Phase 1: Smoking/Grilling (3 Hours)
Place your ribs on the indirect side of the grill, bone side down. Close the lid and let them cook for about three hours. If you’re adding smoke, place a smoker box with wood chips over the active burner. This phase builds a beautiful “bark” and infuses deep smoky flavors into the meat.
Phase 2: Wrapping (2 Hours)
After three hours, carefully remove the ribs. Wrap each rack tightly in heavy-duty aluminum foil. You can add a splash of apple juice or cider vinegar inside the foil. Return the wrapped ribs to the indirect heat for another two hours. This steams the ribs, making them incredibly tender and juicy.
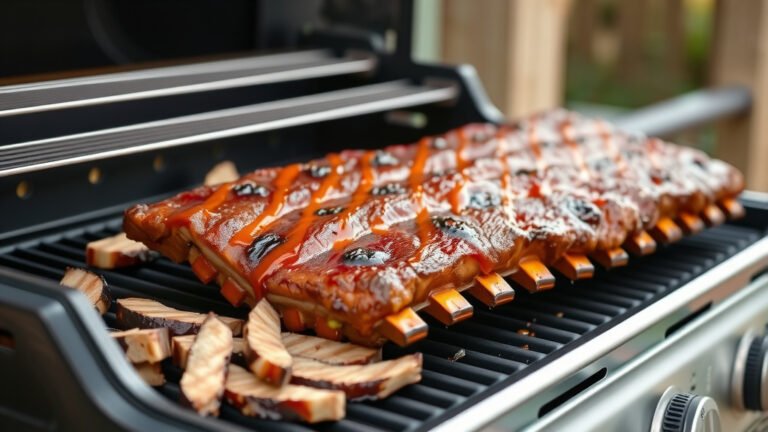
Phase 3: Saucing and Finishing (1 Hour)
Unwrap the ribs after two hours. At this point, you can brush them with your favorite BBQ sauce, if desired. Place them back on the indirect heat for the final hour. This allows the sauce to caramelize and helps the ribs develop their final texture. Many found this phase gives the ribs a perfect finish.
When Are Your Ribs Done?
Knowing when ribs are perfectly cooked is an art and a science. You’re looking for tender meat that pulls easily from the bone, but isn’t falling apart. You want that nice, clean bite.
The Bend Test
To perform the bend test, pick up a rack of ribs with tongs in the middle. Gently bounce the ribs. If the surface cracks and the ribs bend significantly, they are likely done. They should feel limp and almost ready to break.
Internal Temperature
While tenderness is key, an internal temperature check helps. Ribs are generally considered cooked when they reach 195-203°F (90-95°C). Use an instant-read thermometer. We found that this range allows collagen to break down fully, resulting in maximum tenderness (AmazingRibs.com).
Resting Your Ribs for Juiciness
Just like a steak, ribs benefit from resting after cooking. This allows the juices to redistribute throughout the meat. Cover them loosely with foil and let them rest for 15-20 minutes. This simple step ensures your ribs are as moist and flavorful as possible.
Common Gas Grill Rib Mistakes to Avoid
Even experienced grillers can make mistakes. Being aware of these common pitfalls helps you cook perfect ribs every time. You want to avoid disappointment after hours of cooking.
- Cooking at too high a temperature: This dries out the meat and makes it tough. Stick to low and slow.
- Not removing the membrane: This tough layer prevents tenderness and flavor penetration.
- Opening the lid too often: Each time you open the lid, you lose heat, extending cooking time and impacting consistency.
- Not resting the ribs: Skipping the rest makes your ribs less juicy.
- Over-saucing too early: Sugar in BBQ sauce can burn quickly on the grill. Add it in the final phase.
Conclusion
Grilling spare ribs on a gas grill is a rewarding experience when done right. By focusing on indirect heat, maintaining a consistent low temperature, and following a method like the 3-2-1, you can achieve exceptionally tender and flavorful ribs. Remember to prep your ribs well, monitor your grill, and always allow for a short rest. You’ll soon be enjoying perfectly cooked ribs that impress everyone at your next cookout. Happy grilling!
FAQ: Can I use wood chips on a gas grill for ribs?
Yes, you absolutely can use wood chips on a gas grill to add smoky flavor to your ribs. Place dry wood chips (like hickory or apple) in a smoker box or a foil pouch with holes poked in it. Position this directly over an active burner, then close the lid. Once it starts smoking, move it to the indirect side or turn off the burner if it gets too hot. This technique infuses your ribs with a desirable smoky taste.
FAQ: What temperature should I cook ribs on a gas grill?
For spare ribs on a gas grill, you should aim for a consistent grill temperature between 225-250°F (107-121°C). This low and slow cooking range is ideal for breaking down the tough connective tissues in the ribs, resulting in tender, juicy meat. Use your grill’s built-in thermometer or a separate oven thermometer to monitor the temperature accurately.
FAQ: How do I prevent ribs from drying out on a gas grill?
To prevent ribs from drying out on a gas grill, use indirect heat and keep the grill lid closed as much as possible to maintain moisture. Wrapping the ribs in foil with a splash of liquid (like apple juice or cider vinegar) during the middle phase of cooking, often called the “Texas Crutch,” greatly helps retain moisture and tenderize the meat. Misting the ribs occasionally with apple cider vinegar can also help keep them moist.
FAQ: Is it better to grill ribs with the lid open or closed?
When grilling ribs, it is always better to cook with the grill lid closed. Keeping the lid closed helps maintain a consistent internal temperature, traps heat and smoke, and ensures the ribs cook evenly and efficiently. Opening the lid too frequently causes heat loss, prolongs cooking time, and can dry out the meat. Only open the lid when necessary, such as when checking temperature or wrapping the ribs.
FAQ: How long should ribs rest after grilling?
After grilling, ribs should rest for at least 15-20 minutes before slicing and serving. This resting period allows the muscle fibers to relax and reabsorb the juices that have migrated to the center during cooking. Skipping this step can lead to a drier, less flavorful rib. Simply cover the ribs loosely with aluminum foil during the rest period to keep them warm.