
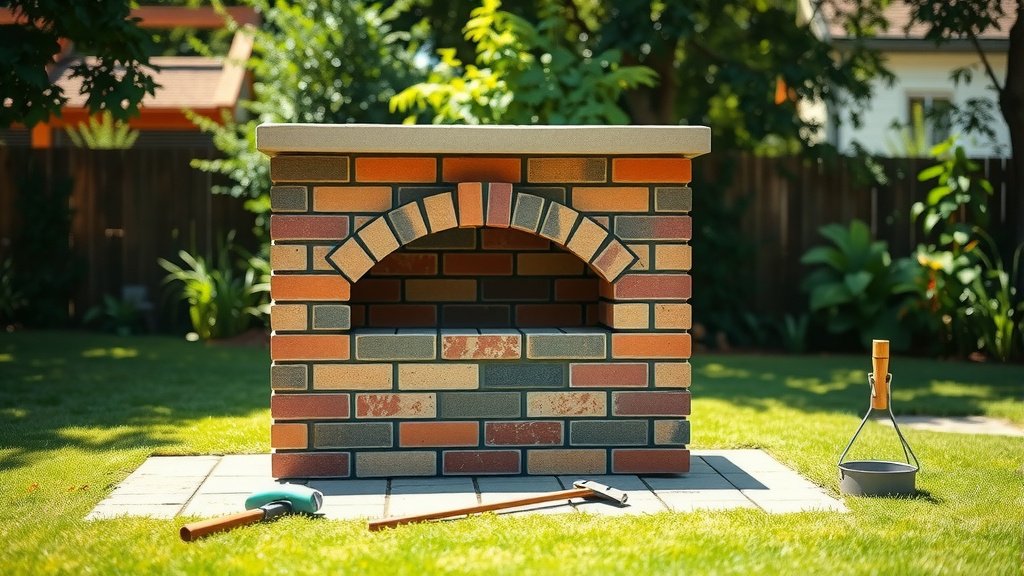
Building your own brick BBQ grill involves careful planning and methodical bricklaying to create a durable, custom cooking space in your backyard.
To make a brick BBQ grill, you’ll need fire-rated bricks, mortar mix, a level foundation, and a robust grill grate, following steps from site preparation to final curing.
- A brick BBQ grill brings a sturdy, custom focal point to your outdoor cooking.
- Start with a solid, level foundation to ensure long-term stability for your grill.
- Use fire-rated bricks and high-quality mortar designed for high temperatures.
- Properly cure the mortar before the first use to prevent cracking and ensure strength.
- Regular cleaning and simple weather protection will keep your brick grill lasting for years.
How To Make Brick BBQ Grill?
Making a brick BBQ grill yourself can be a deeply satisfying project, offering a sturdy and attractive addition to your outdoor living area. Imagine gathering around a grill you built with your own hands!
Why Build a Brick BBQ Grill?
You might wonder, “Why go through the effort of building one?” A brick grill is incredibly durable, often outlasting metal units. It also provides fantastic heat retention, leading to beautifully cooked food every time. Plus, it adds a touch of rustic charm and custom flair to your backyard that a store-bought grill just can’t match. It’s a real conversation starter.
Considering Your Space
Before any brick touches the ground, think about where your grill will live. You need a flat, stable area away from flammable structures like fences or your house. Consider wind direction too; you don’t want smoke blowing into your seating area. Picture your ideal grilling spot – safety first, always.
Types of Brick Grills
Brick grills come in various forms, from simple, open-faced designs to more elaborate structures with built-in storage or a chimney. A basic design is perfect for beginners, focusing on core grilling functionality. More complex ones might include side tables or even a smoker box, but start simple if this is your first build. We found that a straightforward U-shaped or rectangular design is often the best starting point for a reliable grill.
Gathering Your Materials: The Essentials
Having all your supplies ready before you start saves you headaches later. Think of it like a chef prepping all their ingredients before cooking. You wouldn’t want to run out of mortar mid-project, would you?
Key Materials Checklist
- Fire Bricks: These are crucial for the cooking chamber. Standard red bricks work for the outer shell.
- Mortar Mix: High-heat or refractory mortar is best for inside the firebox. Regular mortar for outside.
- Grill Grate: Choose heavy-duty cast iron or stainless steel.
- Rebar or Angle Iron: For supporting the grill grate.
- Concrete Mix: For the foundation slab.
- Tools: Trowel, level, tape measure, string line, wheelbarrow, shovel, safety glasses, gloves.
- Water: For mixing concrete and mortar.
Step-by-Step Guide to Building Your Grill
Building a brick BBQ is a rewarding process, but it requires patience and precision. Don’t rush it; enjoy the journey of creating something lasting. Let’s walk through it together.
1. Planning and Foundation
A strong foundation is the literal bedrock of your grill. Without it, your beautiful brickwork could crack or shift over time. Many experts say that a solid, level base prevents future structural issues.
Leveling the Ground
First, clear the chosen area of any grass, rocks, or debris. Dig down about 4-6 inches and ensure the area is perfectly level. You can use a hand tamper to compact the soil, making it extra firm. Imagine building a house; you’d never skip the foundation, right?
Laying the Base
Pour a concrete slab for your grill’s footprint. This slab should extend a few inches beyond the grill’s planned dimensions on all sides. Allow this concrete to cure fully, usually 24-48 hours, before you start laying bricks. Research often connects proper curing with long-term structural integrity (Construction Guides).
2. Laying the Bricks
This is where your grill starts to take shape! Think of each brick as a piece of a puzzle, carefully placed to form a strong, unified structure.
First Courses
Start laying your first course of bricks on the cured concrete slab. Apply a generous bed of mortar and firmly set each brick, tapping it into place with your trowel handle. Use a level constantly to ensure each brick is straight and plumb. Keep your mortar joints consistent, around 3/8 to 1/2 inch thick.
Creating the Cooking Chamber
As you build upwards, you’ll define the cooking chamber. This is usually a U-shape or rectangle. We found that using fire bricks for the interior of the firebox provides much better heat resistance and longevity than standard bricks. Remember, this area will see intense heat.
3. Adding the Grill Grate Supports
Around the 7th or 8th course, you’ll need to incorporate supports for your grill grate. This is a critical step for grilling versatility.
Metal Rods or Angle Iron
Lay metal rods or pieces of angle iron across the width of the grill, embedding their ends into the mortar joints of opposing walls. You can place these at two or three different levels to allow for adjustable cooking heights. This lets you sear food close to the coals or slow-cook further away. We found that steel angle iron provides excellent, stable support for heavy grates.
4. Finishing Touches
You’re almost there! These final steps ensure your grill is safe, durable, and ready for many delicious meals.
Curing Your Mortar
Once all bricks are laid, resist the urge to fire it up immediately. The mortar needs to cure properly. This can take several days, sometimes even a week, depending on the weather. Keep the mortar damp by lightly misting it with water, which helps it gain maximum strength. Many experts suggest allowing mortar to cure for at least 72 hours before applying significant stress.
Testing the Draft
Before your first cook, do a small test fire. This helps burn off any residual moisture and allows you to check if your grill drafts well. Does the smoke rise effectively? A good draft is key to even cooking and less smoke in your face.
Common Mistakes to Avoid
Even experienced DIYers can make small errors. Knowing what to watch out for can save you time and frustration. Let’s learn from common pitfalls.
Rushing the Mortar
Mixing mortar too thin makes it weak; too thick, and it’s hard to work with. Take your time to get the consistency right, like thick peanut butter. And never rush the curing process! An uncured grill can lead to cracked mortar after its first big fire. We found that patience here pays dividends for durability.
Ignoring Drainage
If your grill is open to the elements, consider how rain might drain from the cooking area. Standing water can eventually damage your bricks or mortar. Some people build a slight slope in the base of the firebox or add small weep holes. Others prefer to cover their grill when not in use. Here’s a trade-off: a cover offers full protection, while a slight slope ensures natural drainage.
Wrong Brick Type
Using regular building bricks inside the firebox is a common mistake. They aren’t designed for extreme heat and can crack or crumble over time. Fire bricks, also known as refractory bricks, are formulated to withstand high temperatures without degradation. Research often highlights the importance of using appropriate materials for high-heat applications (National Association of Home Builders).
| Brick Type | Best Use | Heat Resistance | Cost (Relative) |
|---|---|---|---|
| Standard Red Brick | Outer walls, structural support | Low to Medium | Low |
| Fire Brick (Refractory) | Inner firebox, cooking chamber | High to Very High | Medium to High |
Maintenance Tips for Your Brick BBQ
Your brick grill, once built, needs a little love to stay in top shape. A well-maintained grill performs better and lasts longer, giving you years of enjoyment.
Cleaning the Grates
Just like any grill, keeping the grates clean is essential for hygiene and flavor. Scrape them after each use while they’re still warm. For a deeper clean, remove them and wash with hot soapy water. Nobody wants leftover char from last week’s burgers on tonight’s steaks!
Weather Protection
While bricks are tough, prolonged exposure to harsh weather can take a toll on mortar joints. Consider investing in a good quality grill cover, especially during off-seasons. This simple step can significantly extend the lifespan of your mortar and prevent moisture-related damage. It’s like putting a raincoat on your outdoor project.
Conclusion
Building your own brick BBQ grill is more than just a construction project; it’s an investment in countless memorable meals and outdoor gatherings. From laying the first brick to curing the mortar, each step contributes to a durable, beautiful, and highly functional cooking center. With careful planning, the right materials, and a little patience, you’ll create a backyard masterpiece ready for sizzling steaks and smoky flavors for years to come. Enjoy the process and the delicious rewards!
How long does it take for mortar to dry before using a brick BBQ grill?
Mortar generally needs at least 72 hours (3 days) to cure sufficiently before you can use the grill. For optimal strength, some experts recommend waiting up to a week, especially in cooler or humid conditions. Rushing this can lead to cracks.
Can I use regular bricks for the entire BBQ grill?
No, you should not use regular bricks for the entire grill, particularly the internal cooking chamber. Regular bricks are not designed to withstand high temperatures and can crack or crumble. Fire bricks (refractory bricks) are essential for any part of the grill that will be exposed to direct flame and intense heat.
What kind of grill grate should I buy for a brick BBQ?
For a brick BBQ, we found that heavy-duty cast iron or stainless steel grill grates are the best choice. They are durable, retain heat well, and are easier to clean. Ensure you measure your grill’s opening accurately to get a grate that fits snugly.
Do I need a chimney for a brick BBQ grill?
Not necessarily. A basic brick BBQ grill can function well without a chimney, relying on an open top for smoke to escape. However, adding a simple chimney or vent can improve airflow, draw smoke away more efficiently, and provide better heat control, making the grilling experience more pleasant.
What is the best way to clean the inside of a brick BBQ firebox?
To clean the inside of a brick BBQ firebox, wait until it’s completely cool. Then, scoop out all the ash and debris. You can use a stiff brush or a shop vacuum to remove any remaining particles. Avoid using water or harsh chemicals directly on the fire bricks, as this can affect their integrity over time. Keep it dry and clean.
