To get rust off your Blackstone grill, you need to first scrape away loose rust with a metal scraper, then scrub deeper rust using a combination of mild acids like vinegar or abrasive materials like salt and oil.
After removing the rust, it is critical to thoroughly clean and dry the griddle, then immediately re-season the surface to prevent new rust from forming.
- To deal with rust, gently scrape the affected areas first.
- Next, scrub with a paste of oil and coarse salt, or a vinegar solution.
- Rinse the surface well and then dry it immediately to stop new rust.
- Finally, apply several thin coats of cooking oil to re-season the griddle.
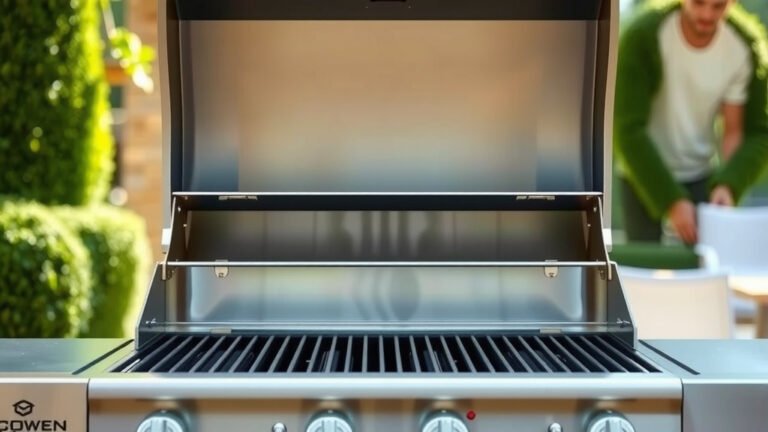
How To Get Rust Off My Blackstone Grill?
Finding rust on your Blackstone griddle can be a bit disheartening, can’t it? Don’t worry, it’s a common issue that many griddle owners face, but it’s also quite fixable. You can absolutely restore your Blackstone to its smooth, non-stick glory with a few simple steps and some elbow grease.
Why Does Rust Appear on Your Griddle?
So, you see that reddish-brown enemy on your beloved cooking surface. Why does it happen? The main culprit is typically a combination of **moisture and lack of proper protection**.
The Enemy: Moisture
Your griddle is made of steel, which is prone to rust when exposed to water or humidity for too long. If you leave it uncovered in the rain, or even in a damp garage, rust can quickly take hold. Even condensation from temperature changes can be enough (University of Illinois Extension).
Missing Protection: Seasoning
The seasoning on your Blackstone isn’t just for non-stick cooking; it’s a vital protective layer. This hardened oil barrier shields the steel from oxygen and moisture. When this layer gets compromised or isn’t built up enough, rust spots can easily form.
Gather Your Rust-Busting Tools
Before you jump into battle against the rust, let’s make sure you have all your gear ready. Having the right tools makes this job much easier and more effective. You probably have most of these items already in your kitchen or garage.
Essential Items for Rust Removal
- A sturdy metal scraper or spatula
- Heavy-duty paper towels or clean rags
- A grill brick, Scotch-Brite pad, or steel wool
- White vinegar (distilled)
- Cooking oil (flaxseed, grapeseed, or canola oil are great)
- Coarse salt (kosher or sea salt works well)
- Heat-resistant gloves (optional, but a good idea)
- A squirt bottle (for vinegar)
Step-by-Step Rust Removal Process
Alright, it’s time to get down to business. Follow these steps carefully, and you’ll have your Blackstone looking sharp again. We found that a systematic approach yields the best results, just like any good cooking recipe.
Safety First: Prepare Your Grill
Make sure your griddle is completely cool to the touch before you start. Always avoid working on a hot surface for safety. Clear away any loose debris or food particles from the surface too.
The Scrape and Scrub Attack
Begin by taking your metal scraper and **gently scrape at the rusted areas**. The goal here is to remove any loose, flaking rust. Don’t be too aggressive at first; let the scraper do the work. After scraping, grab your grill brick or a heavy-duty scour pad. Many experts say that a good scrubbing action is key here (Cook’s Illustrated).
Vinegar Power: A Natural Acid Boost
For more stubborn rust, white vinegar is your friend. Pour some vinegar directly onto the rusted spots, or use a spray bottle for even coverage. Let the vinegar sit for a few minutes, maybe 5 to 10. The acidity helps to break down the rust. Then, **scrub the area vigorously** with your grill brick or steel wool. You’ll see the rust starting to lift away.
Salt and Oil: The Abrasive Duo
Another powerful method involves coarse salt and cooking oil. Sprinkle a generous amount of coarse salt over the rusted areas. Then, add a good splash of cooking oil over the salt. Now, using a paper towel or a clean rag, **scrub this paste into the rust**. The salt acts as an abrasive, and the oil helps to lubricate and lift the rust. We found this method particularly effective for tough spots.
| Rust Removal Method | Primary Action | Best For | Notes |
|---|---|---|---|
| Scraper/Spatula | Mechanical scraping | Loose, flaky rust | Start here to remove surface debris. |
| Vinegar Solution | Acidic breakdown | Medium to stubborn rust | Let it sit for a few minutes before scrubbing. |
| Salt and Oil Paste | Abrasive scrubbing | Stubborn, embedded rust | Creates a powerful scrubbing agent. |
| Grill Brick/Steel Wool | Intense abrasion | All rust types | Use with caution to avoid deep scratches. |
Wipe It Clean: Remove Residue
Once you’ve scrubbed the rust away, you’ll have a dark, sludgy residue on your griddle. Use heavy-duty paper towels or clean rags to **wipe all this residue off** thoroughly. You want the surface to be as clean as possible before the next step.
Rinse (Carefully!) and Dry
This part is crucial. You need to rinse away any remaining vinegar, salt, or rust particles. Use a minimal amount of water, perhaps a damp cloth, to wipe the surface. The most important thing is to **dry the griddle immediately and completely**. Pat it dry with towels, and then turn the griddle on low heat for a few minutes to evaporate any lingering moisture. This prevents flash rust.
Re-Seasoning Your Blackstone Griddle
After all that hard work, your griddle is bare and vulnerable. Re-seasoning isn’t just an option; it’s a requirement. Think of it as putting a new coat of armor on your cooking surface.
Why Re-Seasoning is Key
A well-seasoned griddle provides a naturally non-stick surface, which makes cooking and cleaning a breeze. More importantly, it acts as a **protective barrier against rust**. Without this layer, your griddle is an open invitation for rust to return.
The Seasoning Process Explained
Apply a very thin, even layer of high smoke point cooking oil (like flaxseed, grapeseed, or canola) over the entire griddle surface. Use a paper towel to wipe off any excess, leaving almost no visible oil. Then, heat the griddle on high until it starts to smoke and the oil burns off. Repeat this process 3-5 times, allowing the griddle to cool slightly between coats. Each thin layer bakes on, creating a **durable, rust-resistant finish**.
Preventing Future Rust: Your Best Defense
Now that you’ve battled the rust and won, let’s talk about keeping it away for good. Prevention is always easier than a cure, right? These habits will keep your griddle in top shape.
Always Clean After Use
After every cooking session, scrape off food debris, wipe the surface clean, and apply a **light coat of cooking oil**. This simple step immediately after cooking makes a huge difference. Many guidelines point to daily cleaning as a good first step (Blackstone Grills official advice).
Maintain That Seasoning Layer
Periodically, you might notice your seasoning looking a bit thin or patchy. Just like a good cast iron skillet, your Blackstone benefits from occasional touch-up seasoning. Add a thin layer of oil and heat it until it smokes. This keeps the **protective barrier strong**.
Proper Storage and Cover Use
Always store your griddle in a dry place. If it lives outdoors, investing in a high-quality, weather-resistant cover is essential. Make sure the cover fits well and **keeps moisture out**. Some people even place a moisture-absorbing packet under the cover.
Humidity Control Tips
If you live in a very humid environment, rust can be a persistent challenge. Consider storing your griddle under a patio cover or in a shed rather than fully exposed. **Regularly check the surface** for any signs of moisture, wiping it dry and applying a thin oil coat as needed.
Your Rust Prevention Checklist:
- Clean the griddle after every use.
- Apply a thin layer of oil after cleaning.
- Ensure the griddle is completely dry before covering.
- Use a proper, fitted griddle cover.
- Store in a dry area away from direct rain or prolonged dampness.
- Touch up seasoning periodically as needed.
Conclusion
Dealing with rust on your Blackstone grill might seem like a daunting task at first, but with the right approach and a little patience, it’s entirely manageable. Remember, the process involves scraping, scrubbing with a solution like vinegar or salt and oil, thorough cleaning, and most importantly, re-seasoning. By taking these steps, you not only remove the existing rust but also lay the groundwork for long-term protection. Keep your griddle seasoned and dry, and you’ll enjoy countless delicious meals for years to come. Happy griddling!
FAQ: Can I cook on a rusted Blackstone?
While a little surface rust might not be immediately dangerous, it’s not recommended to cook on a heavily rusted Blackstone. Rust can flake off into your food and also affect the taste. It’s best to remove the rust and re-season your griddle before cooking again for safety and better food quality.
FAQ: How often should I season my Blackstone?
You should apply a light coat of oil and heat the griddle after every single use to maintain the seasoning. A full re-seasoning, similar to the initial factory seasoning, might be needed once or twice a year, or whenever you notice patchy areas, food sticking, or rust spots appearing.
FAQ: Is cooking on rust dangerous?
Generally, small amounts of rust are not considered highly toxic if ingested, but they can upset your stomach. More importantly, rust can ruin the taste and appearance of your food. For these reasons, it’s always best practice to clean off rust before cooking (Cleveland Clinic).
FAQ: What kind of oil is best for seasoning?
For seasoning your Blackstone, high smoke point oils are ideal. Common choices include flaxseed oil, grapeseed oil, canola oil, and avocado oil. These oils polymerize well when heated, creating a durable, non-stick surface.
FAQ: How do I store my Blackstone long-term?
For long-term storage, clean your griddle thoroughly, apply a generous layer of cooking oil over the entire surface, and ensure it’s completely dry. Then, cover it with a heavy-duty, weather-resistant cover. If possible, store it indoors or in a dry shed to protect it from extreme temperature changes and humidity.