
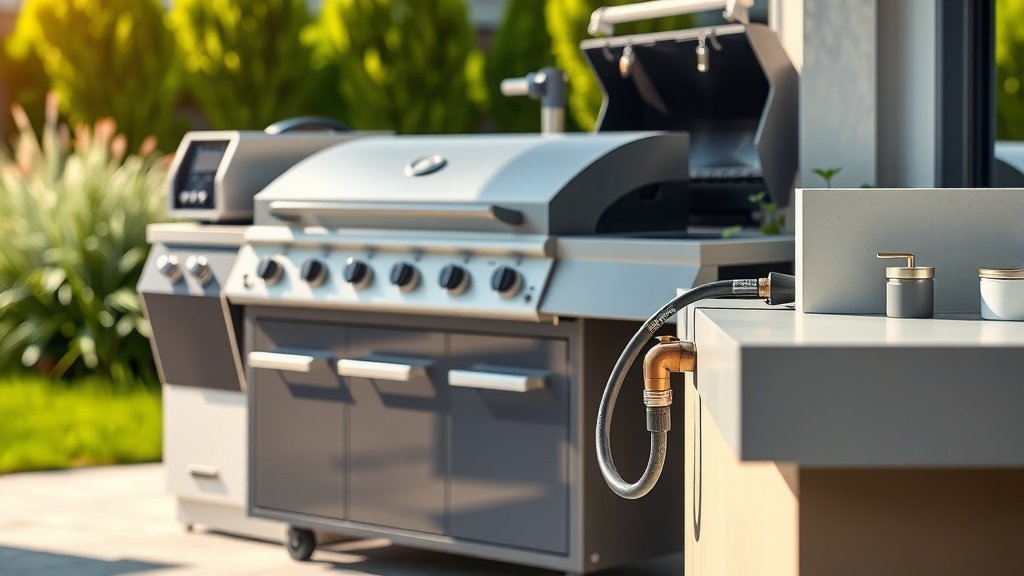
To hook up a natural gas grill, you first need a dedicated natural gas line with a quick-connect valve already installed on your property. Then, you connect the grill’s flexible natural gas hose directly to this quick-connect valve, ensuring all connections are secure and performing a mandatory leak test before use.
This process requires careful attention to safety and proper connections to ensure your grilling experience is both enjoyable and secure.
TL;DR: Ready to fire up that natural gas grill? Here’s the quick scoop:
- Confirm you have a dedicated outdoor natural gas line with a quick-connect valve.
- Gather your essential tools like pipe thread sealant and a wrench.
- Connect your grill’s flexible hose to the quick-connect valve.
- Perform a vital leak test using soapy water.
- Enjoy the convenience of continuous fuel for your grilling adventures!
How Do You Hook Up A Natural Gas Grill?
Hooking up a natural gas grill involves connecting its specialized hose to an existing natural gas supply line with a quick-connect fitting. You will need to ensure a secure, leak-free connection for safe operation.
Why Choose Natural Gas for Grilling?
Many grill enthusiasts choose natural gas for its incredible convenience. You never run out of fuel mid-cook, unlike propane tanks that always seem to empty at the worst possible time. This means no more refilling or swapping out tanks, which is a huge time-saver.
We found that natural gas often costs less per use than propane. It also burns cleaner, which is a plus for the environment. Plus, imagine the joy of uninterrupted grilling! You can literally grill for hours without a worry.
Safety First: Crucial Preparations
Before you even touch a wrench, safety is your absolute priority. Working with natural gas means you are dealing with a combustible fuel. Always check your local codes and regulations; some areas require a licensed professional for gas line installations (City of Houston, for example, has specific guidelines). You are working with a powerful fuel, so treat it with respect.
Make sure you have a clear, well-ventilated area for working. Have a fire extinguisher nearby, just in case. It is better to be prepared for any unforeseen circumstances.
Gathering Your Tools and Parts
What do you need to get started? Having the right tools makes the job much smoother. You would not try to bake a cake without flour, right? The same logic applies here.
- Adjustable wrenches (two are ideal for tightening)
- Pipe thread sealant (rated for natural gas)
- Soapy water solution (for leak testing)
- Your grill’s natural gas conversion kit (if applicable)
- A high-quality, approved natural gas hose with quick-connect fittings
Ensure all your parts are specifically rated for natural gas. Propane parts are different and can be dangerous if misused. Always double-check the product labels.
Finding Your Gas Line Connection
Your outdoor natural gas line should already have a dedicated shut-off valve and a quick-connect fitting. This is usually located near your desired grilling spot. The quick-connect ensures you can easily detach your grill when not in use or for storage. Think of it like a garden hose connection, but for gas.
If you do not have an outdoor natural gas line, stop right here. You will need a qualified plumber or gas technician to install one. This is not a DIY project if the line itself needs to be extended or installed. Safety always comes before convenience.
Connecting the Quick-Connect Hose
Now, let’s get to the actual connection. This is where your grill meets your home’s gas supply. You want this connection to be as robust as possible. A loose connection can be a serious hazard.
Understanding the Quick-Connect Valve
The quick-connect valve on your gas line has a spring-loaded sleeve. You pull this sleeve back to insert the male fitting from your grill’s hose. This design makes connecting and disconnecting simple. It is like a secure handshake between two pipes. Always make sure the gas line’s shut-off valve is in the OFF position before you begin. This prevents any accidental gas release.
Attaching the Grill’s Flex Hose
First, apply pipe thread sealant to the threads of the male adapter on your grill’s flexible hose. This sealant creates an airtight seal and is crucial for preventing leaks. Screw the hose into the quick-connect valve on your gas line. Tighten it firmly with your wrenches. One wrench holds the valve, the other tightens the hose fitting. This prevents twisting the gas line. You want it snug, but do not overtighten, as this can damage the threads.
Performing a Leak Test
This step is non-negotiable. Many experts say a proper leak test is the most important part of the entire installation. Do not skip it. A small gas leak can quickly become a big problem. Here’s how you do it:
- Turn the gas supply valve slowly to the ON position.
- Mix some dish soap with water to create a bubbly solution.
- Apply this soapy water generously to all newly made connections.
- Watch closely for bubbles. Any bubbles forming indicate a gas leak.
- If you see bubbles, turn off the gas immediately, tighten the connection, and retest.
- Repeat until no bubbles appear. No bubbles mean no leaks!
If you smell gas at any point, turn off the supply valve immediately and ventilate the area. If you cannot stop the leak, call your gas company or a professional plumber. Your nose is a great detector.
First Ignition: Firing Up Your Grill
With a confirmed leak-free connection, it is time for the exciting part! Follow your grill’s owner’s manual for specific ignition instructions. Usually, it involves turning on the gas at the grill, then turning a burner knob to the “light” or “high” setting and pressing the igniter button. You should hear a whoosh and see the burner light up. If it does not light, turn off the gas, wait a few minutes, and try again. Sometimes the lines need a moment to fill with gas.
Troubleshooting Common Issues
Even with careful installation, sometimes hiccups happen. What if your grill won’t light? First, recheck your gas supply valve to ensure it is fully open. Then, confirm your burner valves are turned on. Sometimes, air can get trapped in the line. Patience is key. If you have a quick-connect, ensure it is fully seated. If the issue persists, refer to your grill’s manual or consider the next step.
When to Call a Pro?
There are clear signs when to step back and call in a professional. If you are uncomfortable at any point, or if you smell gas after the leak test, do not hesitate. Also, if you need a new gas line installed or modified, a licensed gas technician is essential. Their expertise ensures everything meets safety standards and local codes. Think of them as your grilling guardian angels.
Maintaining Your Natural Gas Setup
Good maintenance keeps your grill running smoothly and safely for years. Periodically inspect your gas hose for any signs of wear, cracks, or damage. Check the connections for tightness. Keep the quick-connect clean and free of debris. Just like you clean your grill grates, a little attention to the gas line goes a long way. Regularly checking your setup can prevent future problems.
Is Natural Gas Right for Your Grilling Style?
Natural gas grilling is fantastic for those who grill frequently and love convenience. It is perfect for backyard parties, weeknight dinners, or even just a quick burger. If you only grill once or twice a year, a propane grill might be more flexible. But for consistent grill masters, the benefits of natural gas are hard to beat. Consider your own grilling habits and how much you value uninterrupted cooking.
| Feature | Natural Gas Grill | Propane Grill |
|---|---|---|
| Fuel Source | Direct line from home | Portable tanks |
| Convenience | Unlimited fuel, no refills | Tank refills or exchanges needed |
| Portability | Limited to gas line location | Highly portable |
| Installation | Requires proper line connection | Attach regulator to tank |
| Cost per Use | Generally lower | Generally higher |
Conclusion
Hooking up a natural gas grill can significantly enhance your outdoor cooking experience, offering unmatched convenience and cost savings over time. By following these clear steps – from ensuring safety and gathering the right tools to making secure connections and performing a thorough leak test – you can confidently get your grill ready for action. Remember, if any step feels beyond your comfort zone, or if you encounter persistent issues, calling a licensed professional is always the wisest and safest choice. Enjoy the steady flame and endless grilling possibilities!
How do I know if my house has a natural gas line for a grill?
You can usually tell if your house has a natural gas line by looking for an outdoor spigot-like connection, often with a shut-off valve, on the exterior wall near where you might grill. If you are unsure, consult a licensed plumber or your local gas utility company.
What kind of hose do I need for a natural gas grill?
You need a flexible natural gas hose specifically designed and rated for outdoor natural gas use, which typically comes with quick-connect fittings. Do not use propane hoses, as they are not compatible or safe for natural gas.
Can I convert a propane grill to natural gas?
Many propane grills can be converted to natural gas, but it requires a specific natural gas conversion kit from the grill manufacturer. This usually involves replacing orifices and sometimes the regulator. Always follow the manufacturer’s instructions or have a professional perform the conversion.
How do I safely disconnect my natural gas grill for storage?
First, ensure the gas supply valve on your home’s line is fully off. Then, pull back the sleeve on the quick-connect fitting to release the grill’s hose. Store the hose properly, away from damage, and replace the dust cap on your gas line’s quick-connect valve to keep it clean.
Is it normal for a natural gas grill to take longer to heat up than a propane grill?
Natural gas has a slightly lower BTU output per cubic foot compared to propane, meaning it can sometimes take a little longer to reach maximum temperature. This is normal and usually only a minor difference that does not impact overall cooking performance.
