
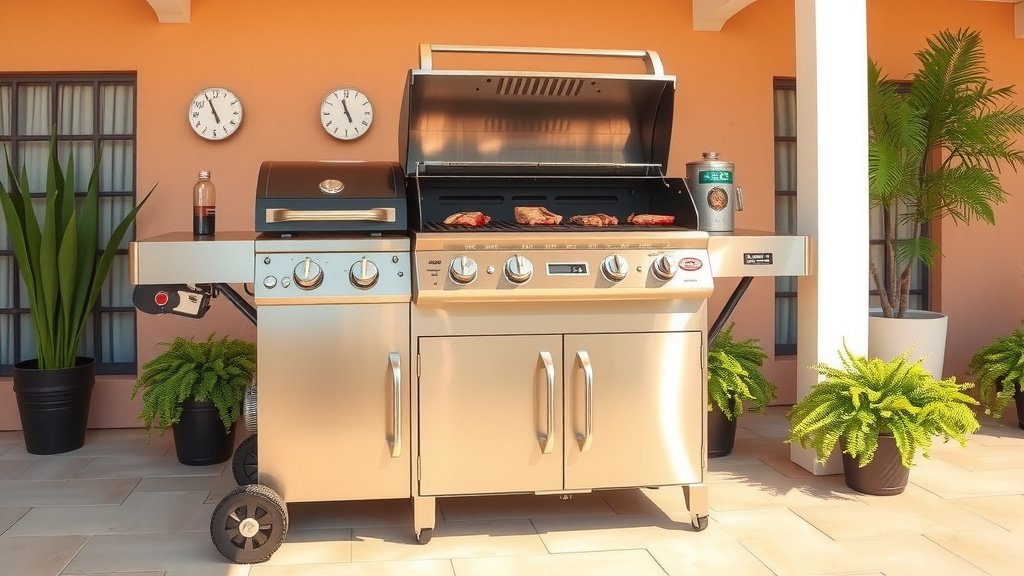
To use a BBQ grill effectively, first ensure it’s clean and stable on a level surface away from flammable materials. Then, preheat it to your desired temperature, placing food over direct heat for searing and indirect heat for slower cooking, always monitoring internal food temperatures for safety.
Always keep safety in mind by having a fire extinguisher nearby and never leaving your grill unattended while it’s hot. Proper fuel management, understanding heat zones, and timely cleaning are key steps for a successful grilling experience.
- Get to know your grill type (gas, charcoal, electric) for best results.
- Prioritize safety with proper placement and ventilation, always.
- Clean grill grates before and after each use for better flavor.
- Master direct and indirect heat zones for versatile cooking.
- Use a meat thermometer for perfectly cooked, safe food (USDA guidelines).
- Cool down and clean your grill after every session for longevity.
How To Use BBQ Grill?
Using a BBQ grill might seem simple, but a few key steps make all the difference. You want to cook amazing food safely, right? We’ll guide you through setting up, heating, cooking, and cleaning your grill like a pro.
Think of your grill as a kitchen appliance, but outdoors. Just like an oven, understanding its features helps you get the most out of it. Let’s make your grilling experience joyful and delicious.
Getting Started: Your First Steps
Before any flame touches food, a little preparation goes a long way. This ensures both safety and fantastic flavor. You want your grilling adventure to be smooth and fun, not stressful.
Understanding Your Grill Type
Grills come in various types, each with its own charm. Do you have a gas, charcoal, or electric model? Knowing your grill helps you prepare correctly.
Gas grills offer convenience and quick heat-up times. Charcoal grills provide that classic smoky flavor many love. Electric grills are often plug-and-play, great for balconies (many experts say).
Safety First, Always
Grilling involves fire and heat, so safety is paramount. You wouldn’t leave a hot stove unattended inside, would you? The same goes for your outdoor cooker.
Place your grill on a stable, level surface. Keep it away from your house, fences, or overhanging branches. Good ventilation prevents smoke buildup and is always a smart choice.
Have a fire extinguisher or a bucket of sand nearby. This is just a good habit, like keeping a first-aid kit in your home. We found that most grill accidents are preventable with simple precautions.
Prepping for Perfection
Once you understand your grill and its safe placement, it’s time to prepare. These steps are like warming up before a workout; they set the stage for success.
Cleaning Your Grill Grates
Clean grates are non-negotiable for great grilling. Leftover food bits can stick to your fresh meal and cause uneven cooking. Nobody wants old, burnt crust on their perfectly grilled steak.
Use a sturdy grill brush to scrape off residue. Do this when the grill is hot, then again just before placing food. Many experts say clean grates prevent sticking and improve flavor.
Fueling Your Fire
How you light your grill depends on its type. Gas grills are straightforward, but charcoal needs a bit more attention. Don’t worry, it’s not complicated at all.
For gas grills, open the lid, turn on the gas, then ignite the burners. For charcoal, stack briquettes or lump charcoal into a pyramid. Use a chimney starter or firelighters to get them going. Once ash-covered, spread them out.
Mastering the Heat Zones
Understanding heat zones is like knowing where the hot and cool spots are in your oven. This skill allows you to cook different foods perfectly at the same time. It’s a game-changer for versatility.
Direct vs. Indirect Heat
These are your two main cooking zones. Direct heat is right over the flames or coals. Indirect heat is away from the heat source. Knowing the difference is a vital skill.
Here’s a quick guide to help you decide:
| Heat Type | Best For | Example Foods |
|---|---|---|
| Direct Heat | Searing, quick cooking, browning | Steaks, burgers, hot dogs, vegetables |
| Indirect Heat | Slow cooking, roasting, baking | Whole chickens, ribs, large roasts |
You can create both zones on one grill. Push charcoal to one side, or turn off burners on one side of a gas grill. This flexibility gives you many cooking options.
Temperature Control is Key
An accurate grill thermometer is your best friend. For gas grills, adjust burner knobs. For charcoal, manage airflow using top and bottom vents. More air equals hotter coals, and less air makes them cooler.
Research shows that consistent temperatures lead to more evenly cooked food. Don’t be afraid to adjust vents or burner settings throughout your cooking time. You are the master of your grill.
Grilling Techniques You’ll Love
Now that your grill is hot and ready, let’s talk about some techniques. These will help you achieve amazing textures and flavors. You’ll impress everyone with your skills.
Searing for Flavor
Searing is about creating a beautiful crust on your food. Place your meat over direct, high heat for a few minutes per side. This develops incredible flavor and color.
Many chefs use searing as a first step. Then they move the food to indirect heat to finish cooking. This method delivers juicy interiors and crispy exteriors (we found).
Slow Cooking for Tenderness
For larger cuts or tougher meats, slow cooking over indirect heat is your answer. Low and slow transforms tough fibers into tender, fall-off-the-bone deliciousness.
Close your grill lid to mimic an oven. This allows the heat to circulate evenly around the food. Patience is a virtue when it comes to slow-cooked barbecue.
Marinating and Seasoning Tips
Flavor starts long before the grill. Marinating adds moisture and deep flavor. Seasoning with rubs creates a delicious crust. Here’s a quick checklist for flavor success:
- Choose a marinade with acid (vinegar, lemon juice) and oil.
- Marinate for at least 30 minutes, or up to several hours for deeper flavor.
- Pat food dry before seasoning for better browning.
- Apply rubs generously, pressing them into the meat.
- Consider a brine for poultry or pork for extra juiciness (Cook’s Illustrated).
Monitoring and Flipping
You’ve got your food on the grill, now what? Resist the urge to constantly poke and prod. Patient monitoring is crucial for perfect results.
When to Flip Your Food
Flip your food only when necessary. For meats, look for a nice brown crust and easy release from the grates. If it sticks, it probably isn’t ready to turn.
Most foods only need one or two flips. Too much flipping can cool down the grates and prevent a good sear. Let the heat work its magic.
Using a Meat Thermometer
This is arguably the most important tool you own. A good meat thermometer tells you when your food is safely cooked. Guessing is never a good idea with raw meat.
Insert the thermometer into the thickest part of the meat, avoiding bone. Follow USDA guidelines for safe internal temperatures. For example, chicken should reach 165°F (USDA).
Post-Grill Care
The party isn’t over when the food comes off the grill. Proper cleanup ensures your grill lasts longer. It also keeps it ready for your next culinary adventure.
Cool Down and Clean Up
Once you’re done cooking, turn off gas burners or close charcoal vents. Let the grill cool down completely. Once cool, scrape the grates again to remove any remaining food bits.
Empty any ash from charcoal grills. Wipe down exterior surfaces if needed. A clean grill is a happy grill, ready for its next delicious task.
Storing Your Grill Properly
Protect your investment from the elements. If possible, store your grill in a sheltered area. A quality grill cover is essential for outdoor storage.
This prevents rust and keeps your grill looking good. Many manufacturers recommend covering your grill to extend its life. You want your grill to be ready whenever the craving strikes.
Conclusion
Using a BBQ grill is a rewarding experience that combines cooking with outdoor enjoyment. By following these simple steps, from initial setup and safety to mastering heat and post-grill care, you’ll be grilling like a seasoned pro in no time. Remember, practice makes perfect, so don’t be afraid to experiment and enjoy the process. Happy grilling!
What is the best way to clean grill grates after cooking?
The best way to clean grill grates after cooking is to do it while they are still warm. Use a stiff wire brush to scrape off any food residue. For a deeper clean, especially if cooled, you can use warm soapy water and a scrub pad, then rinse thoroughly.
How do I know if my charcoal grill is hot enough?
Your charcoal grill is hot enough when the coals are covered in a layer of gray ash. This usually takes about 15-20 minutes after lighting. You can also use the hand test: hold your hand about 5 inches above the grates; if you can keep it there for 2-4 seconds, it’s typically hot enough for direct cooking.
Can I use lighter fluid to start my charcoal grill?
While lighter fluid can start charcoal, many experts recommend avoiding it. It can leave a chemical taste on your food. A chimney starter is a much better alternative, using newspaper or a firelighter cube to ignite the coals cleanly and effectively.
How often should I clean my gas grill burners?
You should clean your gas grill burners at least once a year, or more frequently if you grill often. Remove the grates and heat deflectors to access the burners. Use a wire brush to clear any clogged ports, which ensures even flame distribution and efficient cooking.
Is it safe to grill in the rain?
Grilling in the rain is generally safe if you take precautions. Position your grill under a covered patio or use a grill gazebo to protect it and yourself. Avoid grilling directly in heavy downpours, especially with electric grills, and ensure good ventilation to prevent smoke buildup.
