To treat a Blackstone Grill effectively, you must properly season the griddle surface before its first use and continue with consistent maintenance. This creates a non-stick cooking surface and protects against rust.
Seasoning involves applying thin layers of high smoke point oil and heating it until it polymerizes, forming a durable, protective layer on your Blackstone Grill.
Here’s a quick summary of how to treat your Blackstone Grill:
- Always clean your new griddle thoroughly before seasoning.
- Apply very thin layers of high smoke point oil, like flaxseed or grapeseed.
- Heat the griddle until the oil burns off completely and stops smoking.
- Repeat this oiling and heating process at least 4-5 times for a robust initial seasoning.
- Clean the griddle after every use and apply a light oil coat to maintain its seasoning.
How To Treat A Blackstone Grill?
Treating a Blackstone Grill means giving it the care it needs to perform well and last a long time. The core process centers around seasoning, which forms a protective, non-stick surface on the griddle.
Why Season Your Blackstone Grill?
Seasoning isn’t just a suggestion; it’s essential. It creates a natural barrier between your food and the griddle, preventing sticking. Think of it like adding a tough, natural coating to your griddle surface (National Science Foundation).
Beyond non-stick properties, seasoning also acts as a shield against rust. A well-seasoned Blackstone Grill resists moisture, keeping that shiny metal protected from corrosion.
The Science of Seasoning
When you heat oil on your griddle, it undergoes a process called polymerization. The oil molecules break down and reform into a hard, plastic-like layer that bonds to the metal. This makes the surface smooth and durable.
Many experts explain that this polymerized layer is what gives your griddle its natural non-stick properties and its deep, dark color. It’s a chemical transformation, not just a greasy coating.
Before You Begin: Initial Prep
Before you even think about seasoning, your new griddle needs a good cleaning. You’ll want to remove any factory oils or residues that might be present.
Use hot, soapy water and a soft cloth to gently wash the cooking surface. Rinse it completely, then dry it thoroughly with paper towels. You don’t want any moisture left behind.
What You’ll Need for Seasoning
Gathering your supplies beforehand makes the process smooth. You’ll need a good oil, plenty of paper towels, and maybe some heat-resistant gloves.
- High smoke point oil: Flaxseed, grapeseed, avocado, or even regular vegetable oil work well.
- Paper towels: For applying oil and wiping excess.
- Heat-resistant gloves: To protect your hands from the griddle’s heat.
- Griddle scraper or spatulas: Useful for initial cleaning.
The Step-by-Step Seasoning Process
Let’s walk through building that beautiful, dark seasoning on your Blackstone Grill. It takes a little patience, but the results are worth it.
Step 1: Clean Your Griddle
As we mentioned, start with a clean griddle. Remove any remaining factory grease. Use warm water and a small amount of mild soap. Rinse well and dry completely to prevent rust from forming.
Step 2: Heat It Up
Turn all your Blackstone burners to high heat. You want the griddle surface to get nice and hot. Wait about 10-15 minutes, or until the entire surface starts to change color slightly.
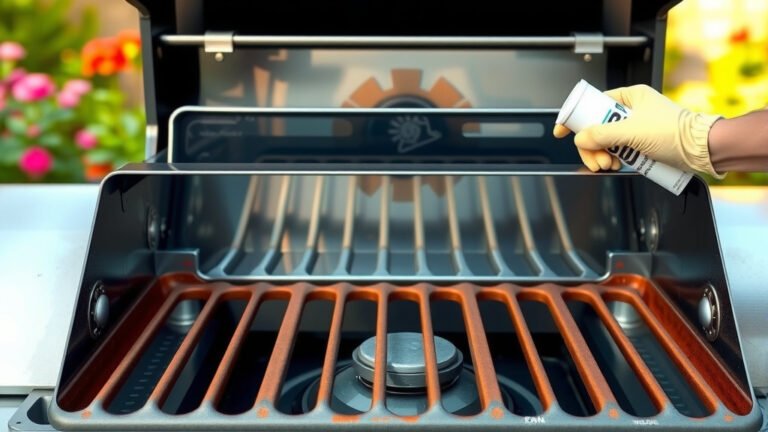
Step 3: Apply a Thin Layer of Oil
Once hot, turn off the burners or lower them significantly. Pour about 1-2 tablespoons of your chosen high smoke point oil onto the griddle. Use a paper towel held with tongs to spread a super thin, even layer across the entire surface.
Remember, less is more here. Too much oil will create a sticky, gummy mess. You want just enough to coat it, almost invisible.
Step 4: Let It Smoke and Burn Off
Turn the burners back to high. The oil will start to smoke. Let it smoke completely until it stops and the griddle darkens. This process usually takes 15-20 minutes. It means the oil has polymerized.
The griddle surface should look dry and slightly darker. This is your first layer of seasoning. You’re building a protective shield.
Step 5: Repeat for Multiple Coats
After the first coat stops smoking, let the griddle cool for a few minutes. Then, repeat steps 3 and 4. Many experts recommend at least 4-5 layers for the initial seasoning. Some even go for 7-10 layers for optimal results.
Each layer adds depth and durability. You’ll notice the griddle turning a rich, dark brown or black color. This color is a good sign of successful seasoning.
| Seasoning Layer | Action | Expected Result |
|---|---|---|
| Layer 1 | Clean, heat, apply thin oil, burn off. | Light browning, first protective coat. |
| Layers 2-4 | Repeat oil application and burn off. | Griddle darkens significantly, becomes more uniform. |
| Layers 5+ | Continue for deeper, more durable seasoning. | Rich black, non-stick surface, enhanced rust protection. |
Which Oils Work Best?
Choosing the right oil is an important step. You need something with a high smoke point that can withstand the griddle’s heat without burning too quickly and creating off-flavors.
- Flaxseed oil: Often cited for forming a very hard, durable seasoning layer.
- Grapeseed oil: A popular choice due to its high smoke point and neutral flavor.
- Avocado oil: Another excellent high smoke point option, great for cooking too.
- Vegetable or Canola oil: More affordable and readily available, they still do a decent job.
Maintaining Your Blackstone Grill
Seasoning isn’t a one-time event. Ongoing maintenance keeps your griddle in top shape. Think of it like moisturizing your skin—regular care keeps it healthy.
Cleaning After Every Use
After each cookout, while the griddle is still warm, scrape off any food debris. Use a griddle scraper to push any bits into the grease trap. This keeps the surface clean for your next meal.
Many guidelines suggest that a good scrape and a wipe with a paper towel are often enough. You want to preserve that precious seasoning.
Scraping and Wiping
Once you’ve scraped, pour a small amount of water onto the warm surface. It will steam and help loosen any stuck-on food. Scrape again, then wipe it dry with paper towels.
Finally, apply a very thin coat of cooking oil to the entire griddle surface. This refreshes the seasoning and keeps it protected until your next use.
Re-Seasoning When Needed
Even with good care, your griddle’s seasoning might wear down over time. Don’t worry, it’s easy to fix. You’ll notice your food starting to stick or rust spots appearing.
To re-season, simply repeat the process of applying thin oil layers and burning them off. You might only need a few coats to restore the surface.
Signs Your Griddle Needs Love
Keep an eye out for these clues that your Blackstone Grill might need a touch-up or a full re-seasoning:
- Food sticks more often than usual.
- The griddle surface looks dull or unevenly colored.
- You see small patches of rust, especially after humidity.
- Water doesn’t bead up on the surface anymore.
- There are visible light spots where the seasoning has worn away.
Common Blackstone Grill Mistakes to Avoid
Sometimes, what we think is helping can actually hurt our griddle. Let’s look at a few pitfalls to steer clear of.
Using Too Much Oil
This is a big one. Piling on too much oil during seasoning leads to a sticky, gummy surface that’s hard to cook on. It won’t polymerize properly and will just make a mess.
Remember the “less is more” rule. You want a coat so thin it almost looks like there’s no oil there at all.
Skipping Preheating
Cooking on a cold griddle is a recipe for sticking. Your food will seize onto the surface. Always preheat your Blackstone to the proper temperature before adding food.
A well-preheated griddle ensures that food releases easily and cooks evenly. It’s a simple step that makes a huge difference.
Improper Cleaning
Using abrasive scrubbers or harsh soaps after your griddle is seasoned can strip away all your hard work. Stick to scraping and wiping to preserve the seasoning.
Many experts confirm that harsh cleaning agents are detrimental to the seasoning layer. A gentle touch goes a long way.
Quick Maintenance Checklist
- Season griddle properly before first use.
- Clean griddle while warm after every cook.
- Apply a very thin oil layer after cleaning.
- Store in a dry place, covered from elements.
- Re-season promptly if rust or sticking occurs.
Conclusion
Treating your Blackstone Grill correctly is really about two main things: thorough initial seasoning and consistent, gentle care. By applying thin layers of high smoke point oil and burning them into a protective polymer, you build a durable, non-stick cooking surface. Regular cleaning and re-oiling after each use will keep that surface robust and rust-free, ensuring your griddle delivers amazing meals for years to come. It’s a simple routine that pays off with every delicious meal you cook.
How many coats of seasoning do I need for a new Blackstone?
For a new Blackstone Grill, we found that 4-5 coats of seasoning are generally recommended to build a solid initial layer. Some users and experts suggest up to 7-10 coats for maximum durability and non-stick performance.
Can I use olive oil to season my Blackstone?
It’s generally not recommended to use olive oil for initial seasoning. Olive oil has a lower smoke point and can burn off too quickly, leading to a sticky, gummy residue rather than a hard, polymerized layer. High smoke point oils like flaxseed, grapeseed, or avocado oil are much better choices.
What should I do if my Blackstone Grill starts to rust?
If you notice rust on your Blackstone Grill, gently scrub the rusted area with a griddle scraper or steel wool until the rust is removed. Then, clean the area thoroughly, dry it, and re-season that spot (or the entire griddle) with several thin layers of oil, following the standard seasoning process.
How often should I re-season my Blackstone Grill?
The frequency of re-seasoning depends on your usage and cleaning habits. If you consistently clean and lightly oil your griddle after each use, a full re-seasoning might only be needed every few months or when you notice food sticking more often or the surface looking dull. Regular maintenance reduces the need for frequent full re-seasoning.
Can I cook on my Blackstone Grill immediately after seasoning?
Yes, you can cook on your Blackstone Grill immediately after completing the initial seasoning process. In fact, cooking fatty foods like bacon or burgers for your first few meals can help further reinforce and build up the seasoning layer, making it even more robust.