How to Store a Flat Top Griddle in Winter?
On this page (3 sections)
Storing your flat top griddle for winter is simpler than you might think. The key to successful winter storage is a thorough cleaning and applying a protective layer to prevent rust. You’ll want to properly clean and season your griddle before covering it. This ensures it’s ready for warmer weather without damage.
Winter weather can be tough on outdoor cooking equipment. Moisture and temperature swings can lead to rust and other issues. Taking a few smart steps now can save you a lot of headaches later. Protecting your investment means enjoying your flat top for years to come. Many griddle owners find that a good cover is their best friend during the cold months.
- Clean your griddle thoroughly.
- Season the cooking surface.
- Apply a protective oil.
- Cover it well.
- Store in a dry place if possible.
Let’s walk through exactly how to get your flat top griddle ready for its winter nap.
Getting Your Flat Top Ready for Winter Storage
Storing your flat top griddle properly is key to its longevity. You want it to be in tip-top shape when spring rolls around. This means protecting it from the elements. Cold, damp air can cause all sorts of trouble. Rust is the biggest enemy. Let’s make sure your griddle survives the winter unscathed.
The Importance of a Thorough Clean
Before you even think about covering your griddle, a deep clean is absolutely essential. Food debris, grease, and grime left on the surface can become a sticky mess. They can also attract pests. This makes cleaning much harder later. A clean surface is the first step to preventing rust and sticking.
Scraping Away Debris
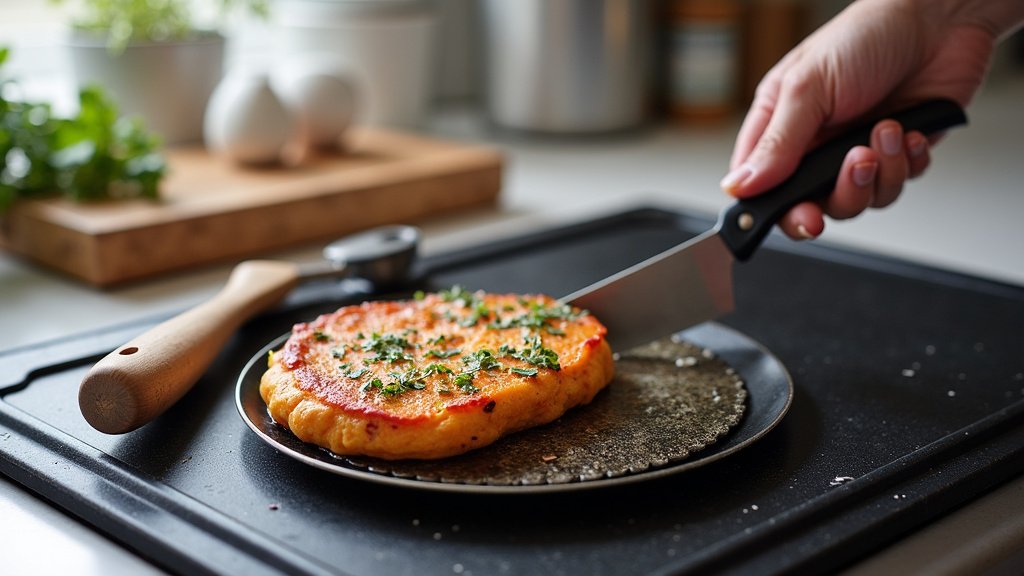
Start by scraping off any loose food bits. Use a sturdy spatula or scraper. Get into all the nooks and crannies. Don’t be afraid to apply a little pressure. You’re aiming to remove everything visible. This prevents those bits from hardening into a stubborn layer.
Degreasing the Surface
Next, you’ll want to degrease. For most flat tops, a good degreaser or even hot, soapy water works well. Use a soft cloth or sponge. Wipe down the entire cooking surface. For stubborn spots, you might need a bit more elbow grease. Research and found that a good scrub can make a big difference (Weber Grills).
Seasoning for Protection
Once your griddle is clean, it’s time to re-season it. Seasoning creates a protective layer on the metal. This layer helps to repel moisture. It’s like giving your griddle a protective coat of armor. This process is similar to how you season a new cast iron pan.
Applying Cooking Oil
You’ll need a high-heat cooking oil. Options like vegetable oil, canola oil, or flaxseed oil work well. Apply a thin layer of oil evenly across the entire cooking surface. Don’t use too much, or it will become sticky. You want a light sheen.
Heating the Griddle
Turn on your griddle to a medium heat. Let it heat up for about 10-15 minutes. You’ll see the oil start to smoke. This is normal. The heat polymerizes the oil, creating that protective barrier. It’s important to let it heat evenly. This ensures the entire surface is protected.
Cooling and Wiping
After heating, let the griddle cool down completely. Once it’s cool, wipe away any excess oil with a clean paper towel. You’re not trying to remove the seasoning, just any pooling oil. Repeat this process a couple of times for a robust protective layer. Many experts recommend at least two rounds of seasoning (Kamado Joe).
Choosing the Right Cover
The right cover is your griddle’s best friend during winter. It needs to offer protection from rain, snow, and sun. Don’t underestimate the sun; UV rays can still degrade materials.
Material Matters
Look for covers made from heavy-duty, waterproof material. Polyester and vinyl are common choices. Ensure the cover is breathable to prevent condensation build-up. Trapped moisture is a rust culprit. Some covers have vents built-in for this reason. We found that covers with reinforced stitching hold up better over time.
Fit and Coverage
The cover should fit snugly without being too tight. You want it to cover the entire griddle, including the sides and legs if possible. This prevents water from seeping in from all angles. A loose cover can also let in wind and debris.
Storage Location Considerations
Where you store your griddle can make a big difference. While a good cover is essential, a dry environment is even better.
Indoors vs. Outdoors
If possible, storing your griddle indoors is ideal. A garage, shed, or even a covered patio is a good choice. This offers the best protection from the harshest weather. If indoor storage isn’t an option, ensure your outdoor spot is well-protected. Think under an overhang or a sturdy deck.
Avoiding Damp Areas
Whatever location you choose, try to avoid damp or humid areas. Basements can sometimes be a problem if they tend to get moist. Even a well-covered griddle can suffer if it’s sitting directly on a wet surface. Elevating it slightly can help.
Quick Checklist for Winter Prep
Here’s a quick rundown to make sure you haven’t missed a step:
- Scrape and clean all food debris.
- Degrease the entire cooking surface.
- Apply a thin layer of high-heat cooking oil.
- Heat the griddle to polymerize the oil.
- Allow the griddle to cool completely.
- Cover with a waterproof and breathable cover.
What About Accessories?
Don’t forget about your griddle accessories! Things like spatulas, tongs, and grill brushes also need attention.
Cleaning Utensils
Clean all your cooking tools thoroughly. Remove any food residue. A good wash with soap and water should do the trick. For metal utensils, a quick wipe down with a lightly oiled cloth can prevent rust.
Storing Small Parts
If your griddle has removable parts, like side shelves or grease traps, consider removing them. Clean and dry them thoroughly. Store them in a plastic bag or a separate container. This prevents them from getting lost or damaged during storage.
Conclusion
You’ve taken the essential steps to prepare your flat top griddle for winter. Remember, a thorough cleaning and proper seasoning are your best defenses against rust and damage. Investing a little time now ensures your griddle is ready for sizzling adventures when spring returns. Don’t forget to protect your accessories too! Now, cover it up tight and store it well. Your griddle will thank you for it next grilling season.
Frequently Asked Questions
How often should I re-season my flat top griddle?
You should re-season your griddle at least once before winter storage. If you use your griddle frequently throughout the year, you might consider re-seasoning it a couple of times a year. This maintains the protective layer.
What’s the best type of oil to use for seasoning?
High-heat cooking oils are best for seasoning your flat top. Vegetable oil, canola oil, and flaxseed oil all work effectively. They polymerize well to create a strong, protective layer on the cooking surface.
Can I leave my griddle outside during winter?
While possible with an excellent cover, it’s not ideal. Indoor storage in a garage or shed offers superior protection from harsh weather. If you must store it outside, choose a spot with natural shelter, like under a deck or eave.
What if I notice a little rust when I take it out in the spring?
Don’t worry, a little rust can usually be fixed! Scrub the rusted areas with steel wool or a stiff brush. Then, re-season the affected spot, or the entire griddle, to restore its protective coating.
Do I need to disconnect the propane tank for winter storage?
Yes, it’s a good safety practice to disconnect the propane tank before storing your griddle. Store the tank upright in a well-ventilated area, away from direct heat sources. This prevents any accidental leaks.