Making delicious ribs on a pellet grill involves a simple 3-2-1 method, which breaks down the cooking process into three distinct phases for tender, smoky results.
You will achieve fall-off-the-bone ribs by smoking for three hours, wrapping for two, and then saucing and finishing for one hour.
TL;DR: Here’s the quick rundown for amazing ribs:
- Prep your ribs by removing the membrane and applying a good rub.
- Smoke them unwrapped at 225°F for three hours to build that smoky flavor.
- Wrap the ribs tightly in foil with a little liquid for two hours to tenderize them.
- Finish by unwrapping, saucing (if you like), and cooking for one more hour.
- Always let your ribs rest before slicing to keep them juicy.
How To Make Ribs On A Pellet Grill?
Cooking ribs on a pellet grill means you get amazing smoky flavor with less effort. It’s a game-changer for many home pitmasters. This method helps you achieve ribs that are both tender and flavorful every single time.
Choosing Your Ribs Wisely
The journey to perfect ribs starts at the butcher. You’ll generally choose between baby back ribs and St. Louis-style spareribs. Baby backs are leaner and cook a bit faster, while St. Louis ribs are meatier and richer. We found that St. Louis ribs often have more connective tissue, which can translate to deeper flavor when cooked low and slow.
Prepping for Perfection
Before any heat hits your ribs, some key prep steps are vital. Think of it like laying the foundation for a great meal. These steps ensure your ribs cook evenly and absorb all those wonderful flavors.
Removing the Membrane: A Must-Do Step
One step you really shouldn’t skip is removing the thin membrane from the back of the ribs. Why bother? This membrane can be tough and chewy, making your ribs less pleasant to eat. Many experts say that removing it allows your rub to penetrate deeper and improves the texture (AmazingRibs.com).
To do this, simply slide a butter knife under a corner of the membrane, then grab it with a paper towel and pull it off. It might take a little practice, but it’s worth it.
Applying Your Rub: Flavor layering
After the membrane is gone, it’s time for the rub. Don’t be shy here! A good dry rub is the backbone of great rib flavor. Apply it generously to all sides of the ribs. We found that letting the rub sit on the ribs for at least 30 minutes, or even overnight in the fridge, allows the flavors to meld. This process helps create a delicious crust called the “bark.”
Understanding the 3-2-1 Method
The 3-2-1 method is a classic for a reason, especially on a pellet grill. It’s a forgiving process that breaks down the cook into three distinct stages, each serving a specific purpose. This method is particularly useful for spareribs, helping them become incredibly tender.
The Smoke Phase (3 Hours)
This is where the magic of the pellet grill really shines. You’ll place your seasoned ribs directly on the grates, bone-side down. Set your grill to a consistent 225°F. During these three hours, the ribs will absorb a lot of smoky flavor, and a nice bark will start to form on the surface. Resist the urge to open the lid too often; “if you’re lookin’, you ain’t cookin’.”
The Wrap Phase (2 Hours)
After three hours, it’s time to wrap. This step is about tenderizing. Take your ribs off the grill and wrap them tightly in heavy-duty aluminum foil. Before sealing, you can add a splash of apple juice, cider vinegar, or even beer. This liquid creates a steamy environment inside the foil, helping to break down connective tissue. Return the wrapped ribs to the grill for two more hours at 225°F. This is often called the “Texas Crutch” in BBQ circles.
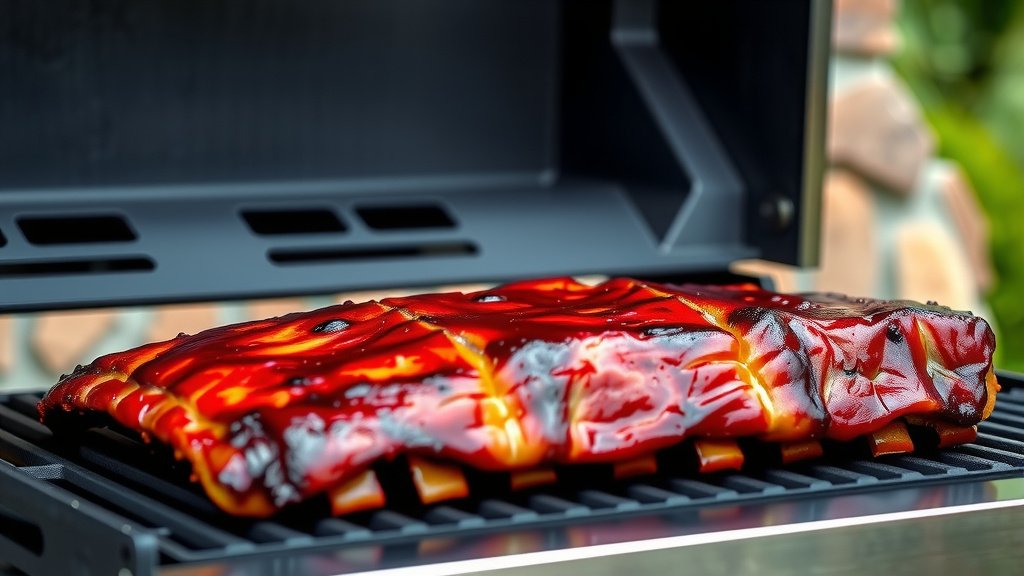
The Sauce Phase (1 Hour)
The final hour is all about finishing and, if you choose, saucing. Unwrap the ribs carefully, discarding the foil and any remaining liquid. Place them back on the grill. If you’re a fan of BBQ sauce, now is the time to apply a thin layer. Cook for the final hour, reapplying sauce every 15-20 minutes to build layers of glaze. This also allows the sauce to caramelize nicely without burning. For those who prefer their ribs naked, simply continue cooking for an hour to firm up the bark.
Mastering Your Pellet Grill Settings
Consistency is your best friend when cooking ribs. Pellet grills are fantastic for maintaining steady temperatures. We found that 225°F is the ideal temperature for slow-smoked ribs, allowing enough time for smoke penetration and tenderization. Always preheat your grill thoroughly before putting the ribs on.
Consider the type of pellets you use, too. Different woods impart different flavors. Apple and cherry pellets give a mild, sweet smoke, great for pork. Hickory and oak offer a stronger, more traditional BBQ flavor. Many people like to blend different pellet types for a unique taste (BBQ Guys research).
Key Steps for Perfect Ribs
- Choose high-quality ribs (baby back or St. Louis style).
- Remove the membrane from the back of the ribs.
- Apply a generous amount of your favorite dry rub.
- Preheat your pellet grill to 225°F.
- Smoke unwrapped for 3 hours.
- Wrap in foil with liquid and cook for 2 hours.
- Unwrap, sauce (optional), and cook for 1 more hour.
- Rest the ribs before slicing and serving.
Sauce or No Sauce? That is the Question!
This is a true BBQ debate! Some purists believe ribs should stand alone, relying solely on the rub and smoke flavor. Others wouldn’t dream of eating ribs without a sticky, sweet, or tangy sauce. What do you prefer? If you’re using sauce, consider making your own; it adds a personal touch. If not, pick a good quality store-bought one. Remember to apply it only in the last hour to prevent burning.
Common Rib Mistakes to Avoid
Even seasoned grillers make mistakes. One common error is cooking at too high a temperature, which can make ribs dry. Another is over-saucing too early, leading to a burnt exterior. Also, don’t rush the rest period. The ribs will lose precious juices if cut immediately. Patience is key here, truly.
Here’s a quick overview of what to avoid:
| Mistake | Impact on Ribs | How to Prevent |
|---|---|---|
| Not removing membrane | Chewy texture | Pull it off with a paper towel |
| Cooking too hot | Dry, tough ribs | Maintain 225°F consistently |
| Saucing too early | Burnt sauce, bitter taste | Apply sauce in final hour only |
| Not resting ribs | Juices run out | Rest 15-20 minutes after cooking |
Troubleshooting Your Rib Cook
What if your ribs are still tough after the 3-2-1 method? Perhaps your grill temperature wasn’t accurate, or your ribs were particularly thick. You can always add a little more time in the wrap phase if needed. If they are falling apart too much, you might have cooked them a bit long, especially if they are baby backs, which are smaller. Adjustments are part of the learning process.
Resting Your Ribs: The Final, Crucial Step
You’ve smoked, wrapped, and sauced. Are you ready to dive in? Almost! After taking your ribs off the grill, let them rest for 15-20 minutes. Just tent them loosely with foil. This resting period allows the juices to redistribute throughout the meat, making them incredibly moist and tender. Many chefs confirm this step makes a significant difference (Culinary Institute of America). It’s an act of patience that truly pays off.
Serving Suggestions for Your Masterpiece
Once rested, slice your ribs between the bones and arrange them on a platter. What pairs well? Classic sides like coleslaw, potato salad, baked beans, or cornbread are always a hit. Offer extra sauce on the side for those who like more. Watch your friends and family enjoy your hard work – there’s nothing quite like it!
Conclusion
Making ribs on a pellet grill is a rewarding experience. By following the 3-2-1 method, focusing on proper prep, maintaining a consistent temperature, and allowing for a crucial rest period, you’ll be creating smoky, tender, and delicious ribs with ease. Don’t be afraid to experiment with rubs and sauces to find your perfect flavor profile. Happy grilling!
Frequently Asked Questions
How do I know when my ribs are done?
Your ribs are done when they are tender. A good test is to pick up a rack with tongs in the middle; if they bend easily and the meat starts to crack, they are ready. The meat should also pull away cleanly from the bone.
Can I use baby back ribs with the 3-2-1 method?
Yes, you can use baby back ribs, but you might want to adjust the timing slightly to a 2-2-1 or 2-1-1 method. Baby backs are smaller and leaner, so they cook faster and can become overcooked if left for the full 3-2-1 duration.
What if I don’t have time for a full 6-hour cook?
While the low-and-slow method is ideal, for a quicker cook, you can increase the grill temperature to around 275°F-300°F and reduce each phase. However, this will result in less smoke penetration and might make the ribs slightly less tender than the traditional method. Many pitmasters say that patience is a secret ingredient.
Do I need to spritz my ribs during the smoke phase?
Spritzing, or misting your ribs with apple juice or water, is optional but can help keep them moist and add flavor. If you choose to spritz, do it every hour or so during the initial smoke phase, but try not to open the lid too frequently.
What if my ribs come out too dry?
Dry ribs often indicate overcooking or cooking at too high a temperature. Ensure your grill maintains a steady 225°F. Adding a bit more liquid during the wrap phase (like apple juice or broth) can also help keep them moist. Monitoring your grill’s temperature is key to preventing dryness.