
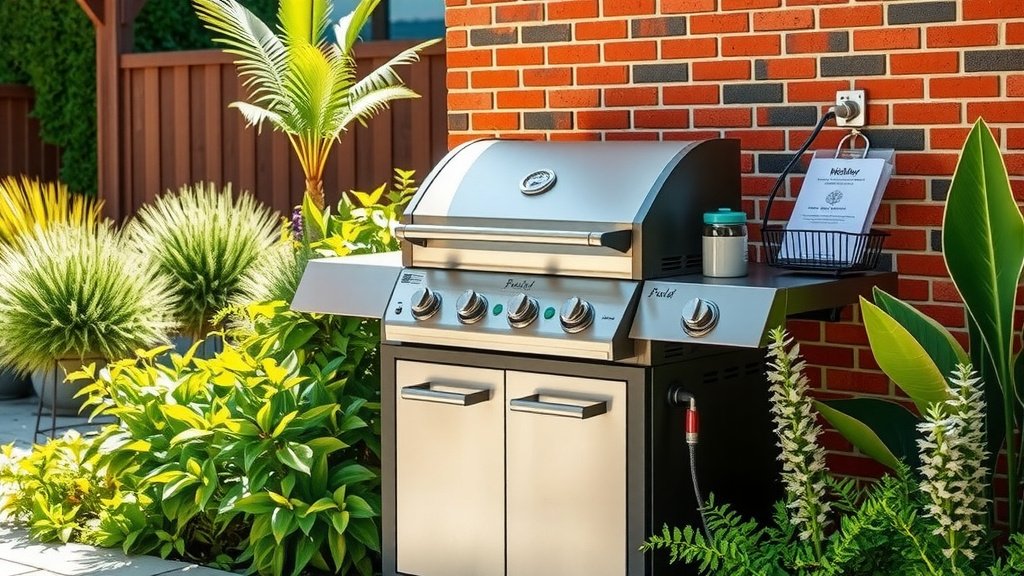
To hook up a natural gas grill, first ensure your gas line is properly installed and shut off the main gas supply to that line.
Then, apply a suitable thread sealant to the male threads of your grill’s quick-disconnect fitting and securely attach it to the gas supply line.
- Get ready to connect your natural gas grill safely and effectively.
- Always prioritize safety: shut off the gas before doing anything.
- You will need specific tools like wrenches, a quick-disconnect hose, and thread sealant.
- Follow our step-by-step instructions to ensure a secure, leak-free connection.
- Checking for leaks with soapy water is a vital final step after hookup.
How To Hook Up Natural Gas Grill?
Hooking up a natural gas grill makes outdoor cooking simple. You get an endless fuel supply right from your home, no more running out of propane. We found that a safe and correct hookup ensures great grilling sessions for years to come.
Why Natural Gas? The Grill Master’s Choice
Choosing a natural gas grill is a smart move for many grill enthusiasts. Imagine never having to swap out a propane tank again. This convenience is a big part of its appeal.
Convenience at Your Fingertips
With natural gas, your grill is always ready to go. You have a constant fuel source. Many experts say this steady supply makes grilling more enjoyable. You can focus on your food, not on fuel levels.
Consistent Heat, Better Grilling
Natural gas often provides a very consistent flame. This consistency helps you cook your food evenly. Research suggests stable heat leads to better searing and more predictable results (AGA, American Gas Association).
Safety First: Before You Start
Safety is not something to skip when working with gas. A proper natural gas grill hookup starts with understanding the risks. Your well-being and home safety depend on careful steps.
Check Your Local Codes
Always check local building and gas codes before starting any work. Many regions have specific rules for gas appliance installations. We found that following these guidelines protects you legally and practically.
Know Your Gas Line
Ensure you have a dedicated natural gas line for your grill. This line should be properly sized and installed by a qualified professional. A typical residential natural gas line uses a 1/2-inch connection. You’ll want to confirm your grill’s requirements.
Tools and Materials You’ll Need
Before you begin, gather everything you need. Having the right tools makes the job smoother and safer. Here is a quick list:
- Adjustable wrenches or pipe wrenches
- Gas-rated thread sealant (Teflon tape or pipe dope)
- Natural gas quick-disconnect hose kit (match your grill’s BTU output)
- Soapy water solution (for leak detection)
- Safety goggles
- Work gloves
Step-by-Step Connection Guide
Ready to get your grill fired up? Follow these steps carefully. Remember, patience here pays off. It’s about safety and a good connection.
Step 1: Shut Off the Gas
This is the most critical first step. Locate the shut-off valve for your natural gas line. Turn it completely off. You want absolutely no gas flowing before you start disconnecting or connecting anything.
Step 2: Apply Thread Sealant
Take your gas-rated thread sealant. Apply it liberally to the male threads of the quick-disconnect fitting. This sealant creates a tight seal and prevents gas leaks. Many experts recommend using a sealant specifically designed for natural gas lines (National Fuel Gas Code Handbook).
Step 3: Connect the Quick-Disconnect Hose
Now, carefully screw the female end of the quick-disconnect hose onto the gas supply line’s shut-off valve. Use your adjustable wrenches to tighten it securely. Avoid over-tightening, but make sure it is snug.
Step 4: Secure the Grill End
Connect the other end of the quick-disconnect hose to your natural gas grill’s inlet. Again, apply thread sealant to the male threads if needed. Tighten this connection firmly with your wrenches. Ensure the hose has no kinks or sharp bends.
Step 5: Turn Gas On and Check for Leaks
Slowly turn the gas supply back on at the shut-off valve. Now, it is time for the leak test. Spray your soapy water solution over all newly made connections. If you see bubbles forming, you have a leak. Shut off the gas immediately and re-tighten the connection. Repeat until no bubbles appear.
Troubleshooting Common Issues
Even with careful installation, you might run into small problems. Don’t worry, many issues have simple fixes. Here are a few common ones we found:
| Issue | Possible Cause | Solution |
|---|---|---|
| Low Flame | Partially closed valve, gas regulator issue | Ensure valve is fully open. Check regulator for damage (professional). |
| No Flame | Gas valve completely off, blocked hose | Confirm gas valve is open. Check hose for kinks or blockages. |
| Gas Smell (no bubbles) | Loose connection, minor leak, or pilot light issue | Re-check all connections with soapy water. Call professional if smell persists. |
| Grill Not Lighting | Igniter problem, low gas pressure | Check igniter battery/spark. Confirm gas supply is adequate. |
Low Flame?
If your grill has a weak flame, first check that the gas supply valve is fully open. A partially closed valve is a common reason for low gas flow. Sometimes, a faulty gas regulator can also cause this (AGA, American Gas Association).
Gas Smell?
A gas smell, even without visible bubbles, means you have a leak. Turn off the gas at once. Re-spray all connections with soapy water. If the smell continues after tightening, contact a licensed professional. Your safety is top priority.
Maintenance Tips for Your Natural Gas Grill
Once your grill is hooked up, keeping it in good shape ensures years of great cooking. A little care goes a long way. This also helps with safety and performance.
Regular Cleaning is Key
Keep your grill grates and internal components clean. Grease build-up can affect performance and pose a fire risk. Many guidelines point to regular cleaning as a good first step for grill longevity (Weber Grills).
Inspect Hoses and Connections
Periodically, check your natural gas hose and connections. Look for cracks, wear, or damage. We found that a quick visual inspection can catch problems before they become serious leaks. Do this a few times a year, especially before grilling season starts.
Maintenance Checklist:
- Clean grates after every use.
- Empty and clean drip tray regularly.
- Check igniter function before each use.
- Inspect gas hose for cracks or damage seasonally.
- Test for gas leaks annually with soapy water.
- Keep grill cover on when not in use.
Conclusion
Hooking up your natural gas grill provides endless convenience and consistent grilling power. By following these steps—from safety precautions to the actual connection and regular maintenance—you’re set for many memorable meals. Remember to always prioritize safety, check for leaks, and consult a professional if you feel unsure about any step. Enjoy the fantastic experience of natural gas grilling!
Are natural gas grills safe to use?
Yes, natural gas grills are generally very safe when installed correctly and maintained properly. The key is to follow all manufacturer instructions, local codes, and regularly check for leaks.
What is the difference between a natural gas grill and a propane grill?
A natural gas grill connects directly to your home’s natural gas line, providing a constant fuel supply. A propane grill uses portable propane tanks that need refilling or exchanging.
Can I convert a propane grill to natural gas?
Often, yes, but it requires a conversion kit specific to your grill model. This process involves changing out orifices and other components to handle the different pressure and type of gas. It is often best to have a certified technician perform the conversion.
How do I check for a gas leak after hooking up my grill?
After turning on the gas, spray a solution of soapy water (dish soap and water) onto all connections. If you see bubbles forming, that indicates a gas leak. Immediately turn off the gas and tighten the connection, then re-test.
Should I hire a professional to hook up my natural gas grill?
If you are not comfortable working with gas lines or unsure about any part of the process, hiring a licensed professional is always the safest option. Many experts agree that professional installation ensures safety and adherence to codes (NFPA, National Fire Protection Association).
