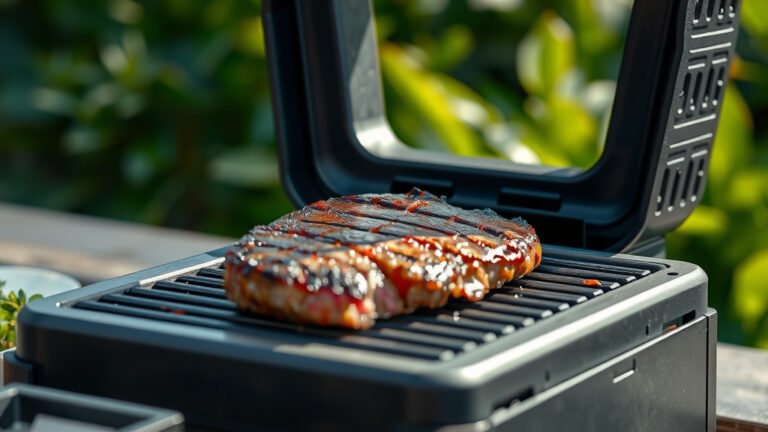
To grill bone-in chicken on a gas grill, preheat your grill to medium-high (around 400°F or 200°C), then reduce one burner to low or turn it off entirely to create a crucial two-zone cooking setup.
Sear the bone-in chicken skin-side down over direct, higher heat for a few minutes for crispness, then move it to the indirect side to finish cooking gently until the internal temperature precisely reaches 165°F (74°C).
- Achieve perfect bone-in chicken on a gas grill by always using a strategic two-zone cooking method.
- Start with a quick, high-heat sear over direct flames to develop a delicious, crispy skin and rich flavor.
- Finish cooking slowly over indirect heat to ensure the chicken cooks thoroughly and stays incredibly juicy.
- Always monitor the chicken’s internal temperature with a reliable thermometer; the target is a safe 165°F (74°C).
- Rest the grilled chicken for at least 5-10 minutes after removing it from the grill to allow juices to redistribute.
How To Grill Bone In Chicken On Gas Grill?
Grilling bone-in chicken on a gas grill involves balancing a beautiful sear with thorough, even cooking without burning. You will need to manage your grill’s heat zones effectively for the best, most delicious results.
Why Bone-In Chicken Can Be Tricky
Bone-in chicken pieces, like thighs, drumsticks, or split breasts, present a unique challenge. The bone conducts heat slower than the meat, meaning the meat closest to the bone takes longer to cook. This can lead to uneven cooking if you are not careful.
Many home grillers find that the outside gets too dark or dry before the inside cooks through. It is a common hurdle, but one we can easily overcome together. We found that the key is patience and smart heat management.
Essential Gear for Grilling Success
Before you even think about lighting your grill, let’s make sure you have the right tools. Having the proper equipment makes all the difference in achieving perfectly grilled bone-in chicken. Think of these as your grilling superpower.
The Right Thermometer is Your Best Friend
A reliable instant-read meat thermometer is not optional; it is absolutely essential. Many experts say it is the single most important tool for safely cooking poultry. It tells you the exact internal temperature, ensuring your chicken is done but not overcooked.
Tongs and Spatulas
You will need good, long-handled tongs for turning the chicken. A sturdy spatula can also be helpful for delicate pieces. Always choose tools that keep your hands a safe distance from the heat.
Basting Brush (Optional but Nice)
If you plan to use a glaze or barbecue sauce, a heat-resistant basting brush is handy. Apply sauces late in the cooking process to prevent them from burning. This adds a beautiful shine and extra layer of flavor.
| Tool | Why You Need It | Quick Tip |
|---|---|---|
| Instant-Read Thermometer | Ensures food safety and prevents overcooking. | Check thickest part, away from bone. |
| Long-Handled Tongs | Safely move and flip chicken on hot grates. | Look for sturdy, non-slip handles. |
| Grill Brush | Clean grates before and after grilling. | A clean grill prevents sticking. |
| Basting Brush | Apply sauces and marinades evenly. | Silicone brushes are easy to clean. |
Setting Up Your Gas Grill for Bone-In Chicken
The secret to perfectly cooked bone-in chicken, especially on a gas grill, lies in understanding and creating heat zones. This technique gives you control, preventing burnt exteriors and raw interiors.
Understanding Two-Zone Grilling
Two-zone grilling means setting up your gas grill with both a direct heat zone and an indirect heat zone. The direct zone is where you sear; the indirect zone is where the chicken gently cooks through. This method is a game-changer for thicker cuts of meat like bone-in chicken.
We found that this setup prevents flare-ups from dripping fat. It also ensures the chicken cooks evenly without scorching. Think of it like having an oven on your grill.
How to Create Dual Heat Zones
For a two-burner gas grill, light one burner to medium-high and leave the other off. For a three or more burner grill, light the outer burners to medium-high and keep the middle one off. This creates a hot side and a cooler side.
Aim for a grill temperature around 400°F (200°C) on the direct side. The indirect side will be significantly cooler, around 250-300°F (120-150°C). Close the lid to let the grill preheat for 10-15 minutes.
Preparing Your Chicken for the Grill
A little preparation goes a long way towards delicious, juicy chicken. These steps are simple but make a huge difference in the final taste and texture.
Brining or Marinating for Flavor
For extra flavor and moisture, consider brining or marinating your chicken. A simple brine of salt, sugar, and water can make chicken incredibly juicy. A marinade adds herbs, spices, and acidity for deeper flavor penetration.
Just remember to pat the chicken very dry after brining or marinating. Excess moisture prevents that wonderful crispy skin we are aiming for.
Pat it Dry for Crispy Skin
This step is non-negotiable if you want crispy skin. Use paper towels to thoroughly pat down every piece of chicken. Any moisture on the skin will steam instead of crisp, resulting in rubbery skin.
Once dry, you can lightly brush with olive oil and season generously with salt, pepper, and your favorite rub. Do not be shy with the seasoning!
Here’s a quick checklist for chicken prep:
- Thaw chicken completely if frozen.
- Rinse chicken under cold water (optional, some experts advise against it to prevent cross-contamination).
- Brine or marinate chicken for 2-4 hours, or overnight.
- Pat chicken pieces thoroughly dry with paper towels.
- Season generously with your preferred rub, salt, and pepper.
The Grilling Process: Step-by-Step
Now for the fun part! You have prepped your chicken and set up your grill. Let’s get grilling with confidence.
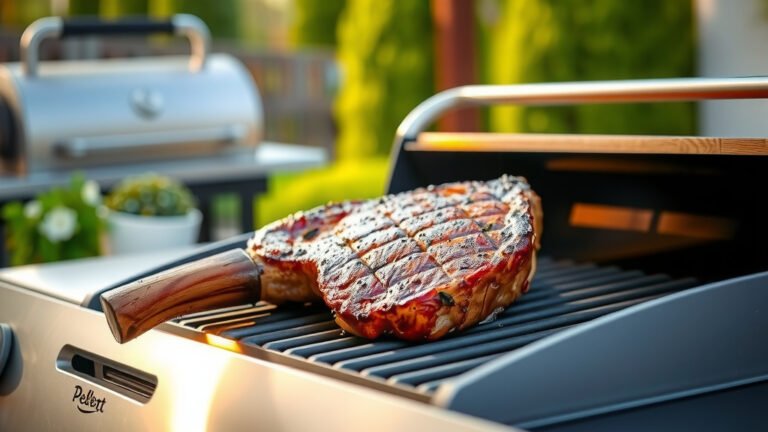
Searing for Flavor and Texture
Place the bone-in chicken pieces skin-side down over the direct, higher heat zone. Listen to that satisfying sizzle! Let them sear for about 3-5 minutes, depending on the heat of your grill, until the skin is golden brown and crispy.
Keep a close eye on them to prevent burning. If flare-ups occur, temporarily move the chicken to the indirect side until the flames die down. This initial sear locks in flavor and creates that desirable crunchy skin.
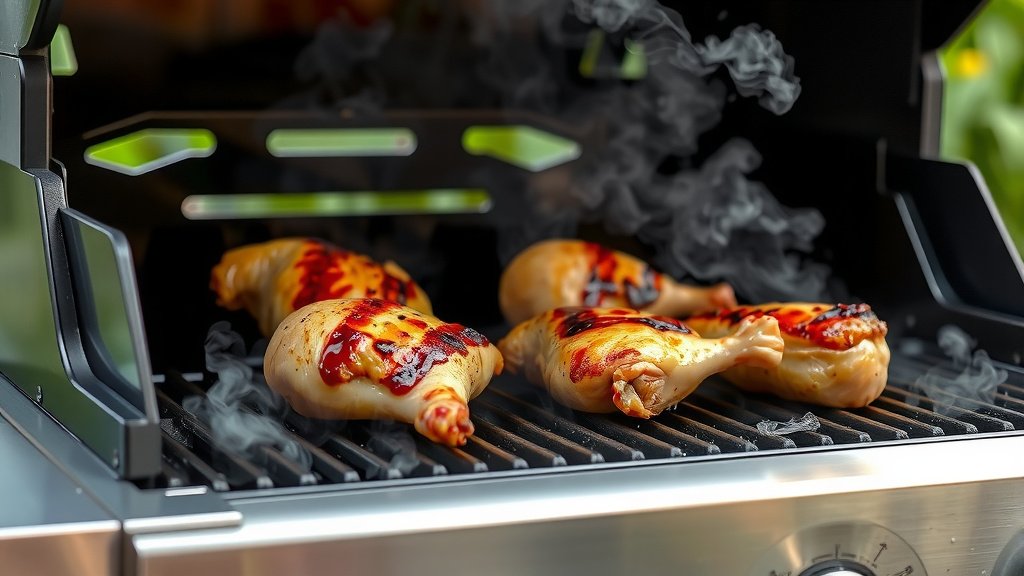
Slow Cooking on Indirect Heat
After searing, move the chicken pieces immediately to the indirect heat zone. Arrange them so they are not directly over any lit burners. Close the grill lid to allow the ambient heat to cook the chicken gently and evenly.
This is where patience pays off. Cooking times will vary depending on the size of your chicken pieces. Expect drumsticks and thighs to take 30-45 minutes, while larger split breasts might need 40-55 minutes. Keep the lid closed as much as possible to maintain a consistent temperature.
Monitoring Internal Temperature
Start checking the internal temperature after about 20-25 minutes of indirect cooking. Insert your instant-read thermometer into the thickest part of the meat, avoiding the bone. You are looking for a consistent 165°F (74°C) (USDA Food Safety and Inspection Service).
If some pieces are cooking faster than others, you can rotate them or move them slightly closer to or further from the direct heat. This shows you are truly mastering your grill.
When is it Done?
The chicken is safe to eat once it reaches 165°F (74°C). The juices should run clear when pierced with a fork. Do not rely solely on color; a thermometer is your best guide. Trust the numbers, not just your eyes!
Resting Your Perfectly Grilled Chicken
This step is often overlooked, but it is critical for juicy results. Do not skip it!
Why Resting Matters
Once your chicken hits 165°F, remove it from the grill and place it on a clean cutting board or platter. Tent it loosely with foil. Let it rest for 5-10 minutes before serving. This rest period allows the muscle fibers to relax and reabsorb the juices.
Cutting into chicken immediately after grilling will cause all those precious juices to run out, leaving you with dry meat. A rested piece of chicken is noticeably more tender and flavorful.
Troubleshooting Common Grilling Issues
Even seasoned grill masters run into snags sometimes. Here are a couple of common problems and how to fix them.
Burnt Skin, Undercooked Inside?
This usually happens when you rely too much on direct heat or your grill is too hot. The solution is better heat management. Ensure your indirect zone is truly indirect and move the chicken sooner after searing. Reduce the overall grill temperature slightly if needed.
Many experts say controlling the flame is your most important skill. Do not be afraid to turn burners down.
Dry Chicken Blues?
Dry chicken often means overcooked chicken. This is where your trusty meat thermometer shines. Pull the chicken off the grill the moment it reaches 165°F (74°C). Also, consider brining or marinating as a preventative measure. It really helps retain moisture.
Remember, the chicken will continue to cook slightly while it rests. Pulling it at the perfect temperature is key.
Conclusion
Grilling bone-in chicken on a gas grill does not have to be intimidating. By understanding two-zone cooking, prepping your chicken properly, and using a reliable thermometer, you can achieve perfectly cooked, juicy, and flavorful results every time. It just takes a little practice and patience to master this popular grilling favorite. Now go fire up that grill and enjoy your delicious creations!
How do I know when bone-in chicken is fully cooked on a gas grill?
You know bone-in chicken is fully cooked when its internal temperature reaches 165°F (74°C) as measured by an instant-read meat thermometer. Insert the thermometer into the thickest part of the meat, avoiding the bone, for an accurate reading.
Should I keep the grill lid open or closed when grilling bone-in chicken?
For most of the cooking process, especially when using indirect heat, you should keep the grill lid closed. This helps maintain a consistent internal temperature, similar to an oven, allowing the chicken to cook evenly and thoroughly. Open the lid only when flipping or checking temperature.
Can I grill frozen bone-in chicken directly on a gas grill?
No, you should never grill bone-in chicken directly from frozen. Always thaw chicken completely in the refrigerator before grilling. Grilling frozen chicken will result in uneven cooking, with the exterior burning before the interior thaws and cooks to a safe temperature.
What causes chicken skin to burn before the meat is cooked through?
Chicken skin typically burns when it is exposed to direct, high heat for too long, or if the overall grill temperature is excessive. The solution is to move the chicken from direct heat to an indirect heat zone much sooner after searing, allowing it to finish cooking gently.
Is it better to grill bone-in chicken with or without skin?
Grilling bone-in chicken with the skin on is often preferred for flavor and moisture. The skin helps protect the meat from drying out and crisps up beautifully, adding texture and taste. If you prefer less fat, you can remove the skin after cooking.