To cook St Louis style ribs on a gas grill, first prepare your ribs with a dry rub. Then, cook them low and slow using indirect heat for 3-4 hours until tender, finishing with a glaze of BBQ sauce if desired. Achieving tender St Louis style ribs on a gas grill requires maintaining a consistent low temperature and monitoring internal doneness.
- Choose St Louis ribs, trim them, and apply your favorite rub.
- Set up your gas grill for indirect cooking at 250-275°F (120-135°C).
- Cook ribs for 3-4 hours, or until they reach 195-203°F (90-95°C) internal temperature.
- Wrap ribs in foil for part of the cook to keep them moist and tender.
- Finish with a tasty BBQ sauce for the last 30 minutes, then rest and enjoy.
How To Cook St Louis Style Ribs On Gas Grill?
Cooking St Louis style ribs on a gas grill means creating a smoky, tender meal without a dedicated smoker. You can achieve amazing results by using indirect heat and managing your grill’s temperature carefully.
Why St Louis Style Ribs?
St Louis style ribs come from the belly of the hog. They are spareribs that have been trimmed, removing the sternum bone and cartilage. This cut gives you a nice rectangular rack, making them easier to cook evenly and present beautifully.
Many pitmasters prefer them for their meaty texture and uniform shape. They offer a great meat-to-bone ratio, perfect for absorbing all those wonderful smoky flavors (National Pork Board). You will love how they turn out.
Gather Your Gear
Before you start, ensure you have the right tools. A few simple items will make your grilling experience much smoother. Don’t worry, you probably have most of these already.
- Gas grill with a lid
- Meat thermometer (digital is best)
- Aluminum foil
- Tongs or heat-resistant gloves
- Spray bottle (for apple cider vinegar or water)
- A sturdy cutting board and sharp knife
Rib Prep: Getting Started Right
Proper preparation is half the battle when it comes to ribs. You want to give your ribs the best chance to be succulent. This step is about setting the stage for flavor.
The Magic of the Membrane
Flip your ribs over and look at the bone side. You will see a thin, silverskin-like membrane. This membrane needs to be removed. It can become tough when cooked and prevent your rub from penetrating the meat.
To remove it, slide a butter knife under one end of the membrane. Then, grip it with a paper towel and peel it off. It might take a few tries, but this step is important for tender ribs.
Seasoning Your Ribs
Now for the flavor! Apply a generous layer of your favorite dry rub to both sides of the ribs. Don’t be shy here. We found that a good rub creates a wonderful crust.
You can make your own rub with salt, pepper, paprika, garlic powder, and onion powder. Or, use a high-quality store-bought rub. Let the ribs sit with the rub for at least 30 minutes, or even overnight in the fridge (BBQ Pitmasters Association).
Setting Up Your Gas Grill for Success
Your gas grill is more versatile than you might think. We will be transforming it into a low-and-slow cooking machine. Think of it as a makeshift smoker.
Indirect Heat Is Your Friend
To cook ribs on a gas grill, you must use indirect heat. This means having burners on one side of the grill lit, and the ribs cooking on the unlit side. For a two-burner grill, light one burner. For a three or four-burner grill, light the outside burners and place ribs in the middle.
This method ensures your ribs cook slowly and evenly, without burning. It mimics the gentle heat of a smoker. Indirect cooking prevents charring and promotes tenderness.
Temperature Control: The Rib Whisperer
Maintaining a consistent temperature is key. Aim for 250-275°F (120-135°C) inside the grill. Use your grill’s thermometer, but a separate digital thermometer placed near the ribs gives a more accurate reading.
Adjust your lit burners as needed to hold this temperature. It might take some fiddling at first, but you will get the hang of it. Slow and steady wins the race with ribs.
The Cooking Process: Low and Slow Wins the Race
This is where the magic happens. Ribs are not a quick cook. Be patient, and your reward will be fall-off-the-bone goodness.
Phase 1: The Smoke Ring Stage
Place your seasoned ribs directly on the grates over the unlit burners. Close the lid. For the first 2-3 hours, let them cook undisturbed. You want to see them develop a nice color. This initial phase helps develop a flavorful bark.
Many experts say this is also a good time to spritz them. A mix of apple cider vinegar and water in a spray bottle can help keep the surface moist. Spritz every 45-60 minutes if you like.
Phase 2: The Foil Wrap (2-2-1 or 3-2-1 Method)
After the initial cooking, it is time to wrap your ribs. This step locks in moisture and helps tenderize them quickly. You can use a common method like 3-2-1 or 2-2-1.
Here’s a simple breakdown:
| Method | Unwrapped (Smoke/Bark) | Wrapped (Tenderize) | Unwrapped (Sauce/Set) |
|---|---|---|---|
| 3-2-1 | 3 hours | 2 hours | 1 hour |
| 2-2-1 | 2 hours | 2 hours | 1 hour |
For St Louis style ribs on a gas grill, the 2-2-1 method often works well. Wrap each rack tightly in heavy-duty aluminum foil. You can add a splash of apple juice or beer inside the foil for extra moisture. Return them to the indirect heat.
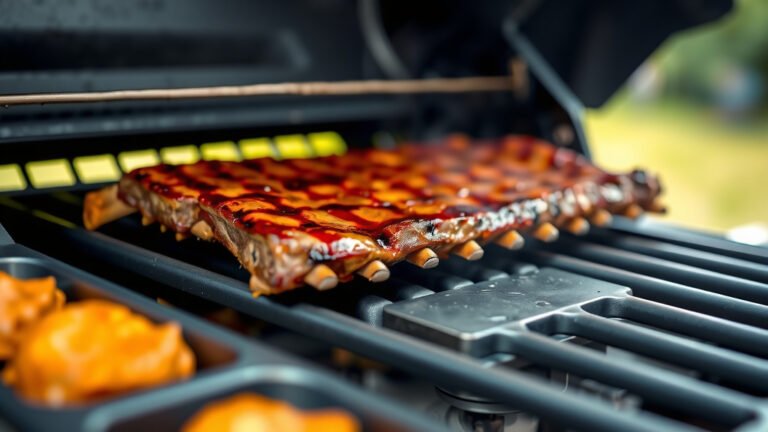
Phase 3: Saucing and Finishing
Once your wrapped cooking time is up, carefully unwrap the ribs. They should be very tender. Now, it is time for the BBQ sauce. Apply your favorite sauce evenly over both sides of the ribs.
Place them back on the grill, still over indirect heat, for another 30-60 minutes. This allows the sauce to caramelize and set. Keep an eye on them to prevent the sauce from burning.
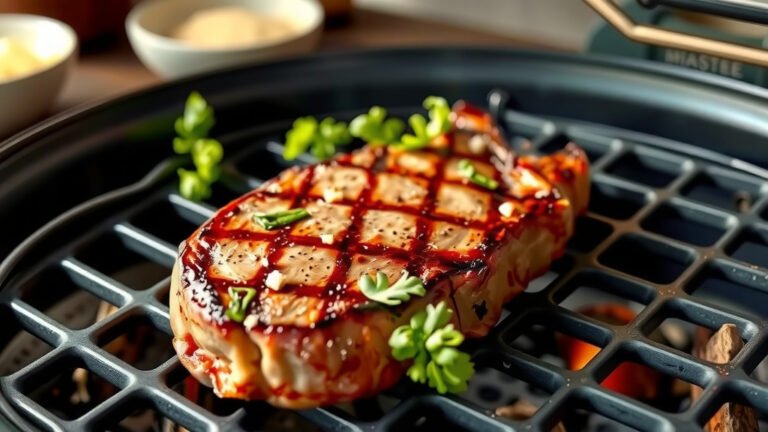
Knowing When Your Ribs Are Done
How do you know when your masterpiece is ready? A meat thermometer is your best friend here. Insert it into the thickest part of the meat, avoiding the bone.
We found that St Louis ribs are perfectly tender when they reach an internal temperature of 195-203°F (90-95°C). Another good test is the bend test. Pick up one end of the rack with tongs. If the rack bends significantly and the meat starts to tear, they are ready to eat.
Resting Your Masterpiece
Just like any good piece of meat, ribs need to rest. Remove them from the grill and let them sit for 10-15 minutes. You can loosely tent them with foil.
This resting period allows the juices to redistribute throughout the meat. Cutting into them too soon can make them dry. Patience here is rewarded with incredibly juicy ribs.
Conclusion
Cooking St Louis style ribs on a gas grill is not only possible but can yield fantastic results. By mastering indirect heat, controlling your temperature, and being patient through the cooking phases, you can create ribs that are juicy, tender, and full of flavor. Give these steps a try, and you will be amazed at what your gas grill can do. Enjoy your homemade, perfectly grilled ribs!
What is the ideal temperature for cooking St Louis ribs on a gas grill?
The ideal temperature for cooking St Louis ribs on a gas grill using indirect heat is between 250°F and 275°F (120-135°C). This low and slow temperature ensures the ribs cook evenly and become very tender without drying out.
Do I need to soak wood chips for my gas grill ribs?
While soaking wood chips can create a longer-lasting smoke, it is not strictly necessary. Many experts say that dry wood chips or chunks produce just as good, if not better, smoke flavor on a gas grill. You can place them in a foil pouch or a smoker box over a lit burner.
How do I prevent my ribs from drying out on the gas grill?
To prevent ribs from drying out, always cook them over indirect heat, maintain a consistent low temperature, and consider wrapping them in foil for part of the cooking process. Spritzing the ribs with apple cider vinegar or apple juice every hour can also add moisture.
What is the 2-2-1 method for ribs, and is it suitable for a gas grill?
The 2-2-1 method refers to cooking ribs unwrapped for 2 hours, wrapped in foil for 2 hours, and then unwrapped with sauce for 1 hour. This method is highly suitable for a gas grill and helps achieve tender, flavorful ribs by breaking down connective tissues while allowing for bark development and sauce caramelization.
Can I use a dry rub and then add sauce later, or should I choose one?
You absolutely can use both! Applying a dry rub first builds a foundational flavor and creates a delicious bark. Then, adding BBQ sauce during the final phase of cooking allows the sauce to caramelize and set, giving you the best of both worlds. Many grill masters use this exact technique for maximum flavor.