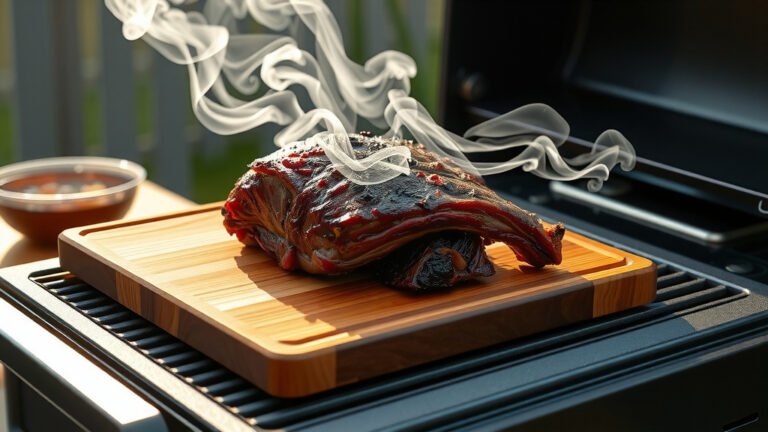
How to build a smoker grill typically involves combining a firebox, a cooking chamber, and a chimney system, often repurposing materials like steel drums or old propane tanks. You will need to gather essential tools, select appropriate materials, and follow safety precautions to create a functional and efficient DIY smoker grill.
Building your own smoker grill offers a deeply satisfying experience and allows for unique customization that store-bought models simply cannot match. It can save you money while teaching valuable skills, ensuring your outdoor cooking setup perfectly fits your needs. Get ready to enjoy delicious, smoky flavors from your very own creation!
How To Build A Smoker Grill?
To build a smoker grill, you typically start with a main chamber, add a heat source or firebox, incorporate a chimney for smoke flow, and install temperature controls. This process transforms raw materials into a cooking powerhouse. It’s a rewarding project, allowing you to craft a unique piece of equipment.
Why Build Your Own Smoker Grill?
Ever dream of custom-built equipment in your backyard? Building your own smoker grill gives you that exact control. You decide on the size, features, and even the look, making it truly yours. It’s a project that brings out your inner craftsman.
Cost Savings and Customization
Many experts say that constructing your own smoker can be significantly cheaper than buying a comparable model. You reuse materials, learn valuable skills, and avoid paying for labor and brand names. Plus, every modification is exactly what you envision, from grate height to airflow.
Essential Tools and Materials You’ll Need
Before you start cutting and welding, a bit of planning goes a long way. Think of it like a chef preparing ingredients; you need everything ready. What tools and materials will help you create your dream smoker?
Gathering Your Toolkit
A successful build often hinges on having the right tools. You’ll likely need a welder, an angle grinder with cutting and grinding discs, and a heavy-duty drill. Don’t forget metal snips, a tape measure, and various wrenches. Always prioritize safety glasses and gloves, as research shows eye and hand injuries are common in DIY projects (Mayo Clinic).
Selecting Your Base Materials
Your smoker’s core material determines its durability and heat retention. Many DIY builders choose steel drums or old propane tanks. These materials are robust and can withstand high temperatures. Here’s a quick comparison:
| Material | Pros | Cons | Typical Use |
|---|---|---|---|
| Steel Drum (55-gallon) | Affordable, easy to find, good size | Requires thorough cleaning, thinner walls | Ugly Drum Smoker (UDS), Small Offset |
| Propane Tank (250-gallon+) | Thick walls, excellent heat retention, durable | Expensive, heavy, requires specific safety steps | Large Offset Smoker, Reverse Flow |
| Sheet Metal (Thick gauge) | Custom sizing, new material, no cleaning | Higher cost, requires more welding skill | Box Smokers, Custom Fireboxes |
We found that food-grade drums are safest if you choose a steel drum. For propane tanks, ensure they are completely purged of gas before cutting (NFPA guidelines).
Choosing Your Smoker Design
There isn’t a single “right” way to build a smoker. Different designs offer various benefits for cooking and construction. Which style speaks to your inner grill master?
The Offset Smoker Explained
An offset smoker features a firebox attached to the side of a larger cooking chamber. Heat and smoke travel horizontally through the main chamber, cooking the food. Many experts say this design provides a smoother, more even smoke flavor. It allows for direct fire management without disturbing your food.
The Ugly Drum Smoker (UDS) Approach
The UDS is a vertical smoker built from a 55-gallon steel drum. The fire sits at the bottom, and the food cooks on grates above, with heat and smoke rising. This design is incredibly efficient and known for producing juicy results. It’s often considered one of the simpler DIY builds for beginners.
Step-by-Step Construction Guide
Ready to turn your materials into a masterpiece? This is where the real fun begins. Remember, patience is key, and measuring twice saves headaches later.
Preparing Your Main Chamber
If you’re using a drum or tank, preparation is crucial. You’ll need to clean it thoroughly. For drums, burn out any residue. For tanks, purge them and fill them with water before cutting. We found that cleanliness prevents off-flavors and ensures safety. Then, mark and cut openings for doors and vents.
- Thoroughly clean and degrease the container.
- For drums, conduct a controlled burn to remove internal linings.
- For propane tanks, fill with water to displace residual gas.
- Carefully mark cutting lines for doors, firebox opening, and chimney.
- Use an angle grinder or plasma cutter for precise cuts.
Building the Firebox (Offset Design)
For an offset smoker, the firebox is where the magic happens. You can construct this from a smaller steel drum, a separate tank, or thick sheet metal. Weld it securely to the side of your main cooking chamber. Ensure you have an adjustable air intake on the firebox for temperature control.
Attaching the Chimney and Vents
A chimney is vital for drawing smoke through the cooking chamber and maintaining airflow. Position it at the opposite end of the firebox on your main chamber. Install an adjustable damper on the chimney. You’ll also want exhaust vents, often on the main chamber, to fine-tune your smoke flow. Research often connects proper airflow with consistent temperatures (NIH).
Adding Grates and Thermometers
Inside your main chamber, install support rails for your cooking grates. These should be sturdy and allow for multiple height adjustments. For accurate cooking, you’ll need at least one reliable thermometer. Place it at grate level, not just on the lid, for the most accurate readings. Many experts suggest using a bimetal thermometer for durability.
Important Safety Considerations
Safety isn’t just a suggestion; it’s a necessity when working with metal and fire. Protecting yourself ensures your project is a joy, not a hazard.
Welding and Cutting Safety
When welding or cutting metal, always wear appropriate personal protective equipment. This includes a welding helmet, thick gloves, and long sleeves. Ensure good ventilation to avoid inhaling fumes. We found that following manufacturer guidelines for your tools prevents accidents and extends their lifespan.
Proper Curing and First Burn
Before cooking your first meal, you must cure your new smoker. This process burns off any manufacturing oils, paints, or residues. Run your smoker empty at a high temperature for several hours. This also helps season the metal, protecting it from rust. Many guidelines point to a thorough curing process as a good first step for longevity (USDA).
Testing Your New Smoker Grill
After all your hard work, it’s time for the maiden voyage! But before you load it with meat, run a few test burns. This helps you understand how your smoker holds and regulates temperature. You’re essentially learning its personality. Adjust vents to see how quickly temperatures respond. This practice session ensures your first cook is a success. Here’s a quick checklist:
- Check all welds and fasteners for security.
- Verify that doors and lids seal properly to minimize smoke loss.
- Calibrate your thermometers if possible, or confirm their accuracy.
- Perform a “dry run” with charcoal or wood to learn temperature control.
- Ensure smoke exits the chimney efficiently, indicating good draw.
- Have a fire extinguisher nearby during initial testing, just in case.
Conclusion
Building your own smoker grill is more than just a project; it’s an investment in your culinary adventures and a testament to your skills. You’ve gone from raw materials to a fully functional cooking machine, ready to infuse your favorite foods with delicious, smoky flavor. Take pride in your creation and enjoy every mouth-watering bite produced by your very own custom smoker. Happy smoking!
How long does it typically take to build a DIY smoker grill?
The time to build a DIY smoker grill can vary widely, from a weekend for a simple Ugly Drum Smoker (UDS) to several weeks for a complex offset smoker requiring welding skills. It largely depends on your experience, the complexity of the design, and the tools available to you.
What is the most crucial factor for maintaining consistent temperature in a smoker?
The most crucial factor for consistent temperature in a smoker is effective airflow management. This involves properly designed intake vents on the firebox and an adjustable exhaust chimney. Being able to control how much oxygen feeds the fire and how smoke exits allows you to fine-tune the heat.
Can I use any metal drum to build an Ugly Drum Smoker (UDS)?
No, you should only use food-grade steel drums that have not previously held hazardous chemicals. It’s essential to thoroughly clean and burn out any internal linings or residues before converting a drum into a smoker to ensure safety and prevent chemical contamination of your food.
Do I need welding skills to build a smoker grill?
While many advanced smoker designs, especially offset smokers, benefit greatly from welding for durability and a good seal, you don’t always need welding skills. Designs like the Ugly Drum Smoker (UDS) can often be built using bolts, rivets, and high-temperature sealants, making them accessible for beginners.
How do I prevent rust on my homemade smoker grill?
To prevent rust, ensure you use high-temperature, rust-resistant paint on the exterior of your smoker. Internally, a good curing process and regular seasoning with cooking oil after use will create a protective layer. Always store your smoker covered and in a dry place when not in use.