Cooking ribs on a pellet grill at 350 degrees Fahrenheit typically takes about 2 to 3 hours for baby back ribs, and 3 to 4 hours for spare ribs.
The exact timing will depend on the rib type, thickness, and your desired tenderness, so always check the internal temperature for best results.
For a quick rundown, here’s what you need to know:
- Baby back ribs generally cook faster, requiring 2 to 3 hours.
- Larger spare ribs will need a bit more time, usually around 3 to 4 hours.
- Always aim for an internal temperature between 195-203°F for fall-off-the-bone tender ribs.
- A good meat thermometer is your best friend for precise cooking.
- Consider wrapping your ribs in foil midway through for extra moisture.
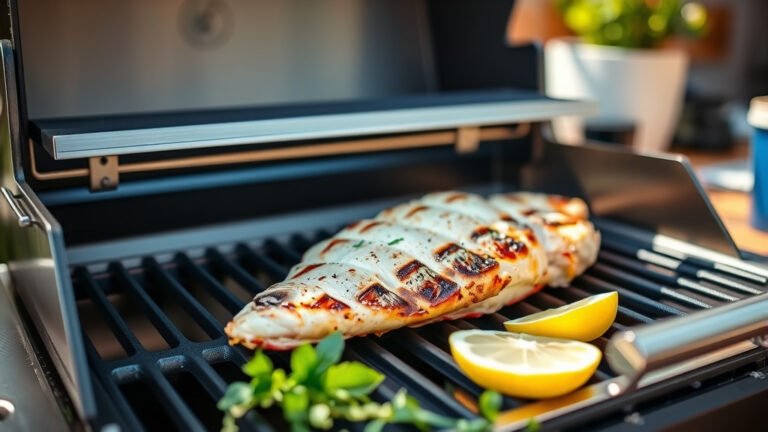
How Long To Cook Ribs On Pellet Grill At 350?
For baby back ribs, plan for 2 to 3 hours, and for spare ribs, expect 3 to 4 hours at 350°F on your pellet grill. Always aim for an internal temperature of 195-203°F for fall-off-the-bone tenderness.
Why 350°F for Ribs on a Pellet Grill?
You might usually hear about low and slow smoking for ribs. But cooking at 350°F on a pellet grill offers a faster alternative without sacrificing much flavor. It’s a great choice when you have less time but still want amazing results.
Understanding the Temperature Choice
A higher temperature like 350°F helps render fat quickly and develops a nice crust, often called a bark, on your ribs. It’s a bit of a balancing act, ensuring tenderness while still getting that smoky flavor from the pellets.
Many experts say this temperature is ideal for those who want a quicker cook. It keeps the meat juicy if managed correctly, and you still get good smoke penetration from the pellet grill’s consistent heat (USDA food science research).
Rib Types Matter for Cook Time
Not all ribs are created equal, and their size and fat content definitely impact how long they need to cook. Knowing your rib type is the first step to success.
Baby Back Ribs: Shorter Cook Times
Baby back ribs, often called loin ribs, are leaner and smaller. They cook up relatively fast, making them a popular choice for weeknight grilling. You’ll find them curling up nicely as they cook.
Spare Ribs: A Bit More Patience
Spare ribs, including St. Louis style (which are trimmed spare ribs), are larger, fattier, and have more connective tissue. This means they need a longer cooking time to break down and become wonderfully tender. Think of it as a low and slow effect, even at 350°F.
Prepping Your Ribs for Success
Good preparation is like building a strong foundation for a house. It makes all the difference in the final product. Don’t skip these crucial steps.
Removing the Membrane
The thin, papery membrane on the bone side of your ribs needs to come off. It creates a tough, chewy texture if left on. We found that gently prying it up with a butter knife and pulling it with a paper towel makes this job much easier.
Seasoning Your Ribs Right
A good rub is key to delicious ribs. Apply a generous layer of your favorite rub, making sure to coat all surfaces. Let the ribs sit with the rub for at least 30 minutes, or even better, a few hours in the fridge to let the flavors really sink in.
The Pellet Grill Setup
Your pellet grill is a fantastic tool for consistent heat. Getting it ready correctly means your ribs will cook evenly and to perfection. It’s about setting the stage for your masterpiece.
Maintaining 350°F Consistently
Preheat your pellet grill to a stable 350°F. Ensure you have enough pellets in the hopper for the entire cook time. Fluctuating temperatures can lead to uneven cooking, so keep that lid closed as much as possible to hold the heat.
Cooking Stages for Juicy Ribs
Cooking ribs is often seen as an art, but it also has a science. Breaking the cook into stages helps manage moisture and tenderness. It’s like a mini-journey for your ribs.
The Initial Smoke Phase
Start your ribs directly on the grates, bone side down. Let them cook unwrapped for the first 1.5 to 2 hours. This phase allows the smoke to penetrate deeply, developing that beautiful flavor and a nice outer crust.
To Wrap or Not to Wrap?
Many grill masters suggest wrapping your ribs in foil after the initial smoke. This helps steam the ribs, making them incredibly tender and preventing them from drying out. You can add a splash of apple juice or broth inside the foil for extra moisture.
If you choose to wrap, cook them wrapped for about 1 hour at 350°F. This method helps the ribs power through the “stall” where temperatures might plateau (BBQ research).
The Final Unwrapped Stage
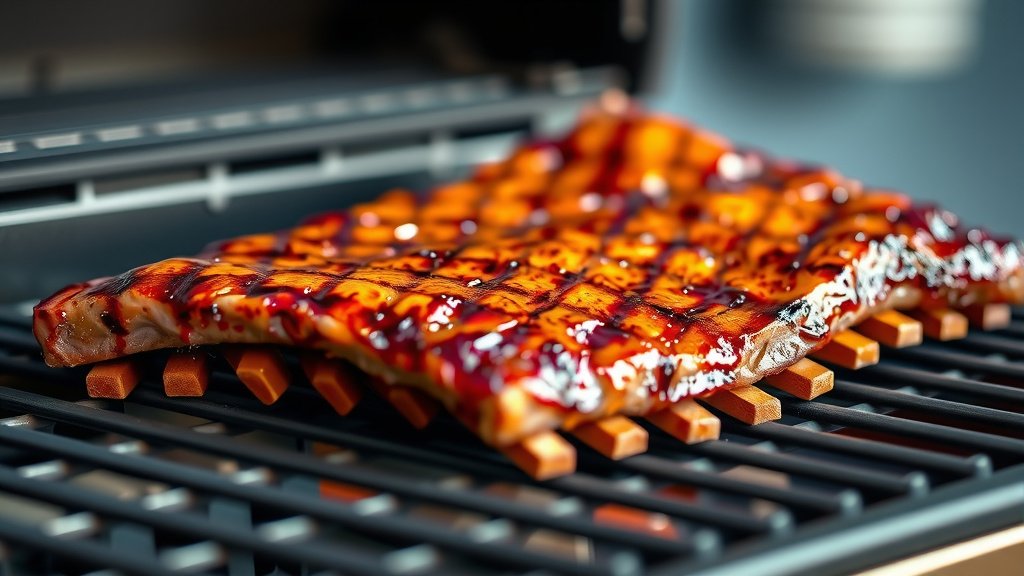
After wrapping, unwrap your ribs for the final 30-60 minutes. This allows the bark to firm up again and any glaze or sauce to set. This is where your ribs get their beautiful finish.
Monitoring Doneness: The Key to Perfection
Never rely solely on time when cooking ribs. Different racks vary in size and fat content. Your senses and a good thermometer are your most reliable tools.
Using a Meat Thermometer
The most accurate way to check for doneness is an internal temperature probe. Insert it into the thickest part of the meat, avoiding the bones. We found that for truly tender ribs, aiming for 195-203°F is ideal (food safety guidelines).
The “Bend Test” for Tenderness
Pick up a rack of ribs with tongs in the middle. If they are done, the rack should bend significantly, and the meat should start to crack on the surface. This is a great visual cue for perfect tenderness.
The Wiggle Test
Another simple test is to gently wiggle one of the bones. If it twists easily or feels loose, your ribs are likely ready. You want them tender, but not falling off the bone prematurely, unless that’s your personal preference.
Troubleshooting Common Rib Issues
Even seasoned grillers run into snags. Here are quick fixes for a couple of common rib dilemmas. Don’t worry, you’ve got this!
Ribs Drying Out?
If your ribs are looking dry, they might be overcooked or didn’t have enough moisture during the wrap stage. Next time, try wrapping them sooner or adding more liquid. A spritz of apple cider vinegar and water every hour can also help immensely.
Ribs Not Tender Enough?
Under-cooked ribs usually mean they need more time. If your temperature is right, simply let them cook longer until they pass the bend and wiggle tests. Sometimes, patience is the secret ingredient.
Pellet Flavor Pairings for Ribs
Choosing the right pellets can enhance your rib experience. Different woods offer different flavor profiles, allowing you to customize your cook. It’s like picking the perfect wine pairing.
- Hickory: A classic choice, offering a strong, smoky bacon-like flavor that pairs well with pork.
- Apple: Provides a milder, slightly sweet and fruity smoke, excellent for a subtle finish.
- Cherry: Gives a rich, subtly sweet flavor and a beautiful mahogany color to your ribs.
- Oak: A medium-strength smoke, versatile and pairs well with almost any meat.
Your Rib Cooking Checklist
Keep these steps in mind for a smooth and tasty rib cook:
- Preheat your pellet grill to a stable 350°F.
- Remove the tough membrane from the back of the ribs.
- Apply your favorite rub generously.
- Cook ribs unwrapped for the first 1.5 to 2 hours.
- Wrap ribs in foil (optional) with liquid for about 1 hour.
- Finish unwrapped until tender, targeting 195-203°F internal temp.
- Let them rest for 15-20 minutes before slicing.
Rib Cooking Time at 350°F Snapshot
Here’s a quick reference to help you plan your cook:
| Rib Type | Approximate Cook Time at 350°F | Target Internal Temperature | Key Doneness Test |
|---|---|---|---|
| Baby Back Ribs | 2 – 3 hours | 195-203°F | Bend Test, Probe Tender |
| Spare Ribs (including St. Louis) | 3 – 4 hours | 195-203°F | Bend Test, Probe Tender |
Conclusion
Cooking ribs on your pellet grill at 350°F is a fantastic way to enjoy delicious, tender ribs in less time than traditional low-and-slow methods. By understanding your rib type, preparing them well, and monitoring their internal temperature, you’re set for success.
Remember, patience and a good meat thermometer are your best allies. You’ll be serving up mouth-watering ribs that your family and friends will rave about. Happy grilling!
Frequently Asked Questions
Can I cook ribs at a lower temperature, like 225°F, on a pellet grill?
Yes, absolutely! Cooking ribs at 225°F is the classic “low and slow” method and typically takes 5-6 hours for baby backs and 6-8 hours for spare ribs. This method often results in a deeper smoke ring and very tender meat, but it requires significantly more time.
Do I need to spritz my ribs while cooking at 350°F?
Spritzing ribs, usually with apple cider vinegar, water, or apple juice, can help keep them moist and prevent the surface from drying out. While not strictly necessary at 350°F, especially if you plan to wrap, it’s a good practice if you notice the ribs looking dry or if you prefer to cook them unwrapped for the entire time.
What internal temperature means my ribs are fully cooked and safe to eat?
Ribs are considered safe to eat when they reach an internal temperature of 145°F (USDA). However, for that desired fall-off-the-bone tenderness, you’ll want to cook them until they reach 195-203°F. This higher temperature allows the collagen and connective tissues to break down properly.
Can I apply BBQ sauce during the cook, or should I wait until the end?
It’s best to apply BBQ sauce during the last 30-45 minutes of cooking. Many BBQ sauces contain sugar, which can burn easily at 350°F, creating a bitter taste. Adding it towards the end allows the sauce to caramelize and set without scorching.
What if my ribs are tough after cooking for the recommended time?
If your ribs are still tough, they likely need more time to cook. Connective tissue needs prolonged heat to break down into gelatin, which makes the meat tender. Check the internal temperature; if it’s below 195°F, keep cooking. Wrapping them can also help speed up the tenderizing process.