Grilling ribs on a gas grill typically takes between 2 to 5 hours, depending on the type of rib and your preferred tenderness. For perfect results, aim for an internal temperature of 190-203°F (88-95°C) and use indirect heat at a steady 225-275°F (107-135°C).
Baby back ribs usually cook faster, around 2-3 hours, while larger spare ribs or St. Louis style ribs might need 3-5 hours to become tender and fall-off-the-bone delicious.
Here’s a quick overview of what you’ll find for grilling ribs on a gas grill:
- Cooking ribs on a gas grill means setting up for indirect heat, keeping temperatures low and steady.
- Baby back ribs usually cook for 2-3 hours, while spare ribs might take 3-5 hours.
- The sweet spot for grill temperature is 225-275°F (107-135°C).
- Always check for an internal temperature between 190-203°F (88-95°C) for perfect tenderness.
- The “bend test” and “bone wiggle” are great ways to tell if your ribs are done.
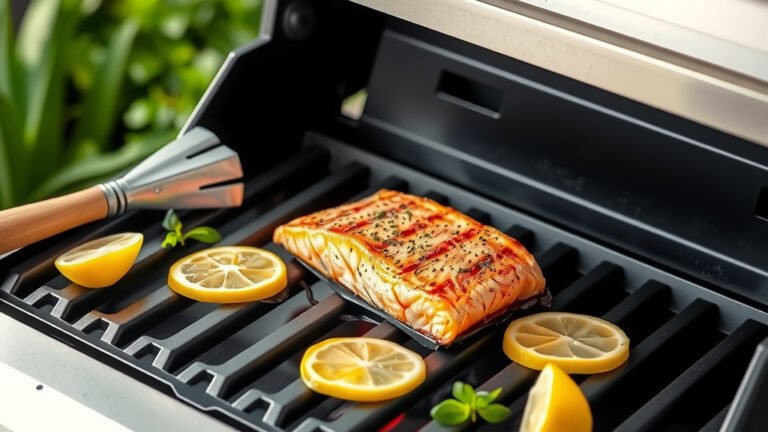
How Long Do You Grill Ribs On A Gas Grill?
When grilling ribs on a gas grill, expect a cooking time of 2 to 5 hours, mainly using indirect heat. This low and slow method helps make them incredibly tender.
Setting the Stage for Great Ribs on Your Gas Grill
Ever wonder why some ribs are dry, and others melt in your mouth? It’s all about control. With a gas grill, you have amazing temperature control, which is your secret weapon.
You’re not just burning meat; you’re transforming it. Think of your grill as an outdoor oven for this job. We want gentle, consistent heat.
Why Indirect Heat is Your Best Friend
Direct heat is great for searing a steak, but it’s too harsh for ribs. It burns the outside before the inside gets tender.
Indirect heat means cooking your ribs away from the direct flame. This setup mimics an oven, letting the ribs cook evenly and slowly. Many experts say this is the key to moist, tender ribs.
Prepping Your Gas Grill for Ribs
Getting your grill ready is super simple. First, clean your grates to prevent sticking. Nobody likes ribs with old grill residue, right?
Next, you’ll set up your grill for two-zone cooking. This means one side of the grill will be hot, and the other will be cool.
The Two-Zone Setup
To create two zones, turn on burners on one side of your grill to medium-low. Leave the burners on the other side completely off. We found that this setup works best for consistent, low heat.
The ribs will cook on the side with the burners off. This gives them a gentle, smoky hug without scorching.
Different Rib Types and Their Grilling Times
Not all ribs are created equal, and their cooking times vary. Knowing your rib type helps you plan your day.
Think of it like different cuts of meat for a stew; some need more time to soften up.
Baby Back Ribs
Baby back ribs are smaller and leaner, typically found higher on the hog’s back. They usually cook faster because they have less meat.
For baby back ribs, plan for about 2 to 3 hours of grilling time on indirect heat. They are a great choice if you’re a bit short on time.
Spare Ribs
Spare ribs are larger, meatier, and come from the belly section. They have more fat and connective tissue, which means more flavor, but also more cooking time.
Expect spare ribs to need 3 to 5 hours on the grill. This extra time allows that fat to render and makes them incredibly succulent.
St. Louis Style Ribs
St. Louis style ribs are essentially spare ribs that have been trimmed. The brisket bone and skirt meat are removed, creating a neater, rectangular rack.
Because they are trimmed spare ribs, their cooking time is similar: 3 to 5 hours. They are easier to handle and serve due to their uniform shape.
The Importance of Temperature Control
Maintaining a consistent grill temperature is absolutely vital. Imagine trying to bake a cake with a fluctuating oven; it just wouldn’t work.
Your grill’s thermometer is your best friend here. Trust it, and adjust your burner settings as needed.
Target Temperature Range
For grilling ribs on a gas grill, aim for an ambient grill temperature between 225-275°F (107-135°C). This range is low enough to tenderize the meat slowly but warm enough to cook it through.
Many experts suggest staying closer to 225°F for the most tender outcome, especially for longer cooks.
The 3-2-1 Method for Ribs (A Popular Guide)
The “3-2-1 method” is a popular technique, especially for spare ribs, but it can be adapted for any rib type. It breaks down the cooking into three distinct phases:
- Phase 1 (3 hours): Smoke or grill the ribs uncovered on indirect heat at 225-250°F. This builds flavor and creates a bark.
- Phase 2 (2 hours): Wrap the ribs tightly in foil with a little liquid (like apple juice or broth). Return them to the grill (still indirect heat). This steaming phase tenderizes them rapidly.
- Phase 3 (1 hour): Unwrap the ribs, apply your favorite BBQ sauce, and put them back on the indirect heat. This allows the sauce to caramelize and set.
Remember to adjust times for baby backs; they might be better suited to a 2-2-1 or 2-1-1 method due to their smaller size.
Knowing When Your Ribs Are Truly Done
How do you know when your ribs are ready to leave the grill? It’s not just about time. It’s about how they feel and their internal temperature. Here are a few reliable signs.
Internal Temperature
The most accurate way to check for doneness is with a meat thermometer. Many guidelines point to an internal temperature of 190-203°F (88-95°C) as ideal for tender ribs (USDA recommends a minimum of 145°F for safety, but higher temps are needed for tenderness).
Insert the thermometer between the bones, avoiding the bone itself, for the most accurate reading. If the meat isn’t hitting that mark, give it more time.
The Bend Test
This is a fun and simple test. Pick up a rack of ribs with tongs, holding it at one end. If the ribs are done, they should bend significantly in the middle without breaking. Cracks will appear on the surface, but the rack should not completely fall apart.
If they feel stiff and barely bend, they need more time. If they completely fall apart, you might have gone a bit too far.
The Bone Wiggle
Another classic test is the bone wiggle. Gently twist one of the bones near the middle of the rack. If it twists easily and feels loose, the ribs are likely done. This shows the connective tissue has broken down beautifully.
Glazing and Resting Your Ribs
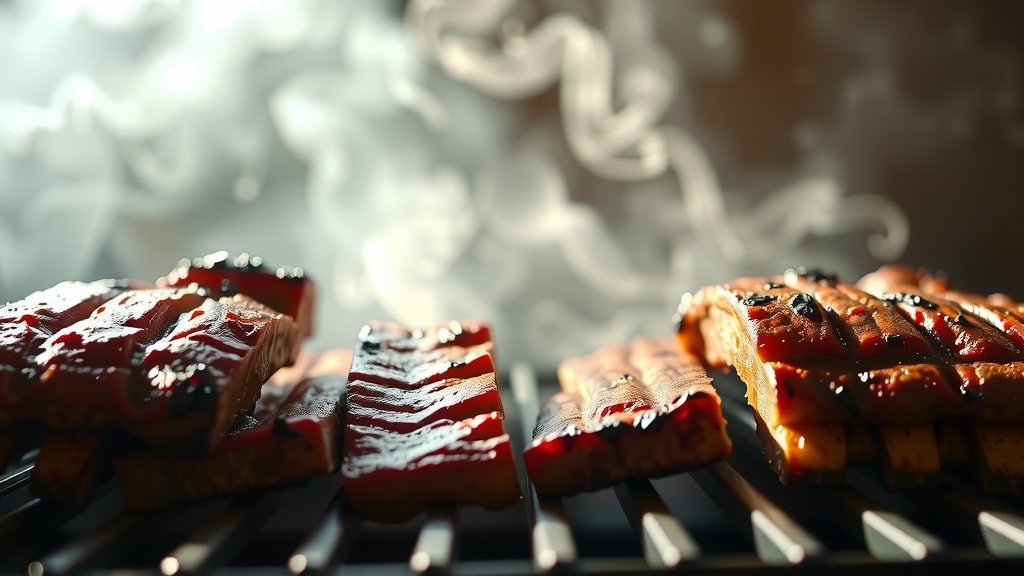
Once your ribs hit that perfect temperature and pass the bend test, it’s time for the final touches. If you like saucy ribs, this is when you apply your favorite BBQ sauce.
Brush the sauce on during the last 30 minutes of cooking. This allows it to warm up and caramelize slightly without burning. After glazing, let your ribs rest, loosely tented with foil, for 10-15 minutes. This helps the juices redistribute, making them even more moist.
Common Rib Grilling Mistakes to Avoid
We’ve all been there, making a few slip-ups. But with ribs, avoiding these common errors can make a huge difference.
- Don’t rush the cook: Low and slow is the mantra for tender ribs.
- Don’t cook over direct heat: This leads to burnt outsides and tough insides.
- Avoid too much peeking: Every time you open the lid, heat escapes, extending cooking time.
- Don’t skip the membrane removal: This thin layer on the back of the ribs gets tough when cooked.
- Don’t forget to rest them: Resting is as important as the cook itself for juicy meat.
- Avoid inconsistent temperatures: Keep an eye on your grill thermometer and adjust.
Rib Grilling Time Table Overview
Here’s a quick summary to help you plan your next rib feast.
| Rib Type | Grill Temperature | Approximate Cook Time (Indirect) | Doneness Indicator (Internal Temp) |
|---|---|---|---|
| Baby Back Ribs | 225-275°F (107-135°C) | 2-3 hours | 190-203°F (88-95°C) |
| Spare Ribs | 225-275°F (107-135°C) | 3-5 hours | 190-203°F (88-95°C) |
| St. Louis Style Ribs | 225-275°F (107-135°C) | 3-5 hours | 190-203°F (88-95°C) |
Conclusion
Grilling ribs on a gas grill is a rewarding process that brings amazing flavor to your table. The key is understanding your grill, controlling the temperature, and being patient. By using indirect heat, aiming for the right internal temperature, and knowing how to test for doneness, you’ll create ribs that are juicy, tender, and truly delicious.
Don’t be afraid to experiment with rubs and sauces to find your perfect rib recipe. Your gas grill is a powerful tool for this, allowing you to fine-tune the heat for outstanding results every time. Happy grilling!
Frequently Asked Questions About Grilling Ribs
How do I add smoky flavor to ribs on a gas grill?
You can add smoky flavor by using a smoker box filled with wood chips (like apple, hickory, or cherry) placed over one of the lit burners. Make sure to soak the wood chips in water for about 30 minutes first to create more smoke.
Can I cook ribs faster at a higher temperature?
While you can cook ribs at a higher temperature, it’s not generally recommended for the best results. Higher heat often leads to tougher, drier ribs because the connective tissue doesn’t have enough time to break down properly. Low and slow is always better for tenderness.
Do I need to remove the membrane from my ribs?
Yes, it’s highly recommended to remove the thin, silverskin membrane from the back of the ribs. If left on, it becomes tough and chewy when cooked, making the ribs less enjoyable to eat. It also prevents seasonings and smoke from penetrating the meat.
What kind of liquid should I use if I wrap my ribs?
If you’re using a wrapping method, like the 3-2-1 method, popular liquids include apple juice, apple cider vinegar, beer, or even a little water. These liquids create steam inside the foil, which helps tenderize the ribs and keeps them moist.
How do I prevent my BBQ sauce from burning on the ribs?
To prevent your BBQ sauce from burning, apply it only during the last 15-30 minutes of grilling. This gives the sauce enough time to caramelize and set without scorching. If you apply it too early, the sugars in the sauce will burn at lower temperatures.