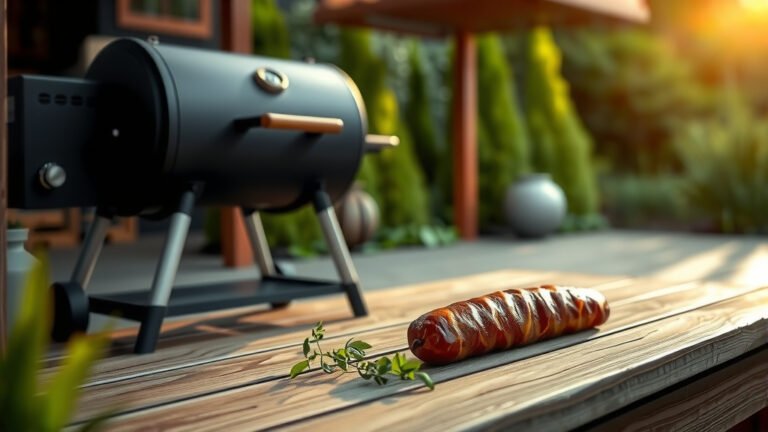
To cook baby back ribs on a pellet grill, you typically follow a low and slow approach, often using the popular 3-2-1 method for consistently tender, fall-off-the-bone results.
This method for baby back ribs involves smoking for three hours, wrapping for two hours, and then saucing and cooking for a final hour at a consistent temperature, usually between 225°F and 275°F (107-135°C).
TL;DR: How to Cook Baby Back Ribs on a Pellet Grill
- Prepare your baby back ribs by removing the tough membrane and applying your favorite dry rub generously.
- Preheat your pellet grill to 225-275°F, selecting fruit wood pellets like apple or cherry for a sweet smoke flavor.
- Execute the 3-2-1 method: 3 hours smoking, 2 hours wrapped in foil with liquid, then 1 hour unwrapped with sauce.
- Verify doneness using the bend test and aiming for an internal temperature of 195-203°F for ultimate tenderness.
- Allow the ribs to rest for 10-15 minutes before slicing; this crucial step locks in all those delicious juices.
How To Cook Baby Back Ribs On A Pellet Grill?
Cooking baby back ribs on a pellet grill is a fantastic way to achieve that sought-after smoky flavor and incredibly tender texture with minimal effort. It really is all about managing consistent temperature and embracing a little patience.
Understanding Baby Back Ribs
Baby back ribs come from the upper rib cage of the hog, right where the loin connects. They are known for being shorter, leaner, and naturally more tender than spare ribs. Their mild flavor makes them a versatile choice, pairing beautifully with a variety of rubs and sauces. You might find them slightly more expensive, but many grill enthusiasts believe the taste and texture are well worth it.
Why Choose a Pellet Grill for Ribs?
Pellet grills excel at maintaining a stable temperature, much like a convection oven, but with the added benefit of real wood smoke. This precision temperature control is essential for cooking ribs evenly and achieving that perfect tenderness. You can often set your desired temperature and let the grill do the hard work, freeing you up to enjoy your day.
Essential Tools You’ll Need
- A dependable pellet grill
- Quality wood pellets (apple, cherry, and pecan are highly recommended)
- A sharp knife and a sturdy cutting board
- An accurate instant-read meat thermometer
- Heavy-duty aluminum foil or butcher paper
- A spray bottle (for spritzing liquid like apple cider vinegar)
- A basting brush for applying sauce
- Your preferred dry rub and barbecue sauce
Preparing Your Baby Back Ribs
The initial steps you take to prepare your ribs are incredibly important. Don’t rush these; they lay the groundwork for a truly outstanding meal.
Step 1: Removing the Membrane
This might seem like a small detail, but it’s critical. On the underside of the ribs (the bone side), there’s a thin, silverskin-like membrane. Leaving it on results in chewy ribs that don’t absorb flavor well. We found that slipping a butter knife or spoon handle under an edge, then grabbing it with a paper towel and pulling firmly, works best. This simple step ensures your ribs will be super tender and flavorful.
Step 2: Applying Your Rib Rub
With the membrane removed, it’s time for flavor. Generously apply your chosen dry rub all over the ribs, ensuring every surface is covered. Think of it like a flavor foundation that will become a delicious “bark” during cooking. Many experts suggest letting the rub sit on the ribs for at least 30 minutes, or even overnight in the refrigerator, allowing the flavors to penetrate the meat deeply. You want the ribs to have a uniform coating.
The 3-2-1 Method: Your Rib Blueprint
The 3-2-1 method is a widely recognized and highly effective strategy for smoking baby back ribs. It divides the cooking into three distinct phases, each contributing uniquely to the final tender, smoky result.
Phase 1: The Smoke (3 Hours)
Start by preheating your pellet grill to a steady 225-250°F (107-121°C). Once it reaches temperature, place your seasoned ribs directly on the grill grates, bone-side down. Close the lid and let them smoke undisturbed for three hours. This initial phase is where the ribs absorb most of that wonderful smoky flavor, and a rich, mahogany-colored bark begins to develop. Some pitmasters like to spritz the ribs every hour with apple cider vinegar or juice to maintain moisture.
Phase 2: The Wrap (2 Hours)
After three hours, it’s time to tenderize. Carefully remove the ribs from the grill and place each rack onto a large sheet of heavy-duty aluminum foil or butcher paper. Before sealing, add a splash of liquid—apple juice, beer, or even a little butter and brown sugar—into the packet. This creates a moist, steaming environment. Wrap the ribs tightly, return them to the grill, and continue cooking for another two hours at the same temperature. This steaming action helps to break down tough connective tissues, making the ribs incredibly soft. We found that a tight wrap is crucial for retaining moisture.
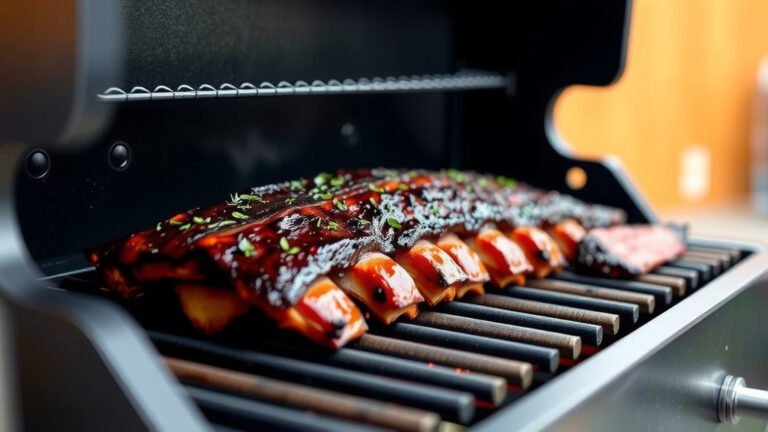
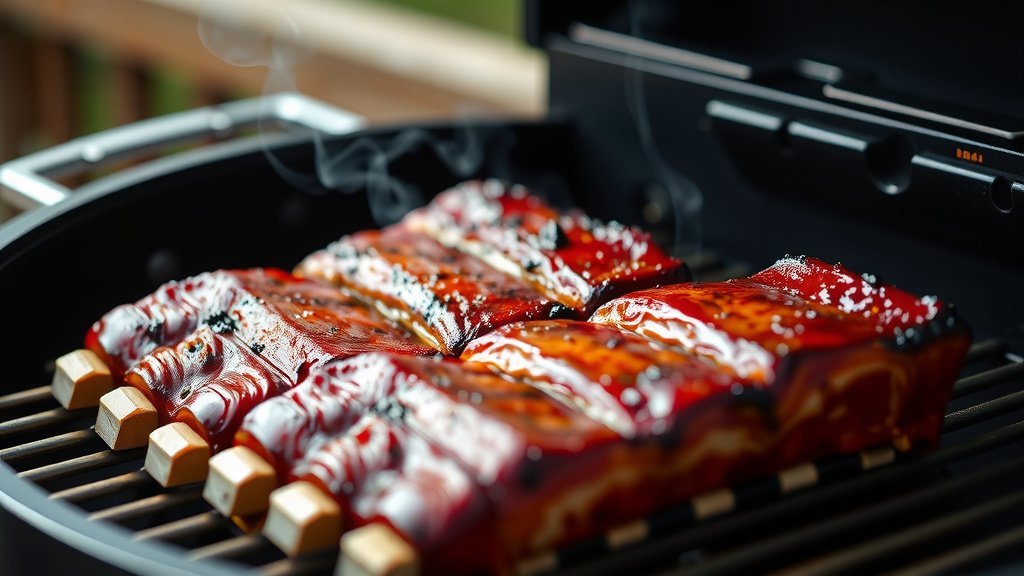
Phase 3: The Sauce and Finish (1 Hour)
Finally, gently unwrap your ribs. They will be very tender, so handle them with care. If you prefer sauced ribs, brush a generous layer of your favorite barbecue sauce over both sides. Place the unwrapped ribs back on the grill for the final hour. This allows the sauce to caramelize and thicken into a delicious, sticky glaze. If you prefer dry ribs, simply return them to the grill unwrapped for 30-60 minutes to firm up the bark. During this final phase, you’re primarily aiming for that perfect saucy finish or a slightly crispier bark.
Checking for Doneness: The Bend Test and Temperature
Knowing when your baby back ribs are perfectly done is an art, but there are reliable methods to guide you. You want them tender, but not falling apart uncontrollably.
| Method | Description | What It Tells You |
|---|---|---|
| The Bend Test | Gently pick up one end of a rack with tongs in the middle. If the rack bends easily and the meat visibly cracks, they’re ready. | Indicates connective tissues have fully broken down, yielding tender meat. |
| Internal Temperature | Insert an instant-read thermometer into the thickest part of the meat, avoiding the bones. | A temperature range of 195-203°F (90-95°C) typically means melt-in-your-mouth ribs (research often connects this range with optimal collagen breakdown). |
| Bone Wiggle Test | Gently twist a single rib bone. If it feels loose and wiggles freely, or pulls out easily, your ribs are done. | Another good sign of the meat being sufficiently tender. |
Resting Your Ribs
Just like with a steak or roast, resting your ribs after cooking is a non-negotiable step. Once you remove them from the grill, tent them loosely with foil and let them sit for 10-15 minutes. This vital pause allows the juices within the meat to redistribute evenly, ensuring every bite is incredibly juicy and flavorful. We found this brief rest is key to preventing dry ribs.
Troubleshooting Common Rib Problems
Even experienced grillers encounter hiccups sometimes. Here are quick solutions for typical issues you might face:
Ribs are Too Tough: This almost always means they needed more cooking time. Next time, consider extending the wrapped phase by an extra 30-60 minutes. Remember, low and slow often requires patience, especially with larger racks.
Ribs are Too Dry: If your ribs are dry, your cooking temperature might have been too high, or you didn’t include enough liquid during the wrap. Ensure your pellet grill holds a consistent low temp, and don’t skimp on that apple juice or broth in the foil. Many pitmasters agree that adequate moisture during wrapping is paramount.
Lack of Smoke Flavor: Make sure your pellets are fresh and of good quality. If you want a deeper smoke ring and flavor, consider using a “smoke tube” filled with extra pellets or wood chips. Place it in the grill during the first few hours of cooking for an added boost of rich smoke.
Serving Suggestions
Once your baby back ribs are perfectly rested, slice them individually between the bones and serve them with pride. They are a classic centerpiece and pair beautifully with traditional barbecue sides. Think creamy coleslaw, tangy potato salad, savory baked beans, or fluffy cornbread. Always have extra barbecue sauce on hand for those who love to add more!
Your Rib Success Checklist
- Did you remove the tough membrane completely?
- Was your chosen rub applied generously and evenly?
- Was the pellet grill preheated to the correct, consistent temperature?
- Did you diligently follow the 3-2-1 method timings?
- Was liquid added to the foil wrap during the tenderizing phase?
- Did you confirm doneness using both the bend test and temperature?
- Were the ribs allowed to rest properly before slicing?
Conclusion
Cooking incredibly tender and smoky baby back ribs on a pellet grill is an achievable and highly rewarding endeavor. By understanding the nature of the ribs, properly preparing them, and diligently following the proven 3-2-1 method, you’re equipped to create a barbecue masterpiece. Remember, success in smoking ribs boils down to careful preparation, maintaining consistent heat, and a generous dose of patience. So, gather your ingredients, fire up your grill, and get ready to enjoy some truly amazing ribs that will surely impress everyone at your next cookout!
Frequently Asked Questions About Pellet Grill Ribs
Can I cook baby back ribs faster on a pellet grill?
Yes, you can cook baby back ribs faster by increasing the temperature to around 275-300°F (135-149°C). This might slightly shorten each phase of the 3-2-1 method. However, many grilling enthusiasts will tell you that a slightly longer, lower temperature cook usually yields the most tender and flavorful results with deeper smoke penetration, so balancing speed and quality is key.
What kind of wood pellets are best for baby back ribs?
For baby back ribs, fruit woods are typically recommended because they provide a mild, sweet smoke that enhances pork without overpowering it. Popular choices include apple, cherry, and pecan. Many pitmasters suggest trying a few different types to discover your personal favorite, but apple or cherry are excellent starting points for their balanced flavor profiles.
Do I need to spray my ribs while they cook?
Spritzing, or spraying your ribs with a liquid like apple juice, apple cider vinegar, or even water during the initial smoke phase, is a common technique. It helps keep the surface moist, which can prevent it from drying out and potentially help the bark develop. It’s not mandatory, but many experienced grillers find it contributes to a better end product by preventing a dry exterior.
What’s the difference between baby back ribs and spare ribs?
Baby back ribs are smaller, leaner, and come from higher on the pig’s back, near the loin, meaning they cook more quickly and are naturally more tender. Spare ribs, on the other hand, are larger, meatier, and come from the belly section, closer to the breast bone. They have more fat and connective tissue, requiring a longer cooking time to achieve tenderness, often benefiting from extended smoking or wrapping phases.
How do I prevent my ribs from drying out on a pellet grill?
To prevent dry ribs, always cook at a consistent low temperature, typically between 225-275°F. The most effective strategy is to incorporate the wrapping phase of the 3-2-1 method, adding a small amount of liquid like apple juice or broth to the foil packet. Also, avoid opening the grill lid too frequently, as this causes temperature fluctuations and moisture loss. Monitoring internal temperature to prevent overcooking is also crucial.