To sear a steak on a gas grill, preheat your grill to its highest setting, around 500-600°F (260-315°C), creating an extremely hot surface for direct contact. Sear each side of the steak for 2-3 minutes to develop a rich, flavorful crust, then move it to a cooler zone to finish cooking to your desired internal temperature.
Achieving a perfect sear on a gas grill involves intense heat to create a caramelized exterior, followed by gentle, indirect cooking to ensure the inside reaches ideal doneness without burning.
- Prep Your Steak: Bring to room temperature, pat it completely dry, and season generously.
- Heat the Grill: Preheat your gas grill to maximum heat, targeting 500-600°F (260-315°C).
- Sear Each Side: Place the steak over direct heat for 2-3 minutes per side to form a deep, brown crust.
- Finish Indirectly: Move the steak to a cooler, indirect heat zone to cook it through to your preferred doneness.
- Rest Your Steak: Allow the steak to rest for 5-10 minutes off the grill to redistribute juices for maximum tenderness.
How To Sear A Steak On Gas Grill?
Searing a steak on a gas grill demands intense direct heat to create a flavorful crust, then moving the steak to a cooler zone to cook it through to your desired doneness. This two-zone cooking method ensures both a beautiful exterior and a tender interior.
Why Searing Transforms Your Steak’s Flavor
Searing isn’t just about pretty grill marks; it’s about flavor development. When meat hits that super-hot surface, something special happens. This process creates a texture and taste experience you can’t get any other way, truly making your steak restaurant-worthy.
Understanding the Maillard Reaction
This is where the real science meets deliciousness. The Maillard reaction is a chemical process that browns the surface of the steak, creating hundreds of new flavor compounds (Food Science Institute). It’s why roasted coffee, toasted bread, and seared steaks all taste so good. You are essentially building a complex flavor profile on the outside of your meat.
Preparing Your Steak for the Perfect Sear
The journey to an amazing seared steak starts long before it touches the grates. Good preparation makes all the difference. Think of it as laying the groundwork for a successful project; attention to detail here pays off.
Choosing the Best Steak Cuts
Not all steaks are created equal for searing. You want a cut that can handle intense heat without drying out too quickly. Good marbling, those little flecks of fat throughout the meat, will keep your steak tender and juicy. We found that ribeyes and New York strips work wonderfully.
Thickness Makes a Difference
A steak around 1.5 to 2 inches thick is ideal for searing. Thinner steaks can cook through before you get a good sear, while super thick ones might burn on the outside before reaching medium-rare inside. Many chefs recommend this thickness for a perfect balance (Culinary Academy).
Essential Steak Prep Steps
Preparation is half the battle when it comes to a perfectly seared steak. Skipping these simple steps can mean the difference between good and great. It’s all about setting your steak up for success and ensuring an even cook.
Bringing Your Steak to Room Temperature
Take your steak out of the fridge at least 30-60 minutes before grilling. A cold steak hitting a hot grill causes the exterior to cook too fast while the inside stays cold. This helps it cook more evenly from edge to center.
Patting It Dry: An Essential Step
Moisture is the enemy of a good sear. Use paper towels to pat your steak bone dry on all sides. Any surface water will steam rather than sear, preventing that crispy, brown crust you’re aiming for (USDA grilling guides). We found that a truly dry surface browns beautifully and much faster.
Seasoning Like a Pro
Keep it simple with salt and freshly ground black pepper. Apply generously to all surfaces right before grilling. The salt helps draw out moisture initially, then creates a flavorful crust as it cooks. Some people add garlic powder or a touch of paprika for extra flair.
Setting Up Your Gas Grill for Searing
Your gas grill is a powerful tool, but you need to set it up correctly. Think of it like a sports car; you need to warm it up and check the tires before hitting the track. This setup creates the ideal environment for a powerful sear.
Getting Your Grill Searing Hot
Always start with clean grill grates. Leftover food bits can stick to your steak and cause flare-ups. Brush them thoroughly before preheating. A clean surface ensures even heat transfer and no sticking. Then, turn all your gas burners to high and close the lid. Let the grill preheat for 10-15 minutes, aiming for a temperature between 500-600°F (260-315°C). This super-hot environment is essential for creating that immediate crust. This intense heat sets the stage.
The Searing Process: Step-by-Step Guide
This is where the action happens. Searing is a quick and intense process on the grill. Stay focused, and you will be rewarded with an incredible steak. It’s a dance between high heat and precise timing, much like a quick culinary performance.
Here’s a simple breakdown of the steps:
- Ensure your grill is screaming hot, at least 500°F (260°C).
- Place your dry, seasoned steak directly over the hottest part of the flames.
- Sear for 2-3 minutes per side for a deep brown crust.
- Move to a cooler, indirect heat zone to finish cooking to desired doneness.
- Always use a thermometer to confirm internal temperature.
The Direct Sear: First Stage
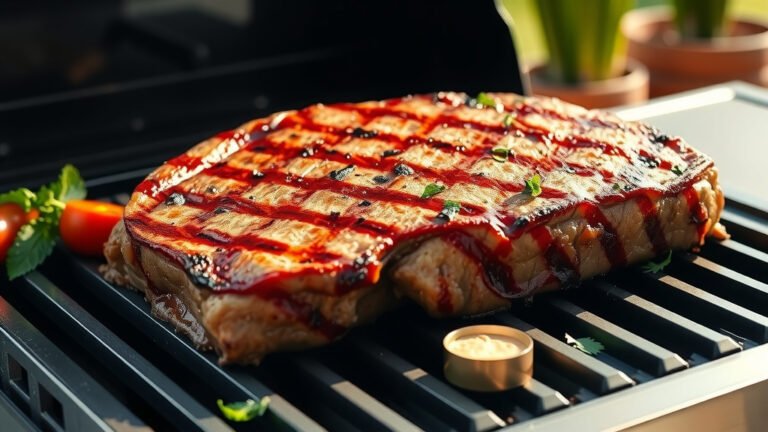
Once your grill is blazing hot, carefully place your steak directly over the hottest burners. You should hear an immediate sizzle. Resist the urge to move it right away. Let it sit and develop that crust. After 2-3 minutes, lift the steak to check for a deep brown crust and grill marks. If you want crosshatch marks, rotate the steak 90 degrees before flipping to the other side. Then repeat the process for the second side. This creates a visually appealing and delicious exterior. Many experts say patience here is key.
Finishing with Indirect Heat
After searing both sides, move the steak to a cooler part of your grill, where the burners are off or on low. Close the lid and let it cook indirectly until it reaches your desired internal temperature. This gentle cooking prevents the outside from burning while the inside finishes. This approach ensures tender results without overdoing it.
Using a Meat Thermometer
A reliable instant-read thermometer is your secret weapon. Insert it into the thickest part of the steak, avoiding bone. Pull the steak off the grill about 5 degrees before your target temperature, as it will continue to cook while it rests. Many guidelines point to accurate temperature readings for food safety (USDA).
| Doneness | Target Temp (Pull from Grill) | Final Temp (After Rest) |
|---|---|---|
| Rare | 120-125°F (49-52°C) | 125-130°F (52-54°C) |
| Medium-Rare | 125-130°F (52-54°C) | 130-135°F (54-57°C) |
| Medium | 135-140°F (57-60°C) | 140-145°F (60-63°C) |
| Medium-Well | 145-150°F (63-66°C) | 150-155°F (66-68°C) |
Finishing Touches and Avoiding Mistakes
The final steps are just as important as the first. A little attention here can elevate your grilled steak from good to unforgettable. We all want that perfect bite, don’t we?
The Importance of Resting
Do not cut into your steak immediately after taking it off the grill! This is perhaps the most overlooked step. Resting allows the juices, which have been pushed to the center by the heat, to redistribute throughout the meat. This ensures every bite is incredibly tender and flavorful. We found that a proper rest makes all the difference.
Tent your steak loosely with foil and let it rest for 5-10 minutes. This patience will be richly rewarded. You’ll have a much juicier steak, we guarantee it.
Common Searing Pitfalls to Skip
We all make mistakes, especially when learning new techniques. Here are some common issues that can derail your steak-searing efforts. By being aware, you can easily avoid them and ensure a better outcome.
Here’s a quick checklist to keep you on track:
- Don’t start with a cold steak.
- Don’t forget to pat your steak dry.
- Don’t overcrowd the grill grates.
- Don’t flip your steak too often.
- Don’t skip the resting step.
- Don’t ignore your meat thermometer.
Avoiding these common issues will significantly improve your results. We found that a little attention to detail prevents many problems.
Conclusion
Searing a steak on your gas grill might seem like a chef’s secret, but it’s a skill you can master with a bit of practice. By understanding the importance of high heat, proper preparation, and patient cooking, you’ll consistently create steaks with an incredible crust and a juicy, tender interior. So fire up your grill, embrace the sizzle, and enjoy the delicious results of your efforts. You are now ready to make amazing grilled steaks!
What is the ideal temperature for searing a steak on a gas grill?
The ideal temperature for searing a steak on a gas grill is between 500-600°F (260-315°C). This intense heat is essential for creating a quick, flavorful crust through the Maillard reaction.
How long should I sear each side of the steak?
You should sear each side of a steak for 2-3 minutes over direct high heat. This timing allows a deep, brown crust to form without overcooking the interior too quickly.
Do I need to oil my grill grates before searing?
Yes, lightly oiling your clean grill grates helps prevent the steak from sticking. You can apply a high-smoke point oil, like grapeseed or avocado oil, to a paper towel and rub it over the hot grates before adding the steak.
Can I sear a frozen steak directly on the grill?
While possible with specific techniques, it’s generally not recommended to sear a fully frozen steak. Thawing it first, or at least bringing it to a partially thawed state, allows for more even cooking and a better sear (Cook’s Illustrated suggests this for quality).
What is the best way to tell if my steak is done without cutting it?
The most accurate way to check your steak’s doneness without cutting into it is by using an instant-read meat thermometer. The internal temperature will tell you exactly where it stands relative to your desired doneness, preventing juice loss.