Building a DIY smoker grill is absolutely possible for the handy enthusiast, offering a custom cooking experience tailored to your exact needs.
You can craft a reliable Do It Yourself Smoker Grill using readily available materials, transforming backyard dreams into delicious reality.
- Building your own smoker grill offers big savings and custom features.
- Popular DIY options include upright barrel smokers and offset designs.
- Safety, proper tools, and good ventilation are extremely important.
- Regular cleaning and maintenance keep your DIY smoker working well.
- Always check local regulations before starting your build.
Do It Yourself Smoker Grill?
Yes, crafting your own smoker grill is a rewarding project for many grill lovers. You gain a completely custom cooking machine. This path requires some elbow grease, but it often saves money and lets you tailor features.
Many people find immense satisfaction in cooking on something they built. It’s a deep connection to the food and the process. Think of the stories you will tell about your first big smoke!
Why Build Your Own Smoker Grill?
Creating your own smoker grill brings several appealing benefits. You get to control every aspect of its design. It’s truly a personal statement in your backyard.
Think about the joy of serving perfectly smoked ribs from your own creation. This makes the effort worthwhile. It’s more than just a cooker; it’s a hobby.
Cost Savings Can Be Significant
Buying a new, high-quality smoker can be quite expensive. When you build your own, you often use recycled or less expensive components. This can lower your overall expense considerably.
Research shows that many DIY projects cost a fraction of retail prices (Consumer Reports). You invest your time instead of a big chunk of cash. This makes gourmet smoking more accessible.
Unmatched Customization Options
A DIY smoker grill means you design it for your specific needs. Do you want a large cooking area for parties? Or a smaller, portable unit? You get to decide.
You can add features like multiple temperature probes or specific shelving. This level of personalization is simply not available with store-bought models. Your smoker becomes an extension of your cooking style.
What You’ll Need: A Basic Materials Checklist
Before you begin, gather your core components. The exact list depends on your chosen smoker type. However, some items are universally useful.
Having everything ready prevents frustrating stops and starts. A well-prepared builder is a happy builder. This preparation helps the project run smoothly.
- Large steel drum or water heater tank (for barrel smokers)
- Thick sheet metal (for offset or firebox construction)
- Heavy-duty hinges and latches
- Welding rod or high-temperature sealant
- Cooking grates (food-grade stainless steel)
- Thermometer (accurate and durable)
- High-temperature paint (food-safe for exterior)
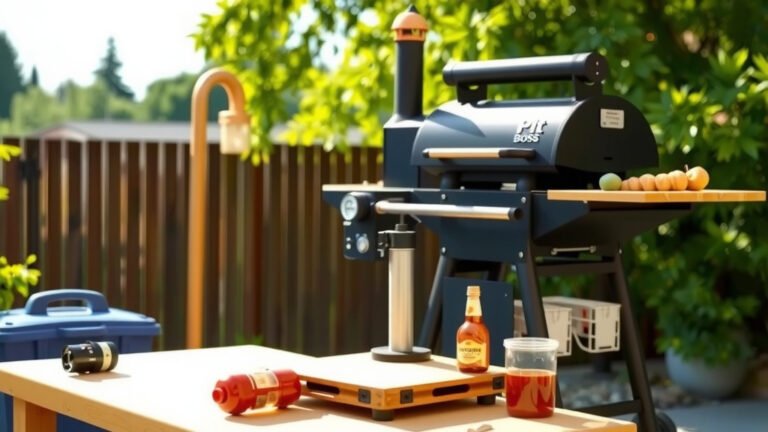
Common DIY Smoker Types to Consider
There are several popular designs for a Do It Yourself Smoker Grill. Each has its own benefits and challenges. Choosing the right type for you is a key first step.
Some designs are simpler for beginners, while others offer more advanced smoking control. Consider your skill level and how much time you have. Think about the types of food you want to smoke.
The Upright Barrel Smoker (UDS)
The UDS is a favorite for its simplicity and effectiveness. It often uses a 55-gallon steel drum. The drum stands upright, and the fire is at the bottom.
This design is known for producing incredibly moist and flavorful meat. Many experts say it’s one of the easiest DIY smokers to build (AmazingRibs.com). It’s a great starting point for many.
The Offset Smoker Design
An offset smoker has a separate firebox attached to the side of the main cooking chamber. Smoke travels horizontally. This offers good control over heat and smoke flow.
This type often requires more welding and fabrication. It can be more challenging for a first-time builder. However, the results can be fantastic for serious pitmasters.
Brinkmann Mod (Smoker Box Modification)
This method involves modifying an existing electric or charcoal smoker. You improve its seals, add better vents, or upgrade the thermometer. It’s a lower-effort entry into DIY smoking.
This is perfect if you already own a basic smoker but want better performance. It’s a smart way to upgrade without starting from scratch. You can significantly improve heat retention.
Planning Your Build: Crucial First Steps
Good planning makes for a successful project. Before cutting or welding, draw out your design. Think about dimensions, airflow, and heat distribution.
A solid plan helps avoid mistakes that could be costly or time-consuming. It’s like drawing a map before a long journey. You know where you are going.
Safety First: Always a Priority
Working with metal and heat requires strict safety measures. Always wear appropriate personal protective equipment (PPE). This includes gloves, eye protection, and sturdy footwear.
When working with drums or tanks, ensure they are thoroughly cleaned. Any residue from previous contents can be extremely dangerous if heated. Many guidelines point to extreme caution (OSHA).
Essential Tools You’ll Need
Having the right tools makes the job much easier and safer. Here’s a quick look at what you might need:
| Tool Category | Specific Tools | Primary Use |
|---|---|---|
| Cutting & Shaping | Angle grinder, metal shears, hole saws | Preparing metal, making openings |
| Joining | Welder (MIG/TIG), drills, rivets, clamps | Assembling parts, securing components |
| Measuring | Tape measure, straight edge, marker | Accurate sizing and placement |
| Safety | Welding helmet, gloves, safety glasses | Protecting yourself from hazards |
The Building Process: Key Steps
Once you have your plan and materials, the real work begins. Take your time and focus on precision. Rushing can lead to errors that are hard to fix.
Remember, this is a creative process. Enjoy each stage as your smoker takes shape. It’s a journey, not just a destination.
Here’s a simple checklist to guide you:
- Clean and prepare: Ensure all metal is free of rust and contaminants.
- Cut openings: Create holes for vents, thermometer, and door.
- Assemble body: Weld or bolt the main chamber and firebox.
- Add doors/lids: Attach with heavy-duty hinges; ensure a tight seal.
- Install grates: Create supports for your cooking grates.
- Place thermometer: Mount it at grate level for accurate readings.
- Seal everything: Use high-temp sealant on all seams and joints.
First Fire-Up and Seasoning Your Smoker
Your new DIY smoker grill isn’t ready for food right away. You need to season it. This crucial step burns off any manufacturing oils or paint fumes.
Seasoning also helps to build a protective layer inside the smoker. This layer improves flavor over time. Think of it as preparing a new cast iron pan.
Light a small fire and let your smoker run at around 250-300°F for a few hours. This step is often called the “burn-in” process. It prepares your smoker for many delicious meals.
Maintenance for Long-Lasting Performance
Just like any tool, your DIY smoker grill needs care. Regular cleaning and maintenance extend its lifespan. This ensures consistently great results.
After each use, clean out ash and grease. A wire brush can help with grates. Check seals and hinges periodically. Proper care protects your investment of time and effort.
Research often connects proper maintenance with equipment longevity (NFPA). A well-cared-for smoker will be a reliable friend for years.
Conclusion
Building your own Do It Yourself Smoker Grill is an incredibly rewarding venture. You gain a powerful cooking tool. More than that, you gain the satisfaction of creation.
From choosing your design to that first savory bite of smoked meat, every step is part of the experience. It’s a journey that culminates in delicious food and proud moments. So, are you ready to fire up your inner builder?
What is the most important factor for a DIY smoker’s performance?
The most important factor for a DIY smoker’s performance is good airflow and excellent heat retention. Proper vents and tight seals ensure stable temperatures and efficient smoke circulation, leading to better cooked food.
Can I convert an old gas grill into a smoker?
Yes, you can often convert an old gas grill into a basic smoker, but it requires modifications. You’ll likely need to add a smoke box, improve seals, and find a way to maintain lower, consistent temperatures. It might not be as efficient as a dedicated smoker, but it’s a good starting point for experimentation.
How do I ensure my DIY smoker is food-safe?
To ensure your DIY smoker is food-safe, use food-grade materials for any surfaces that touch food, especially cooking grates. Avoid galvanized metals inside the cooking chamber. Use high-temperature, food-safe paint for exterior parts, and make sure to thoroughly season the smoker before its first use with food (USDA).
What are common mistakes to avoid when building a DIY smoker?
Common mistakes include poor sealing, inadequate ventilation, using unsuitable materials, and rushing the build. These can lead to temperature swings, uneven cooking, or even unsafe operation. Take your time, plan thoroughly, and use appropriate, safe components.
How much does it typically cost to build a DIY smoker grill?
The cost to build a DIY smoker grill varies greatly, often ranging from $100 to $500, depending on the design and materials. Using salvaged parts like old steel drums can significantly reduce costs. Buying all new metal and components will place you at the higher end of that spectrum.