
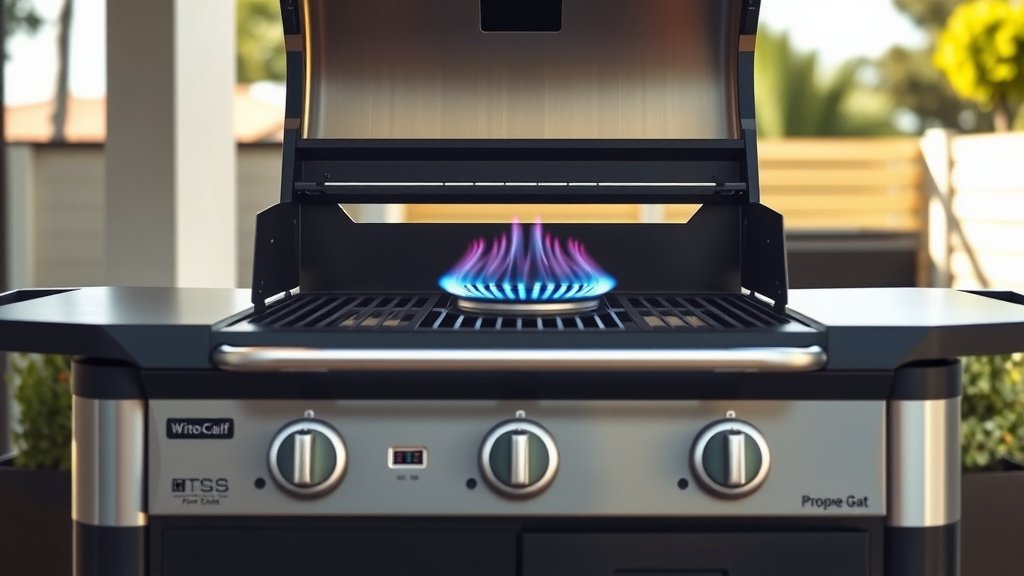
To turn on a propane gas grill, first ensure the propane tank valve is fully open. Then, open the grill lid and turn one burner knob to a high setting before pressing the igniter button.
Always ignite your grill with the lid open to prevent gas buildup and ensure safe operation.
TL;DR: Quick Steps to Grill Success!
- Open your propane tank valve fully counter-clockwise.
- Keep the grill lid open for safety.
- Turn one burner knob to HIGH.
- Press the igniter button until the burner lights.
- Close the lid, preheat, and start grilling!
How To Turn On Propane Gas Grill?
Turning on your propane gas grill involves ensuring a secure tank connection, opening the gas supply, then igniting a burner with the lid open for safety.
Follow a simple sequence of steps to get your grill ready for delicious meals every time.
Safety First: Before You Begin Grilling
Before you even think about lighting that flame, let’s talk safety. You want your grilling experience to be enjoyable and safe, right?
Think of it like checking your car before a road trip; a few moments now save trouble later.
Check Your Grill’s Condition
Always give your grill a quick visual inspection. Look for any loose hoses or connections to the propane tank. We found that a **loose connection can be dangerous**.
Also, ensure the burner ports are clear of debris. Spider webs are surprisingly common culprits here (Grill Manufacturer Guidelines).
Positioning Your Grill Safely
Where you place your grill matters. Make sure it’s on a **level, stable surface** and at least three feet away from your home, fences, or any combustible materials.
This simple rule helps prevent accidental fires, a critical consideration many experts emphasize.
Connecting Your Propane Tank Correctly
Your propane tank is the heart of your gas grill. Connecting it right is key to getting any flame at all.
It’s a straightforward process, but getting it wrong means no delicious BBQ.
Securing the Regulator
The regulator is the part that connects to your tank and controls the gas flow. Screw it firmly onto the tank valve. You want it snug, but **don’t overtighten it**.
An overly tight connection won’t improve gas flow and might damage the seal, research suggests.
The Leak Test: A Must-Do Step
This step is non-negotiable for safety. A gas leak is no laughing matter. We recommend doing a leak test every time you change the tank or if your grill hasn’t been used in a while.
It’s quick, easy, and can prevent serious problems. Many experts say this is a **critical safety measure**.
| Step | Action | What to Look For |
|---|---|---|
| 1 | Mix soapy water (equal parts soap and water). | A bubbly solution ready for testing. |
| 2 | Brush solution on tank valve and hose connections. | Apply liberally to all joints. |
| 3 | Slowly open the propane tank valve. | Listen for gas; watch the connections. |
| 4 | Observe for bubbles. | **Growing bubbles indicate a leak.** |
| 5 | If bubbles appear, tighten or replace connections. | Re-test until no bubbles are visible. |
The Ignition Sequence: Getting That Flame
Okay, the safety checks are done, and your tank is connected. Now for the exciting part: lighting the grill!
This sequence might feel like a dance at first, but it quickly becomes second nature.
Open the Tank Valve Slowly
Turn the propane tank valve fully counter-clockwise until it stops. Do this slowly. A quick turn can sometimes activate the **tank’s safety flow limiter**, which reduces gas output.
This safety feature is designed to prevent gas surges in case of a detached hose (Propane Safety Council).
Lid Up: A Golden Rule
Before you even touch a burner knob, **lift the grill lid completely**. We found that attempting to light a grill with the lid closed can cause gas to build up inside.
This buildup creates a flash fire risk when ignition eventually occurs, which can be quite startling.
Activating the Burners
Choose one burner, usually the one closest to the igniter, and turn its control knob to the HIGH setting. You might hear a faint hiss as gas starts to flow.
This step introduces propane into the burner tube, ready for ignition.
Using the Igniter Button
Now, press and hold the igniter button. You should hear a clicking sound as it sparks. Keep holding it down for a few seconds until the burner lights.
Once you see a flame, release the button. If it doesn’t light right away, release the button, wait a few minutes, and try again.
Checklist for Grill Ignition:
- Is the propane tank valve fully open?
- Is the grill lid open?
- Have you turned one burner knob to HIGH?
- Are you pressing the igniter button continuously?
- Do you hear a clicking sound from the igniter?
What If It Doesn’t Light? Troubleshooting Common Issues
Don’t panic if your grill doesn’t roar to life on the first try. It happens! Most issues are minor and easily fixed.
Think of it as your grill just needing a little extra attention before it performs its magic.
Low Gas Flow Protection
Remember that safety flow limiter? If you opened the tank valve too quickly, it might have activated. Turn off all burner knobs and then close the propane tank valve completely.
Wait 15-30 seconds, then slowly reopen the tank valve and retry the ignition process. This often resets the safety feature.
Checking for Clogged Burner Ports
Sometimes, debris or spider webs can block the small holes where the gas exits the burner tube. If you see a weak or uneven flame, this might be the reason.
With the gas off and grill cool, use a wire brush or paperclip to carefully clear any blockages (Consumer Product Safety Commission).
Manual Ignition: The Backup Plan
If your igniter isn’t sparking, most grills have a manual lighting option. With the lid open, a burner knob set to HIGH, and the gas flowing, carefully insert a long grill lighter or match through the grates near the burner.
Light it quickly and remove your hand. This method is effective when the igniter fails.
Preheating for Perfect Results
Once your grill is lit, close the lid and let it preheat. This usually takes about 10-15 minutes, depending on your grill’s power and the outside temperature.
Preheating allows the grates to reach a consistent temperature, preventing food from sticking and ensuring even cooking. Many chefs say a **proper preheat is crucial**.
Conclusion
Turning on your propane gas grill doesn’t have to be a puzzle. By following these straightforward steps, from safety checks and tank connection to the ignition sequence, you’ll be grilling with confidence.
Remember to always prioritize safety by performing leak tests and keeping the lid open during ignition. With a little practice, lighting your grill will become as easy as flipping a burger. Enjoy your outdoor cooking!
Frequently Asked Questions About Grilling
Why does my grill sometimes make a “poof” sound when I light it?
A “poof” sound often indicates a small amount of gas built up before ignition. This can happen if the lid was closed, or if there was a slight delay between turning on the gas and hitting the igniter. Always ensure the lid is open before lighting.
How do I know if my propane tank is almost empty?
You can check your propane level by pouring warm water over the side of the tank. The metal will feel cool to the touch below the liquid level. Another method is to use a luggage scale to weigh the tank and subtract the tank’s tare weight (stamped on the tank).
Is it okay to store my propane tank indoors during winter?
No, it is not safe to store propane tanks indoors or in enclosed spaces like garages or basements. Propane tanks should always be stored outdoors, in a well-ventilated area, away from direct sunlight and heat sources (National Fire Protection Association).
My igniter button isn’t sparking. What should I check?
First, check if the battery in your igniter needs replacing, if your model uses one. Also, ensure the igniter wires are securely connected and free from corrosion or damage. Sometimes, simply cleaning the igniter pin can restore its function.
How long should I wait after turning off the grill before disconnecting the propane tank?
It’s best to allow your grill to cool down completely before handling any components. While you can technically close the tank valve immediately, waiting until the grill is cool (usually 15-30 minutes) makes disconnecting the tank much safer and more comfortable.
