Making beef jerky on a pellet grill involves slowly drying thinly sliced, marinated beef at low temperatures, usually between 160-180°F (71-82°C), until it reaches a chewy texture. This method adds a wonderful smoky flavor that traditional dehydrators cannot match, making for a truly delicious snack.
You will need lean beef, a flavorful marinade, and patience to properly dehydrate the meat over several hours on your pellet grill, ensuring it is safe and shelf-stable.
- Select a lean cut of beef and slice it uniformly thin, about 1/8 to 1/4 inch.
- Marinate the beef for at least 6-12 hours for deep flavor absorption.
- Preheat your pellet grill to a low temperature, typically 160-180°F, using a mild wood pellet flavor.
- Lay out the marinated beef slices without overlapping and smoke/dry for 4-8 hours.
- Check for dryness and flexibility; the jerky should bend without breaking and not be crumbly.
How To Make Beef Jerky On A Pellet Grill?
Making beef jerky on a pellet grill is a rewarding experience that combines the smoky goodness of grilling with the careful art of dehydration. You’re essentially transforming lean beef into a chewy, flavorful snack. It’s a process where your grill acts as both a smoker and a dehydrator, giving you incredible control.
Choosing Your Beef: The Leaner, The Better
The first step to amazing jerky is picking the right cut of beef. You want something lean. Why lean? Because fat can spoil, making your jerky go bad faster. We found that top round, bottom round, or flank steak work wonderfully. These cuts have minimal marbling, which is exactly what we need for long-lasting, delicious jerky.
Preparing Your Meat for Success
Once you have your beef, a little prep work goes a long way. Many experts suggest freezing the meat for about 30-60 minutes before slicing (USDA). This firms it up, making it much easier to cut into even strips. Uniform thickness is important for consistent drying. Aim for slices that are about 1/8 to 1/4 inch thick. You can cut with or against the grain; cutting with the grain gives a chewier jerky, while cutting against makes it more tender.
Crafting the Perfect Marinade
Now comes the fun part: flavor! A good marinade does more than just taste great; it also helps tenderize the meat slightly and preserves it. Think about the flavors you enjoy. Are you a fan of spicy, sweet, or savory? This is where you can get creative.
A classic jerky marinade often includes soy sauce, Worcestershire sauce, black pepper, garlic powder, and onion powder. For a little heat, add red pepper flakes. If you prefer a sweeter profile, a touch of brown sugar or honey works well. We found that a small amount of liquid smoke can enhance the flavor if your pellets are very mild, but often the grill smoke is enough.
Marinating for Maximum Flavor
Once you have your marinade, place the sliced beef into a resealable bag or a non-reactive dish. Pour the marinade over the beef, making sure every piece is well-coated. Squeeze out any excess air from the bag. Then, pop it in the refrigerator. We recommend marinating for at least 6 hours, but for deep, rich flavor, go for 12-24 hours. You want those flavors to truly soak in.
Setting Up Your Pellet Grill for Jerky
Your pellet grill is an ideal tool for making jerky. It offers precise temperature control and consistent smoke. The goal here is low and slow. You’re not cooking the meat; you’re drying it out.
Preheat your pellet grill to its lowest smoke setting, typically around 160-180°F (71-82°C). Some grills have a specific “Smoke” mode. This low temperature prevents the meat from cooking too quickly, allowing it to dehydrate properly while absorbing that fantastic smoky essence. Choose a mild wood pellet flavor, like apple, cherry, or pecan, to complement the beef without overpowering it.
Arranging Your Jerky on the Grill
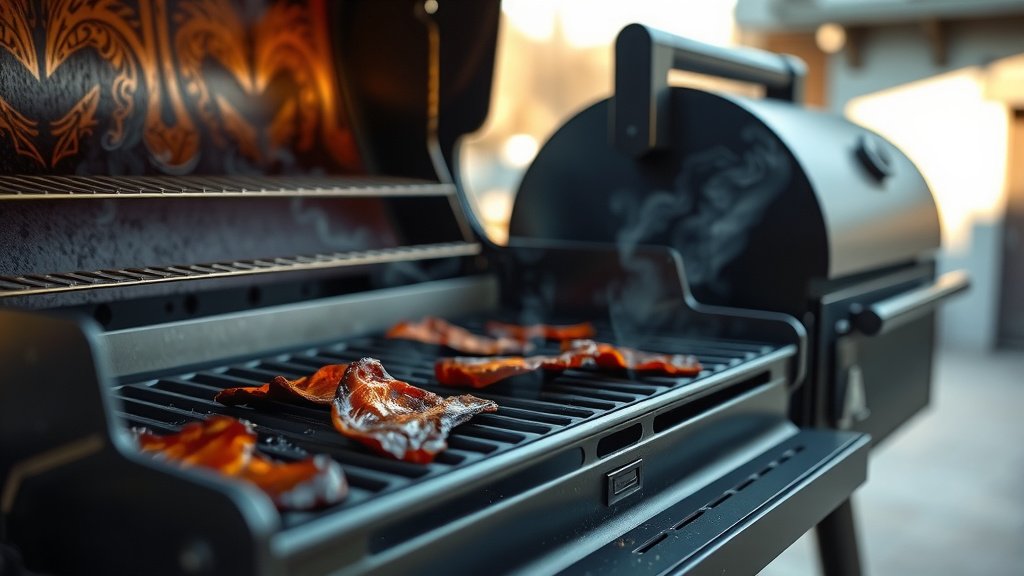
Once your grill is at temperature, arrange the marinated beef slices directly on the grill grates. Make sure they are not overlapping. Good airflow around each piece is key for even drying. If you have a jerky rack or extra grill racks, you can use those to maximize space and ensure consistent airflow. This step is more important than you might think; proper spacing means every piece of jerky dries at the same rate.
The Smoking and Drying Process
Now, let the grill do its work. The smoking and drying process can take anywhere from 4 to 8 hours, sometimes longer, depending on your grill, the thickness of your jerky, and ambient humidity. It’s not a set-it-and-forget-it job; you’ll want to check on it periodically.
Every 1-2 hours, it’s a good idea to rotate your jerky pieces or even flip them. This helps promote even drying. Resist the urge to open the lid too often, though, as this lets out heat and smoke, slowing down the process. We aim for a consistent, low temperature throughout. Many guidelines point to maintaining a steady temperature as a good first step (FDA).
Knowing When Your Jerky Is Done
How do you know when your jerky is perfectly done? This is where a little touch and feel come in. A well-made piece of jerky should be dry to the touch, firm, and pliable. When you bend it, it should crack slightly but not break completely. It shouldn’t feel brittle or overly hard, nor should it feel soft or moist in the middle. We often look for a leathery texture.
Tear a piece in half. You shouldn’t see any moisture in the center. If you do, it needs more time on the grill. Remember, under-dried jerky can spoil quickly, so it’s always better to err on the side of slightly more dry. Research often connects proper drying with food safety (CDC).
Temperature and Time Guide
Here’s a general guide for making beef jerky on a pellet grill:
| Jerky Thickness | Grill Temperature | Approximate Drying Time |
|---|---|---|
| 1/8 inch (thin) | 160°F (71°C) | 4-6 hours |
| 1/4 inch (medium) | 160-170°F (71-77°C) | 6-8 hours |
| 3/8 inch (thick) | 170-180°F (77-82°C) | 8-10+ hours |
These are estimates, and your specific grill and environment will influence the actual time needed. Always trust the texture check more than the clock.
Storing Your Homemade Jerky
Once your jerky is done, let it cool completely to room temperature. This cooling period is important because it allows any residual moisture to dissipate. Don’t rush this step. Once cool, store your jerky in an airtight container or a resealable bag. For the best quality, we suggest storing it in a cool, dry place. Homemade jerky, if dried properly, can last for several weeks at room temperature. For longer storage, you can refrigerate or even freeze it.
Jerky Storage Guidelines
- Airtight Container/Bag: Keeps freshness locked in.
- Cool, Dry Place: Ideal for pantry storage.
- Refrigeration: Extends shelf life to a few months.
- Freezing: Good for up to a year, maintaining quality.
Troubleshooting Common Jerky Issues
Sometimes, things don’t go perfectly on your first try. Don’t worry, that’s part of learning! If your jerky is too dry and brittle, it likely spent too long on the grill or the temperature was too high. For future batches, check it more frequently or lower your grill temperature. If your jerky is too moist or still feels soft, it needs more drying time. Just pop it back on the grill for another hour or two. Remember, practice makes perfect when making jerky.
Your Jerky-Making Checklist
To make sure you have everything ready for your jerky adventure, here’s a quick checklist:
- Lean beef (e.g., top round, flank)
- Sharp knife or meat slicer
- Cutting board
- Large resealable bags or non-reactive bowl
- Ingredients for your favorite marinade
- Pellet grill with preferred wood pellets
- Grill thermometer (optional, but helpful for accuracy)
- Gloves for handling meat (optional)
- Airtight containers for storage
Conclusion
Making beef jerky on your pellet grill is a truly satisfying way to create a wholesome, flavorful snack right at home. From carefully selecting your lean beef and crafting a mouth-watering marinade to mastering the low-and-slow drying process on your grill, each step builds towards a delicious result. The smoky notes from your pellets add a unique dimension that sets homemade jerky apart. With a little patience and attention to detail, you’ll be enjoying your own perfectly chewy, robust jerky in no time. It’s a wonderful project that combines the best of grilling with a timeless preservation technique.
Frequently Asked Questions
Do I need to use curing salt for beef jerky on a pellet grill?
While not strictly required, many experts recommend using curing salt (like Prague Powder #1) in your jerky marinade for an added layer of food safety, especially when drying at lower temperatures over many hours. It helps prevent bacterial growth, giving you peace of mind. If you choose not to use it, ensure proper hygiene and drying until the jerky is definitely done.
What’s the best wood pellet flavor for beef jerky?
For beef jerky, mild and fruity wood pellet flavors often work best to complement the beef without overpowering it. Apple, cherry, and pecan are popular choices. Hickory or mesquite can be used if you prefer a stronger, bolder smoke flavor, but use them sparingly to avoid making the jerky bitter.
Can I make beef jerky without a dehydrator?
Absolutely! A pellet grill is an excellent alternative to a traditional dehydrator. It offers the benefit of infusing smoke flavor while dehydrating the meat. You can also use a conventional oven set to its lowest temperature with the door slightly ajar to allow moisture to escape.
How do I prevent my jerky from getting moldy?
To prevent mold, proper drying is the most important step. Ensure your jerky is fully dehydrated, with no moisture visible when bent or torn. Also, allow it to cool completely before storing. Store it in an airtight container in a cool, dry place. For extended storage, refrigeration or freezing can significantly reduce mold risk.
What if my pellet grill doesn’t go as low as 160°F?
If your pellet grill’s lowest setting is higher than 160-180°F, you can still make jerky, but you’ll need to monitor it very closely. The jerky will dry faster, increasing the risk of it cooking instead of dehydrating. Try to use a “smoke” setting if available, or prop the lid open slightly with a small, heat-resistant object (like a crumpled piece of aluminum foil) to help lower the internal temperature and allow moisture to escape.