To cook spare ribs on a pellet grill, you’ll generally smoke them low and slow, typically between 225-275°F, using a popular method like the 3-2-1 for optimal tenderness.
This approach involves three stages: initial smoking, wrapping with liquid, and a final unwrapped period for saucing and setting the bark, yielding perfectly cooked spare ribs.
TL;DR: How to Get Amazing Spare Ribs on Your Pellet Grill
- Start by prepping your ribs: remove the membrane and apply your favorite rub generously.
- Smoke the ribs unwrapped at 225-250°F for about 3 hours to develop a smoky bark.
- Wrap the ribs tightly in foil with a little liquid and continue cooking for 2 hours for maximum tenderness.
- Unwrap, apply BBQ sauce, and cook for another hour to set the sauce.
- Rest your ribs before slicing for juicy, flavorful results every time.
How To Cook Spare Ribs On A Pellet Grill?
Cooking spare ribs on a pellet grill means you’re in for a treat with rich smoke flavor and incredible tenderness. It’s all about managing temperature and time to let the magic happen.
Why Choose a Pellet Grill for Spare Ribs?
A pellet grill truly simplifies the smoking process, making it a favorite for many backyard chefs. You get consistent temperatures and steady smoke, which are key for ribs.
We’ve found that pellet grills excel at infusing meats with a deep, even smoky flavor. This control removes much of the guesswork from traditional smoking methods.
Essential Rib Prep Before the Smoke
Good ribs start with good preparation. Don’t skip these steps; they truly make a difference in the final taste and texture of your cook.
Picking the Right Ribs
When you’re at the butcher, look for St. Louis-style spare ribs. They are typically trimmed into a rectangular shape, making them easier to handle and cook evenly.
Many experts say these ribs offer a great meat-to-bone ratio and are a perfect canvas for your pellet grill adventures (Grill Master’s Handbook).
Removing the Membrane
This step is often overlooked, but it’s crucial. Flip your ribs over and look for the thin, papery membrane on the bone side.
Use a butter knife to lift an edge, then grab it with a paper towel and peel it off. This ensures your ribs are tender and not chewy, allowing your rub to penetrate better.
Seasoning Your Ribs
Once the membrane is gone, it’s time for flavor! Apply a generous amount of your favorite dry rub to both sides of the ribs.
Don’t be shy; really pat that rub into the meat. Let them sit for at least 30 minutes, or even a few hours in the fridge, for the flavors to meld.
Understanding the 3-2-1 Rib Method
The 3-2-1 method is a widely beloved technique for smoking spare ribs, especially on a pellet grill. It stands for 3 hours smoking, 2 hours wrapped, and 1 hour unwrapped.
This approach helps you achieve that perfect balance of smoky flavor, tenderness, and a delicious glazed finish.
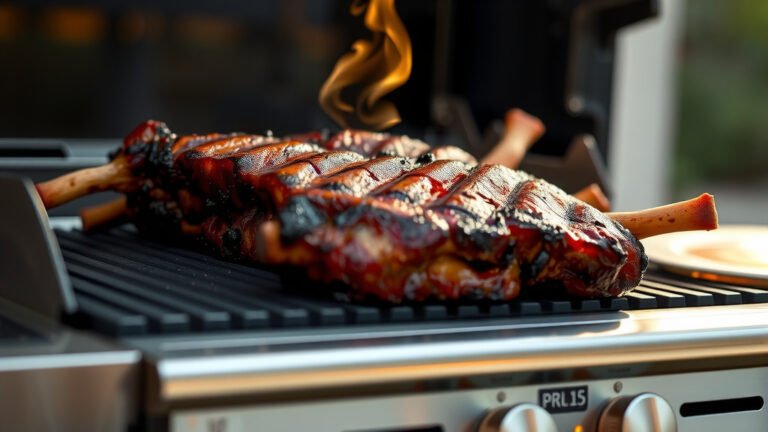
Phase 1: The Smoke (3 Hours)
Preheat your pellet grill to 225-250°F. Place the seasoned ribs directly on the grates, bone-side down.
Let them smoke for three hours. This period is all about building that smoky flavor and creating a nice “bark” on the exterior.
Phase 2: The Wrap (2 Hours)
After three hours, carefully remove the ribs from the grill. Place them on large sheets of heavy-duty foil.
Add a splash of liquid (apple juice, cider vinegar, or beer works well) into the foil packet. Wrap them up tightly to braise and tenderize the meat, then return them to the grill for two more hours.
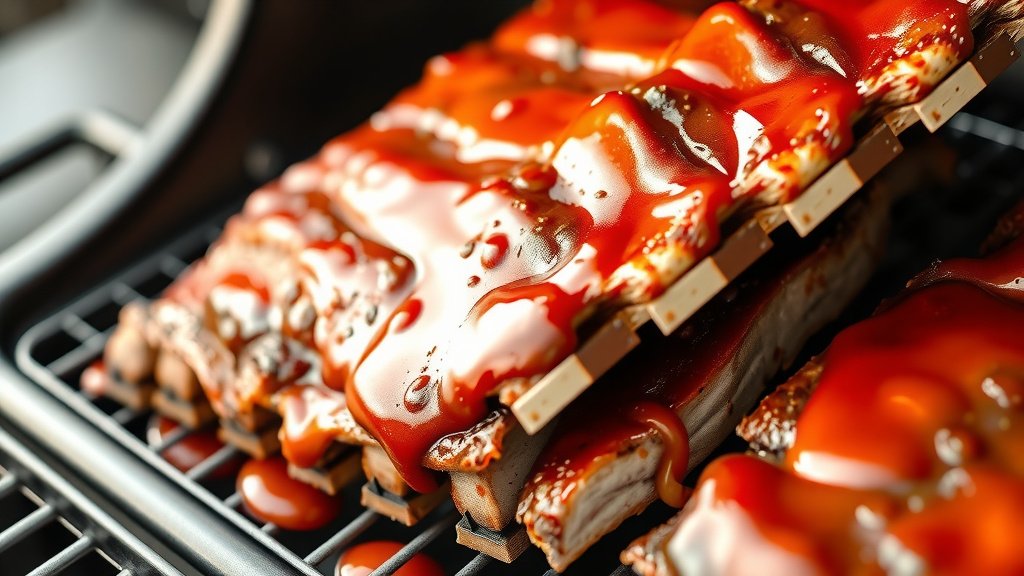
Phase 3: The Finish (1 Hour)
Unwrap the ribs carefully; the steam will be hot! At this point, you can brush them with your favorite BBQ sauce.
Place them back on the grill, unwrapped, for the final hour. This allows the sauce to caramelize and set, creating a sticky, flavorful glaze.
Monitoring Temperature and Doneness
While the 3-2-1 method is a great guide, don’t forget to trust your thermometer and your instincts. Ribs are done when they are tender.
A good sign is when the meat starts to pull back from the bones. We found that a reliable test is when the ribs bend easily and the meat almost wants to fall off the bone (BBQ Pitmaster’s Guide).
| Phase | Temperature | Time | Purpose |
|---|---|---|---|
| Initial Smoke | 225-250°F | 3 hours | Smoke penetration, bark formation |
| Wrapped Cook | 225-250°F | 2 hours | Tenderize meat |
| Sauce Set | 225-250°F | 1 hour | Glaze, set sauce |
Resting Your Ribs: Don’t Skip This Step!
You’ve come so far, don’t rush the finish line! Once your ribs are done, take them off the grill and let them rest.
Wrap them loosely in foil or butcher paper and let them sit for 15-20 minutes. This allows the juices to redistribute, ensuring every bite is moist and delicious.
Troubleshooting Common Rib Issues
Even the pros hit a snag sometimes, right? Here are a couple of common issues and how to tackle them when cooking your ribs.
Ribs are Too Dry?
If your ribs come out dry, it could be due to cooking at too high a temperature or not wrapping them. The wrap phase adds moisture and protection.
Next time, try adding more liquid to your foil wrap or dropping your grill temperature slightly for a more tender outcome.
Not Tender Enough?
Sometimes, ribs need more time. If they’re still tough, they just haven’t cooked long enough to break down the connective tissue.
Simply return them to the grill, wrapped, for another 30-60 minutes until they reach your desired tenderness. Patience truly pays off here.
Rib Cooking Checklist:
- Remove membrane from ribs.
- Apply rub evenly.
- Preheat pellet grill to 225-250°F.
- Smoke unwrapped for 3 hours.
- Wrap with liquid, cook for 2 hours.
- Unwrap, sauce, cook for 1 hour.
- Rest ribs before slicing.
Conclusion
Cooking spare ribs on a pellet grill is an incredibly rewarding experience that consistently delivers amazing results. By following these steps—from proper preparation to the strategic 3-2-1 method—you can create ribs that are wonderfully smoky, juicy, and fall-off-the-bone tender. Remember, patience is your best ingredient, and the gentle, even heat of your pellet grill does most of the heavy lifting. So, fire up that grill and get ready to enjoy some truly fantastic ribs!
How do I know when my spare ribs are done on a pellet grill?
You know your spare ribs are done when they are very tender. The meat should pull back from the bones, and when you pick up one end of the rack with tongs, the slab should noticeably bend in the middle without breaking apart. An internal temperature of 200-205°F is a common target, but tenderness is the best indicator.
What is the best temperature to cook spare ribs on a pellet grill?
Most grill masters agree that 225-250°F is the ideal temperature for smoking spare ribs on a pellet grill. This low and slow approach allows the connective tissues to break down slowly, resulting in exceptionally tender ribs, and also gives the meat plenty of time to absorb that delicious smoky flavor.
Do I need to spray my ribs with apple cider vinegar or other liquids during the cook?
Spraying ribs with a liquid, often called “spritzing,” is a technique some pitmasters use to keep the surface moist and potentially add flavor. While not strictly necessary, especially during the wrapped phase, it can help prevent the bark from drying out in the initial smoking stage. Apple juice or apple cider vinegar are popular choices.
What’s the difference between spare ribs and baby back ribs for smoking?
Spare ribs, particularly St. Louis-style, come from the belly of the hog and are larger, meatier, and have more fat, which contributes to their rich flavor and tenderness. Baby back ribs, from closer to the loin, are smaller, leaner, and cook faster. Both are excellent for smoking, but spare ribs usually require a longer cook time due to their size and fat content.
Can I cook ribs without wrapping them in foil?
Yes, you can cook ribs without wrapping them, a method often called “naked ribs.” This approach yields a tougher, chewier bark and a less “fall-off-the-bone” texture, but many prefer the more intense smoky flavor and firmer bite. It typically requires cooking at a slightly lower temperature for a longer period to achieve tenderness, and you might need to spritz them to prevent drying.